background preloader

Fashion/beauty

Facebook Twitter

Kapeluszniczka: Drugie życie zwykłej bokserki on we heart it / visual bookmark #27410486. Food + words | recipes. stories. life, from scratch. » moisturizing orange face mask. Moisturizing orange face mask. Hey, pretty face! If you’re anything like me, you are a fan of having clear skin. Clear skin = happy skin = happy me. You’re probably wondering why I’m talking about skin and your face. I know some stuff, dudes. I’m really into making things from scratch. Since your skin is your body’s largest organ (sorry, boys), what you put on it is as important as what you put into it, right?

I’ve been making my own homemade masks, exfoliants, face scrubs, hair masks, body polishes and the like since then, and I’ve decided to launch a new section on the site devoted to homemade natural beauty products. Anyhow, this orange face mask is amaaaazing for adding moisture and radiance to your face. Freshly squeezed orange juice is packed full of zinc and antioxidants, which your face loves a whole lot. Plus, if some of this mask accidentally drips into your mouth, you can totally just eat it.

Moisturizing orange face mask Ingredients: Directions: *Valentine*: 1 foulard, 3 possibilités. Natural Cheek & Lip Stain. Love, Life, Family... and then some: Things I Love: Awesome Nail Designs part 2. Love Life Family...and then some Houston Texas Mom Blogger Never Miss a Single Post Not Found, Error 404 The page you are looking for no longer exists. Perhaps you can return back to the site's homepage and see if you can find what you are looking for. Or, you can try finding it with the information below. Pages: Categories: Authors: Haley (1360) Monthly: Recent Posts: Well, Hello there! Haley Shivers is the Author and Mom behind Love, Life, Family...and then some.

Sponsors Archives Coupons tweet tweet recent comments tags autism back to school beauty birthday book review breakfast charity Christmas cleaning Dewberry Farm dinner Disney Fall family fashion food giveaway Halloween Holiday Season home housekeeping Jackson jewelry kids meme menu planning movies nails organizing parenting photography pictures pregnancy product review Quaker recipes review reviews running saving money scrapbooking shopping texas things I love travel Copyright 2013 Love Life Family...and then some. 1980s Hair Tutorial. Hey Glitter Girls, it’s Jessie from Sweet Thing bringing you a fun ’80s inspired hairstyle.

As a child of the ’80s one of my favorite movies growing up was Flashdance. I longed for curly hair like Jennifer Beals. If only I had known that there was no perm necessary to get the very same look. 1. Before bed, wash your hair. When it is almost dry but still damp grab a section and start twisting it all the way down. A few things to note: The direction of the twist determine the direction of the curls. 2. 3. 4. 5. 6. How to Make Your Own Beauty Products from Scratch - Lifestyle. Let's keep things simple this week. When it comes to personal-care products, we are big believers in streamlining what you use—see "Eight Products You Think You Need But Don't" for a refresher—buying less in general, and getting creative. We have both always loved experimenting in our kitchens and our bathrooms, checking ingredients in products we love, isolating the main ones, and then trying them on their own.

Sometimes it works: A favorite hair leave-in contained aloe, for example, so one day we tried aloe alone and found that, lo and behold, it worked just fine on its own. And sometimes it didn't. Over the years we have tried dozens of DIY beauty recipes to find ones we like—and that work. Below are our favorite six. Simple body scrub Honey face wash One-ingredient eye liner For the ladies (or the gents with a flair for the dramatic) this is as easy as it gets: Grab a capsule of activated charcoal, which you can get at most pharmacies and any health food store. Perfume Shave oil. 1308839446234844.jpg (215×650) Homemade Hair Treatments - At Home DIY Hair Treatments.

Eggs, yogurt and honey are, at first glance, all components of a tasty breakfast—but they also happen to be hair treatment ingredients, and affordable, all-natural ones at that. And they're not the only ones. Did you know, for instance, that the oils in avocados more closely resemble our own skin's oils than any product in the beauty aisle does? Or that the mild acidity in lemon is an effective—and gentler—alternative to chemical-laden products? Next time your locks need a lift, save money by using one of these kitchen fixes. For All Hair Types "The [raw] egg is really the best of all worlds," says Janice Cox, author of Natural Beauty at Home.

The yolk, rich in fats and proteins, is naturally moisturizing, while the white, which contains bacteria-eating enzymes, removes unwanted oils, she explains. To Use: For normal hair, use the entire egg to condition hair; use egg whites only to treat oily hair; use egg yolks only to moisturize dry, brittle hair, Cox says. Photo by Shutterstock. Best Tan Recipe EVER! DIY Bracelet Tutorials.

Dorm Room Spa: 3 Easy DIY Beauty Recipes to Try. Photo Credit It’s that taxing in-between time of the semester again – spring break is over, papers and projects are coming due, and finals are looming ahead. It’s clear that college students are stressed right now, and with that stress comes the need for relaxation. And what better way to unwind than by pampering yourself and indulging in some me-time?

Of course, as college students, we can’t all afford to shell out for a trip to a high-end spa. So how do you get all the benefits of a spa treatment without the hefty cost? Easy. Raid your kitchen! 1. Photo Credit Olive oil isn’t just for cooking — it’s great for your hair, too! To give your hair a conditioning treatment, massage about 2 tablespoons of olive oil into your hair and scalp. Next, take a warm, damp towel and wrap it around your head and treated hair (“turban” it). Finally, rinse out the olive oil with shampoo. 2. The secret? To create the mask, mix 2 tablespoons of honey with a teaspoon of cinnamon and a teaspoon of nutmeg. 3. 10 Ways to Wake Up Gorgeous. Image: Getty Sometimes looking in the mirror first thing in the morning can be… challenging. Messy hair, dark circles, puffy face. Unless you’re Karlie Kloss, chances are it’s not a pretty sight.

But it doesn’t have to be that way, check out our tips for looking sexy when you wake up—even if it’s 6 AM. 1. Bad news for stomach sleepers. The average head weighs 7 to 8 pounds—that’s a lot of pressure to be putting on your face night after night. If you just can’t sleep on your back, try sleeping on your side with a body pillow. For those of you who are fortunate enough to be back-sleepers, try throwing an extra pillow under your head. 2. Long gone are the days of sitting around waiting for sticky strips to whiten your teeth. 3. What better time to sleep with comfy socks than winter?

If you’re a deep sleeper, you can also apply lotion to your hands and wear gloves while you sleep. 4. 5. Piling hair on to the top of your head with a soft hair tie (scrunchie, anyone?) 6. 7. 8. 9. You heard us. ...love Maegan : Fashion, DIY, Home, Lifestyle: Messy Rope Braids and Low Bun Hair Tutorial ~ Los Angeles. These little rope braids are a fun way to add a little style with your own hair, creating a sort-of headband of sorts. 
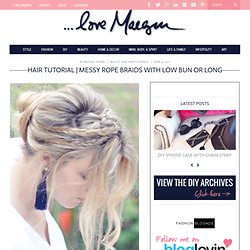
Your hair doesn’t need to be extremely long, but you do need some length to cover the top of your head with. If you have layers, you could instead create a tiny French Braid where the hair is shorter and closer to your head, if that makes sense.

But it’s a fun and cute braided hair style that’s just a little different. I originally wore this style last Summer with two slightly larger braids Watch and Enjoy… * Notes: Instead of one large bun, create two or three little buns at base of your head OR swap the bun for a clean pony tail. Wear it Up… Wear it Down… * Just bobby pin them in place or use a pretty barrette * Click Here for my DIY Tassel Earrings shown above * Have Fun!

Find all my Hair Tutorials here! Easy Cat Eyeliner Tutorial. Cat eyeliner has got to the most unpredictable thing in makeup. You never know what shape you'll end up with. One wrong move & you'll have to think of ways to make it look right. I thought I'd share with you how I've been doing mine, because I think it's almost mistake-proof. So, here's a step-by-step tutorial: Apply eyeshadow on lid. *It's up to you whether you want to line the lower lash line or not. Products Used: Because I have hooded lids, it's important that I contour my crease. Hope you liked the tutorial!

♥ Cynthia Z * DIY Wrap Bracelet. You should all know by now that we are all about stacking bracelets on our wrists. The more, the better. In fact . . . the most, the best! With that being said, we’ll show you how to master a version of the ever so popular wrap bracelet. It’s so simple and addicting, you’ll soon be churning out these wristlets with your eyes closed. Clearly this arm party train isn’t stopping and it’s about time you get on board!

You’ll need (for a double wrapped bracelet) :* Lengths will vary depending on the size of your wrist (see comments for suggestions). Fold the length of leather cording in half to form a loop. Place the ball chain along the leather cording with the end of the chain meeting the end of the wrap. Continue wrapping while checking it for fit around the wrist. When you have reached the end of the ball chain wrap the linen cording around the leather strands 2-3 more times. Thread the hex nut through the strands and tie a second knot. Trim with scissors and your wrap bracelet is finished!! Seven Surprising Uses for Baking Soda - Lifestyle.

Bottle it up. The best stuff in life is free. Like sunshine, blue skies and THE OCEAN…if you have access to it, that is. Which I don’t. And I know it’s only January but I’m already Jonesing for spring. So, to scratch the itch, I decided to go with beach hair. Problem was I needed sea spray to get the really beachy look and texture. So with much hesitation and skepticism I took on the task of making my own, with stuff I already had around the house.

BELIEVE me when I tell you, this is BY FAR the best sea spray I have ever used, EVER. RECIPE: 1 Cup WARM water 3 Tablespoons Sea Salt 1 Tablespoon Gel or Spray Gel 1/2 Tablespoon Conditioner (or leave-in) A couple spritzes of your favorite perfume DIRECTIONS: Mix Warm water and salt first and shake well. DIY Fashion-Forward Bracelets. When money is tight, but fabulous fashion is a necessity, try out your crafting skills to make something new and fantastic. These bracelets are sure to impress and look quite expensive, but all they require is some gold chain and friendship bracelet yarn, both of which you can find at a craft store like Michael’s Art Supply.

Make one signature piece or stack a bunch for a layered look! BFrend Bracelets by Monika You can find the full blog post here to see more styles of these bracelets. In order to create them, check out these various friendship bracelet patterns. Tie your yarn to one end of the gold chain, braid whatever pattern you like, and then knot it to the other end of gold chain once you have reached the right length to fit your wrist. 
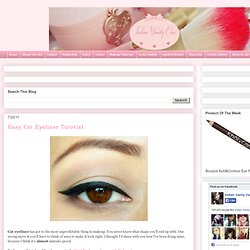
Another fun and very creative bracelet is this one made out of gold or silver nuts, normally used to secure bolts. Amazing what you can create with such inexpensive items! Its because I think too much: Galactic Manicure - StumbleUpon.

I loved how my glittery gradient mani turned out so much that I decided to do a variation on it, using the night sky as my inspiration! Here's how I did it: 1. Prep I grabbed deep navy, silver glitter, and gold glitter polish along with my favorite top coat. I also grabbed an orange stick and some nail art rhinestones. 2. 3. 4. 5. 6. 7. Make-up - StumbleUpon. Make your own dry shampoo. By now you’ve surely heard all the kerfuffle about dry shampoo. Every celebrity swears it’s what’s in their purse at all times. Just what is dry shampoo? It’s basically a product that takes the grease out of your hair on those days you missed the alarm and don’t have time to shower. The crazy thing about all this dry shampoo business, is just how easy it is to make at home, with a few ingredients you probably already have in your pantry.

Seriously. Here are the ingredients to make your own dry shampoo: 2 Tablespoons Cornstarch 2 Tablespoons Baking Soda 2 Tablespoons Cornmeal 2 Tablespoons Ground Oatmeal A salt shaker type container to store dry shampoo Step 1: Grind up oatmeal in a blender. Step 2: Measure out 2 tablespoons each of: cornstarch, cornmeal, baking soda and the ground up oatmeal. Step 3: Pour your fancy new dry shampoo into a container. Step 4: Sprinkle some dry shampoo onto your hand. Step 5: Shampoo. Scrub your head like you would in the shower, all lathered up. Step 6: Now brush. How To Style Maiden Braids - A Beautiful Mess - StumbleUpon. Last month I did a makeover story with Kelsie and had many requests for a maiden braid tutorial. Yesterday she came in and we photographed these simple step by steps.

Kelsie has extremely long and thick hair, but anyone with shoulder length or longer can do these braids (see my photo below for an example). Steps 1-2: Braid two strands on each side of a center part. Steps 3-5: Wrap braids around the crown of your head and pin in place with one pin each. Step 6: Arrange braids so that they cover the front of your head like a headband. Steps 7-8: Pull the rest of the hair into a ponytail and pin it into a cute messy bun. Step 9: Add final pins and spray. Fun Friday - DIY Beach Hair - asuyeta [ah-soo-yeh-tah] clothes &accessories. handmade with love. - StumbleUpon.

How To Use A Sock To Get Beautiful Curly Hair Without Heat | A Spotted Pony - StumbleUpon.