
Pixelstick - Light Painting Photography. Kits. SparkFun will be closed for New Years Day (Jan 1, 2016) and closing at 3:30pm MT on Dec 31st.
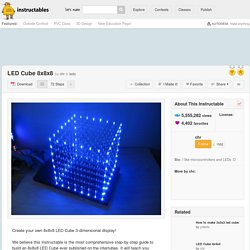
Orders placed after 2pm MT on Dec 31st will process the following Monday. sparkfun.com Shopping Cart 0 items log in register SparkFun kits are a fun way master new skills! Solder with SimonProgram with Digital SandboxBuild circuits with the SparkFun Inventor's KitMake Anything into a Keyboard with MaKey MaKey per page SparkFun Inventor's Kit - V3.2 Favorited Favorite 44 Wish List SparkFun Inventor's Kit for Photon Favorited Favorite 19 FLiR Dev Kit Favorited Favorite 51 Raspberry Pi 2 Starter Kit. Infinite RGB LED Cube. The 8x8x8 LED cube project published on the Instructables website was very detailed and yet looked simple enough for me not just to complete but add substantial enhancements as well.

Following is a tutorial on how I built my 8x8x8 LED cube and also how I created the firmware and simulation using Flowcode 6. After planning on creating a larger single color version of the cube I quickly realized that to double the display dimensions to 16x16x16 meant multiplying the number of LEDs and interconnections by 8. The thought of processing 2,048 LEDs was too much for me so I scaled down my thinking and instead decided to repeat the 8x8x8 (512-LED) design but using full color RGB LEDs instead of single color LEDs. Even at 8x8x8 RGB LEDs it still tallies up to around 2,200 solder joints so be warned! With 512 RGB LEDs in the design each with their own three internal LEDs a lot of control signals are required to switch the LEDs on and off. ElectronicPassion. HNTE - RGB LED Cube. OK so I have finally found some time to begin writing the story of my RGB LED cube, this project was always going to be the next step in the evolution of my LED Cube.
I can only hope that it will be as popular as my original cube, for those of you that followed my original cube project you will probably notice a few similarities. I built the RGB cube while I was living in the UK for 6 months, so I had access to a limited number of tools and most of the work was done on the dining room table to the dismay of my girlfriend (wife now). Working on this project I have learned a lot about animating in colour, software modulation for fading and c++ in general, so hopefully I can teach you readers a thing or two as well. If nothing else at least you will be able to use what I offer here to build one of the greatest light displays you have ever seen!
Adafruit Industries, Unique & fun DIY electronics and kits. Graphical Resistance Calculator. CJKIT-20817: JAMECO KITPRO: Electronic Kits & Projects. 3D LED CUBE. 3D LED cube is composed of 64 mono-chromatic LEDs arranged in a 4 * 4 * 4 matrix.
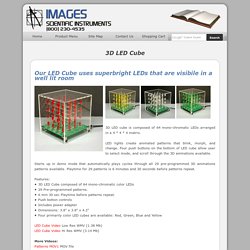
LED lights create animated patterns that blink, morph, and change. Four push buttons on the bottom of LED cube allow user to select mode, and scroll through the 3D animations available. Starts up in demo mode that automatically plays cycles through all 29 pre-programmed 3D animations patterns available. Playtime for 29 patterns is 6 minutes and 30 seconds before patterns repeat. Features: 3D LED Cube composed of 64 mono-chromatic color LEDs 29 Pre-programmed patterns. 6 min 30 sec Playtime before patterns repeat. Kits. 8x8x8 LED Cube Kit Introduction. Project Info Author: Chris Difficulty: Very Difficult Time Invested: 20 Hours Prerequisites: Take a look at the above articles before continuing to read this article.
Building an LED cube has been a project that we have always wanted to do, but the opportunity just never presented itsself. However, with the recent launch of Club Jameco we were able to get our hands on one of their 8x8x8 LED kits which provides all the parts (95% of them) and instructions for building your own LED cube. LED Cube 8x8x8 - Download PDF. A wireframe box is a good geometric shape to show in a monochrome 8x8x8 LED cube.
It gives a very nice 3d effect. We made two box animation functions for the LED cube. Effect_box_shrink_grow() draws a wireframe box filling the entire cube, then shrinks it down to one voxel in one of 8 corners. We call this function one time for each of the 8 corners to create a nice effect. Effect_box_woopwoop() draws a box that starts as a 8x8x8 wireframe box filling the entire cube. Here is how effect_box_shrink_grow() works. It takes four arguments, number of iterations, rotation, flip and delay. To make the function as simple as possible, it just draws a box from 0,0,0 to any point along the diagonal between 0,0,0 and 7,7,7 then uses axis mirror functions from draw.c to rotate it. 1) Enter main iteration loop. 2) Enter a for() loop going from 0 to 15. 3) Set xyz to 7-i. 4) When i = 7, the box has shrunk to a 1x1x1 box, and we can't shrink it any more. 7) Do the rotations.