
Simple Ideas That Are Borderline Genius - 43 Pics. Click Here For More Genius Ideas.
Via duitang.com on Indulgy.com. Casadefirulas.com. Imagina uma loja cheia de produtos coloridos e diferentes por R$ 5,99 cada.
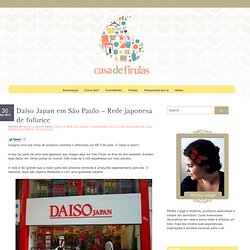
A Daiso é assim! A loja faz parte de uma rede japonesa que chegou aqui em São Paulo no final do ano passado. Existem lojas Daiso em várias partes do mundo. DIY Market Bag. With Earth Day just around the corner, we’re turning to artist and environmentalist Chris Jordan for inspiration.
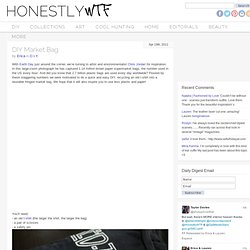
In this large-zoom photograph he has captured 1.14 million brown paper supermarket bags, the number used in the US every hour. And did you know that 2.7 billion plastic bags are used every day worldwide? Floored by these staggering numbers we were motivated to do a quick and easy DIY, recycling an old t-shirt into a reusable fringed market bag.
We hope that it will also inspire you to use less plastic and paper! D.I.Y. DIY Heart Friendship Bracelet. As the month of love approaches, we thought we’d combine friendship and hearts into one Valentine’s Day themed tutorial: a heart patterned friendship bracelet!

Using some candy-colored embroidery floss and your familiarity with the chevron friendship bracelet, you’ll be able to whip up one of these tokens of love in a heartbeat. You’ll need:2 colors of embroidery flossscissorstape or clipboard Creating a heart pattern involves just a simple modification to the chevron patterned friendship bracelet. Start by cutting 4 strands of each color, at about 24 inches each, for a total of 8 strands. Alternate the thread colors before tying them together in a knot. Separate the threads into 2 sets, 2 of each color on each side. Start on the left side with the outermost strand (shown here in red) and make a forward knot by creating a 4-shape over the 2nd strand (shown here in blue), loop it under and back through the opening.
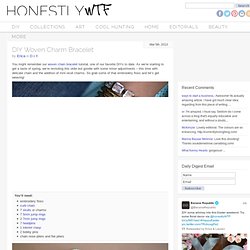
Pull up and to the right to tighten. Mirror the step on the other side. DIY Braided Rhinestone Necklace. A couple of weeks ago, we turned some vintage earrings into a pair of shoe clips.

Inspired by Jolita‘s Mourning Necklace, we’re transforming vintage chains into pretty statement necklaces for spring this week. Sometimes antique rhinestone necklaces are just a tad too short and a bit too dainty so adding a bit of texture and color is the perfect way to add some much needed oomph. You’ll need: Start by cutting approximately 16-19 strands of embroidery floss at about 2.5 times the length of the rhinestone necklace. DIY Woven Charm Bracelet. You might remember our woven chain bracelet tutorial, one of our favorite DIYs to date.
As we’re starting to get a taste of spring, we’re revisiting this oldie but goodie with some minor adjustments – this time with delicate chain and the addition of mini skull charms. So grab some of that embroidery floss and let’s get weaving! 7 Paint Recipes You Will Love. Fingerpaint is real quick and easy to make.
Here are a few tried, tested and perfected fun paint recipes that we’ve collected over the years. Finger-painting is a great activity if you do not mind to get your hands a little dirty. These paints are great to capture little hand and foot prints or to create everyday works of art and crafts without the fuss of washing paintbrushes. Simply rinse paint from hands under running water with soap. Some of these recipes are so yum-delicious you won’t mind sticking your fingers in your mouth! What’s great about homemade fingerpaint? Basic Heated Fingerpaint 1 cup flour2 tablespoons salt1 1/2 cups cold water1 1/2 cups hot water2 tablespoons food colouring Directions: Mix 1 cup of flour and 2 tablespoons of salt Add the cold water and stir until there are no lumps Add the hot water and bring to a boil while stirring Remove from heat once thickened.
ZEST Digital Magazine. Welcome 2010. Wooden Snowman Craft Tutorial. Happy wednesday, crafters!!
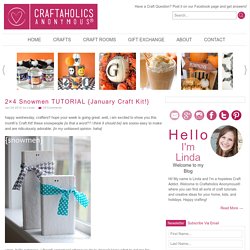
Hope your week is going great. well, i am excited to show you this month’s Craft Kit! These snowpeople {is that a word?? I think it should be} are soooo easy to make and are ridiculously adorable. {in my unbiased opinion. haha} umm, hello cuteness. i {heart} snowmen! DIY Tissue Paper Wedding Centerpiece. This centerpiece is based on one that I created for my own wedding.

It’s easy to make and can be customized by using different colored tissue paper, patterned paper, fabric flowers, painted branches, and so on. For my wedding I even added little paper animals to the bottom so it become a miniature forest scene. Also, try hanging your table number from one of the branches or inserting it into the bottom of the jar. At about $7 each these are a great cost-saving alternative to fresh flowers and they can be made far in advance of your wedding. They’re manageable to make alone but will go much faster and will be a lot more fun to create with the help of a friend or a few bridesmaids. -Anna, RIFLE design. {DIY}The Fat Quarter Infinity Scarf. Meet my newest cold weather accessory - the fat quarter infinity scarf.
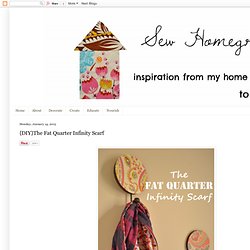
I really really love infinity scarves. You know why? They're easy. Easy to make, easy to wear. What more could you ask for? Here's the tutorial if you'd like to make your own! 2 Fat quarters (fat quarters are 18"x22") a piece of batting 63"x 5" Sewing machine/thread Perle Cotton Thread (if you want to quilt it) Quilting Needle Step 1: Cut both fat quarters into 3 pieces 6"x22" Step 2: Choose one fabric and sew the three pieces end to end, right sides together, to create a long strip 6"x64"(this number may be a little different depending on the seam allowance size you use).
Repeat with the other fabric. Step 3: Choose one of the long strips and lay the batting on the wrong side. It should look like this: