
Candle carving Baur Candle Creations. Free Cut & Curl Candle Making Projects Directory. This small series of articles written several years back are the most popular articles I have ever published.
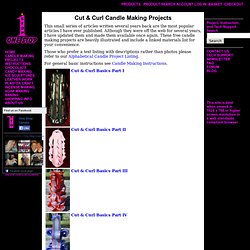
Although they were off the web for several years, I have updated them and made them available once again. These free candle making projects are heavily illustrated and include a linked materials list for your convenience. Those who prefer a text listing with descriptions rather than photos please refer to our Alphabetical Candle Project Listing. For general basic instructions see Candle Making Instructions.
Cut & Curl Basics Part I Cut & Curl Basics Part II Cut & Curl Basics Part III Cut & Curl Basics Part IV Support Free Projects You can help ensure the continued availability and production of free projects and instructions by telling your friends about them. Disclaimer: The information presented here is accurate to the best of my knowledge and common candle making practices as of the time of this writing. Rainbow Candle Making Project. By Bob Sherman I originally published this project in 1998 and have rewritten and modernized it to fit this site.
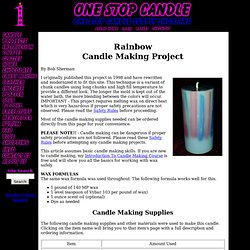
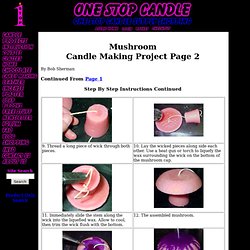
This technique is a variant of chunk candles using long chunks and high fill temperature to provide a different look. The longer the mold is kept out of the water bath, the more blending between the colors will occur. IMPORTANT - This project requires melting wax on direct heat which is very hazardous if proper safety precautions are not observed. Please read the Safety Rules before proceeding. Mushroom Candle Making Project Page 2. By Bob Sherman Continued From Page 1 Step By Step Instructions Continued Return To Page 1 Disclaimer: The information presented here is accurate to the best of my knowledge and common candle making practices as of the time of this writing - July 2006.
The author and the publisher accept no liability for the use or misuse of any of the information presented in this article. Embedding Photos. Step by step instructions for embedding photos or illustrations inside of candles.
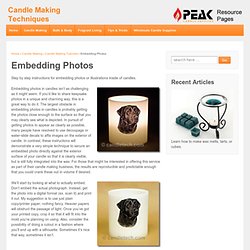
Embedding photos in candles isn’t as challenging as it might seem. If you’d like to share keepsake photos in a unique and charming way, this is a great way to do it. The largest obstacle in embedding photos in candles is probably getting the photos close enough to the surface so that you may clearly see what is depicted. In pursuit of getting photos to appear as clearly as possible, many people have resolved to use decoupage or water-slide decals to affix images on the exterior of candle. In contrast, these instructions will demonstrate a very simple technique to secure an embedded photo directly against the exterior surface of your candle so that it is clearly visible, but is still fully integrated into the wax. We’ll start by looking at what to actually embed. In these instructions, we’ll be embedding the photo in a hurricane shell. Cold-Pour/Rustic Candles. One strategy to create rustic looking candles.
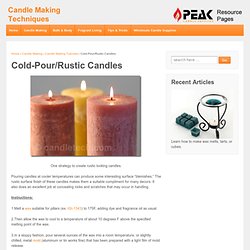
Pouring candles at cooler temperatures can produce some interesting surface “blemishes.” The rustic surface finish of these candles makes them a suitable compliment for many decors. It also does an excellent job at concealing nicks and scratches that may occur in handling. Rainbow Pillars. Playing with color.
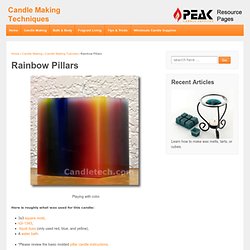
Here is roughly what was used for this candle: Here’s how it was done: 1. Since I knew I was going to use a water bath (more on that later), I set the wicked mold into a saucepan that was about 4 inches deep and applied some weights to the base of the mold. The saucepan was to serve later as the water bath. Chunk Candles. Step by step instructions on making chunk candles.
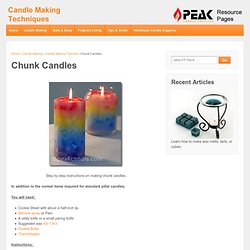
In addition to the normal items required for standard pillar candles, You will need: Instructions: Step 1: Melt Wax and add dye or fragrance oil as desired. Using a double boiler and a thermometer, melt your wax and bring it to a temperature of about 190 degrees F. You can scent and dye the chunks, the overpour wax, or both. For this project, I selected IGI 1343 to make the chunks as well as the overpour. Color Suggestion: Work with colors that are complimentary, generally those that occur together in nature. Wax Melting Instructions - Focus on Safety. Wax Melting Instructions – Focus on Safety While melting wax may seem relatively straight-forward, it is perhaps one of the most dangerous aspects of candle making.
By observing a few safety precautions, we can avoid many of the hazards that exist in candle-making. Hand Dipped Tapers. Paraffin and beeswax are probably the most common waxes to use to make dipped tapers.
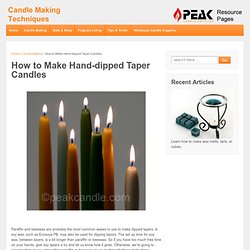
A soy wax, such as Ecosoya PB, may also be used for dipping tapers. The set up time for soy wax, between layers, is a bit longer than paraffin or beeswax. So if you have too much free time on your hands, give soy tapers a try and let us know how it goes. Otherwise, we’re going to assume that you’re using either paraffin or beeswax as we go through these instructions. Beeswax is often used for hand dipped tapers because it is a slow burning wax and the layers go on thicker, resulting in less dipping required to get a reasonably thick taper. Tilted Layer Candles. Add a holiday twist to your candles with these candy cane tilted layer pillars!
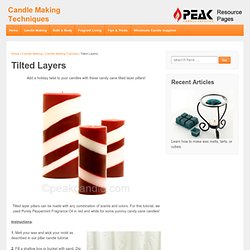
Tilted layer pillars can be made with any combination of scents and colors. For this tutorial, we used Purely Peppermint Fragrance Oil in red and white for some yummy candy cane candles! Watermelon Candle. Get ready for summer with this fresh, fun project! You Will Need: Instructions: 1. Heat a small amount of beeswax (about 2 ounces) in a double boiler and add about 2-3 drops of black dye.
Cupcake Candles. Learn how to make these adorable candles using the “whipped wax” technique. You Will Need: Pillar Wax (such as IGI 4625 or IGI 1343)Container Wax (such as IGI 4630)Pouring PitcherWhiskCupcake CupsMuffin PanWick (appropriate for the size of your cupcake cups. We used C-60 for standard-size cups)FragranceDye. Pillar Candle Embellishment.
A simple way to turn a standard pillar candle into something special and unique. You Will Need: Instructions: 1. Melt your wax in a double boiler, add your fragrance and dye, and mix thoroughly. Meanwhile, lightly coat your cookie sheet with some type of mold release agent such as Silicone Spray Lubricant. Stacked Pillar Candle. An easy way to use up leftover wax and make a beautiful and unique candle. You Will Need: When you make your wax cut-outs to embellish a pillar candle, you should have quite a few leftover shapes. If not, you can follow steps 1-5 of the Pillar Candle Embellishment Tutorial to create the shapes. Candle, making candles, candle wholesale, candle supplies, candle making supplies, candle making supply, candle supplies, candles supplies, candle making - supplies, candle making / supplies by Candles and Supplies.Com, Inc.
Shopping: Crafts: Supplies: Soap and Candle Making: Candles. Soy Wax, Candle Fragrance Oils, Candle Jars and more!