Toilet Paper Roll Wall Art. Well that’s a mouthful! So the time has come, it’s Pinterest Challenge time again! Every season Sherry from YHL and Katie from Bower Power throw a little link party to get people to stop pinning things and actually start making. This couldn’t have come at a better time because I have wanted to start this project forever and once Miss Kelly made her way into my kitchen I knew it was time to start it.
This was the image I saw that sparked me to start saving my toilet paper rolls. You can find the post here. I literally have been saving my rolls for. ever. Here’s what my toilet paper wall art turned into! Ok let’s get down to the nitty gritty. Next, I cut them up. Then, I took 4 pieces and glued them together using a hot glue gun. I continued doing this until I had about 40. Then I took the mirror I was going to use (10″ mirror purchased at Joann’s for $8) and placed it on the floor and started adding all the circles around keeping in mind that I wanted to keep it in a circle. Linking Up To: Orange Peel Roses. Art, Recycling ideas: Orange “roses”Orange “roses” you can decorate a fragrant mixture of dried flower petals Starting from the top of the fruit, spiral cut away thin strip of peel. The upper edge of trying to capture the white stripes. It turns out there is a blank roses Cooked fresh “rose” to put a piece of cardboard and place them on a radiator. It dries in about two days.
Becomes a solid, well-d If you peel an orange with a thick, after cutting the first layer, cut off the second layer – white. If tangerine cut into thin slices and dried in the battery, get a fashionable addition to the dry flower arrangements. Photo: Visit link → Making DIY Coffee Filter Flowers: The Complete Guide.
Hello lovely readers, Apologies for the delayed post today. This post was originally one sweet little DIY tutorial all set to go live at 9am this morning then I got immersed in the intoxicating world of coffee filter flowers and ended up adding another and another until I was up to my eyeballs in coffee filter tutorials and inspiration! So it took waaay longer than expected but I do hope you’ll find it useful. If you’re looking for a cheap, simple and pretty DIY project for your wedding, coffee filter flowers could be just the thing! Photo via Just Simple Designs Who knew coffee filters could look so pretty? The great thing about coffee filter flowers is that they can be used in so many different ways, from decor (they’d make a mean ceremony backdrop) to centerpieces, place settings, wreaths and, if done in miniature, they’d look so sweet attached to escort cards or favor boxes! You could even create a bunch of them, attach them to ribbon wrapped florist’s wire et voila!
Dying Coffee Filters. Butteryfly Tree. This craft project was inspired by something almost identical I saw in a fancy shop here in NYC. It cost almost $500, and I thought to myself, "hey, I can make that". And so I did! Start by printing out butterflies. I found mine online, simply google butterfly prints and millions comes up. Cut them out. Hot-glue or super-glue a small branch to a vintage saucer. Fold the butterflies a little, so they look more alive and simple hot-glue them all to the branches. Photos by Alexandra Grablewski. Straw Art. Now that warmer weather is upon us, it means children will soon be out of school and looking for activities! Keep them entertained with this craft, courtesy of Scrumdilly-Do. It's a great project for ages 3 ½ and up, and rising temperatures means you can take the mess outside and set a table up right on the lawn for this project. The craft involves blowing watercolor paint through a straw onto a blank canvas to create unique artwork for any occasion.
*Drinking straws *2 or 3 colors of paint. Acrylic, tempera, food color or liquid watercolor will work *Water *Containers (the blogger used ice cream dishes from the local scoop shop!) *Paintbrushes *Paper 1. 2. 3. 4. 5. Dictionary Art. Spring Scrapbook Paper Tree. Hello fellow crafters! Tristin and I were invited to be today's featured guest blogger over at Everyday Mom Ideas!
We were thrilled with this wonderful opportunity, and wanted to share with the readers over there one of our trees from the collection we're currently doing. This second tree is very similar to the first one. I'm sorry! (Since this is a guest post on a different blog, and the concept is similar to the first tree.. Thanks, Julia, for having us on your blog! Map Love. I love maps...and look at all the amazing things made with them... i can't remember how i found this site....but i love, love, love all the map goodness going on there...especially that heart broochand, of course, i had to include the union jack.check out more herenote....they have a great etsy store, too! Coffee Stirrer DIY Wall Art.
Last week, I posted a preview of the simple, inexpensive wall art my mom and I created. Now I’m excited to show you how you can make a one-of-a-kind coffee stirrer masterpieces too! I’m big on projects that anyone can do. And this is one of those projects. If you can smear paint on wood and use scissors, you can make this easy art. (Don’t you dare say you’re not “creative!” You’re wrong!) Here’s all you need to get started: 1. Additional Supplies: 5. Okay, first things first. So, once you’ve got your palette, it’s time to paint your frames and your coffee stirrers! My mom and I did our painting as the sun was setting, which is always a questionable decision.
I was going for the reclaimed driftwood sort of look. Once your coffee stirrers are painted, it’s time to trim them to fit into the frame(s) you’ve chosen. I found the quickest way to do this is to measure one stick to be the length you need it and then use it as the guide for trimming all the others. What’s left? City Map Paper Cut Out. It’s rare you find someone who doesn’t at least find fascination with, if not flat out love, a map. They’re so informative; they’re proof of where we’ve been and where we’re going.
More than that, they’re pretty good-looking! They come in all sizes, shapes, colors, varieties and of course, locations. One of the fun things about maps is collecting ones of all the places you’ve been, and all the places you want to be! When we came across this DIY project on how to cut out a city map out of paper, we knew we had to share. Would you do this project? Images: Just Crafty Enough via Apartment Therapy. Rosewood Wreath. I have seen various versions of Faux Rosewood Wreaths in just about every store and catalog for the upcoming season; most with a price tag running upwards of $40 or more. Some are crafted of paper and other of real wood shavings. Last year I made a few rolled flower gift toppers from recycled book pages and they remind me so much of the curled wood roses I thought they would make a good substitute.
{with a much lower price tag} Materials Needed:Foam Wreath FormRecycled Book PagesLots of Hot GlueRibbon to Hang The full step by step tutorial I posted last year can be found {here}.Basically you layer three book pages together and draw a spiral circle. Starting with the outside of the spiral, roll the paper inward to create the flower shape. Give the wreath form a light coat of white {or light color} spray paint to help camouflage any see-through spaces. It seriously takes quite a few roses to fill the entire wreath, however I think the finished project has such a unique look. {Simply Lovely} How to Make Crayon Monogram. Wall-E Art.
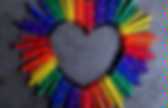
Crayon Art. They are all over pinterest.... (i still am not signed up for pinterest because i don't have time for one more thing but browsing is fun!) So we made one. i took a box of 64 crayons and took out the blacks and browns.i used another small box and doubled up on the good colors i liked and hot glued them to the top of our canvas. then we turned our blow dryer to hot on high. not long after you set the hair dryer by the crayons they get shiny and then the wax starts to melt!
And it dries really quickly too. seriously. what could be happier than this?? GREAT project. loved it today is the first FULL day with ALL my kids in ALL day school.yeah...i am smiling as i type that. it's good. it's quiet. i am rockin' it. removing wallpaper.....making code for craft weekend stuff.....doing my hair....going to lunch..... it's all good. hooray for school! Crayon Rain. EDIT 11/5/2012: We are no longer selling custom crayon pieces in our Etsy shop. We are now focusing on a new jewelry project, so please check that out and we hope you enjoy the tutorial below! Edit: We are now selling custom crayon pieces in our Etsy shop! If you have questions about commissioning your own artwork, please see the shop or email us at lightandspoon@gmail.com. Here’s our contribution to the melted crayon craze on Pinterest.
Anyway! He filled in in with marker, and then we taped some saran wrap around a piece of cardstock to make a run-off barrier for the top of the umbrella. We pulled out all the blues and greys from three boxes we got on sale for $2.50 each at A.C. Then it was just a matter of putting the crayons through the gun–the pretty-but-stupid impulse-buy glue gun that barely works, so I didn’t ruin my good one. The hardest part was removing the guard and fixing the wax around it. Yay! Like this: Like Loading... Hand Art. Pretty Bird Wall Art.