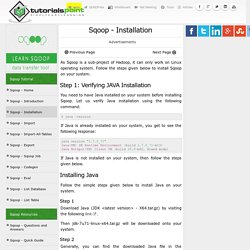

Converting Dataframe sparse vector column to DenseVector - Databricks Community Forum. ChiSqSelector(卡方选择器) · spark-ml-source-analysis. Sqoop Installation. As Sqoop is a sub-project of Hadoop, it can only work on Linux operating system.

Follow the steps given below to install Sqoop on your system. Step 1: Verifying JAVA Installation You need to have Java installed on your system before installing Sqoop. Let us verify Java installation using the following command: $ java –version. Getting Started with Cassandra and Spark. Introduction This tutorial is going to go through the steps required to install Cassandra and Spark on a Debian system and how to get them to play nice via Scala.

Spark and Cassanrda exist for the sake of applications in Big Data, as such they are intended for installation on a cluster of computers possibly spread over multiple geographic locations. This tutorial, however, will deal with a single computer installation. The aim of this tutorial is to give you a starting point from which to configure your cluster for your specific application, and give you a few ways to make sure your software is running correctly. Major Components. 資料科學好好玩. Spark手把手-快速上手營. Making sense of too much data. GitHub - big-data-europe/docker-hadoop-spark-workbench: [EXPERIMENTAL] This repo includes deployment instructions for running HDFS/Spark inside docker containers. Also includes spark-notebook and HDFS FileBrowser. Java - Submit a spark application from Windows to a Linux cluster. GitHub - big-data-europe/docker-spark: Apache Spark docker image. [Spark] 安裝Spark 1.5.2版 (Standalone) 1.Spark簡介 Spark是由美國UC Berkeley AMPLab所開發的專案,是一種能執行分散式運算的系統。
![[Spark] 安裝Spark 1.5.2版 (Standalone)](http://cdn.pearltrees.com/s/pic/th/spark-1-5-2-standalone-136265720)
Spark的運算速度比Hadoop的MapReduce還要快,其原因在於Spark與Hadoop系統的主要差異有: 運算幾乎都在memory完成,減少硬碟的I/O 使用DAG排程,減少job的loading 這樣的優異表現在這兩年多內迅速的成長,甚至許多國際大企業支持這項Open Source的開發。 它的架構如下: Spark的子架構有 Spark SQL:可對資料用SQL語言作查詢Spark Streaming:資料能以串流的方式處理MLib:能用Machine Learning的技術對資料作處理GraphX:將資料轉為圖論作處理 未來會對每一種系統作介紹與使用方式。 2.安裝Spark Spark的分散式模式有Standalone、Yarn與Mesos。
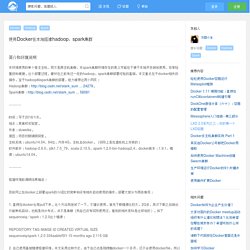
Hadley/dplyr. GitHub - hadley/testthat: An R package to make testing fun. Sparklyr — R interface for Apache Spark. 实现R与Spark接口 - Raining_wcc. 使用Docker在本地搭建hadoop,spark集群 - DockOne.io. 简介和环境说明 本环境使用的单个宿主主机,而不是跨主机集群,本spark集群环境存在的意义可能在于便于本地开发测试使用,非常轻量级和便捷。

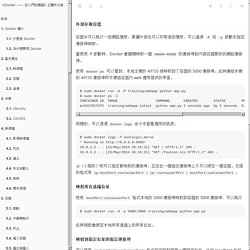
这个部署过程,最好在之前有过一定的hadoop,spark集群部署经验的基础,本文重点在于docker相关的操作,至于hadoop和spark集群的部署,极力推荐这两个网页: Hadoop集群: ... 24279。 Spark集群: ... 58081. 《Docker —— 從入門到實踐》正體中文版. 容器中可以執行一些網路應用,要讓外部也可以存取這些應用,可以通過 -P 或 -p 參數來指定連接埠映射。

當使用 -P 參數時,Docker 會隨機映射一個 49000~49900 的連接埠到內部容器開放的網路連接埠。 使用 docker ps 可以看到,本地主機的 49155 被映射到了容器的 5000 連接埠。 此時連結本機的 49155 連接埠即可連結容器內 web 應用提供的界面。 $ sudo docker run -d -P training/webapp python app.py $ sudo docker ps -l CONTAINER ID IMAGE COMMAND CREATED STATUS PORTS NAMES bc533791f3f5 training/webapp:latest python app.py 5 seconds ago Up 2 seconds 0.0.0.0:49155->5000/tcp nostalgic_morse 同樣的,可以透過 docker logs 命令來查看應用的訊息。 Docker networking basics & coupling with Software Defined Networks. Bryan's Notes for Big Data Analysis and Marketing Research: [Apache Spark][教學] Spark x Docker x ipython Notebook !(四)-pyspark設定+commit images. 我最近感受到催稿的壓力了orz,話不多說最終章開始.承繼之前的進度,設定完ipython notebook以及對外通道後,再來就是要設定pyspark.原理是將pyspark放入ipython的import路徑中就可以了.首先建立pyspark的profile檔案,這個步驟會在ipython的設定檔中新增一個profile檔,名稱叫做pyspark $ ipython profile create pyspark 接著修改這個檔案 $ vi /.ipython/profile_pyspark/ipython_notebook_config.py 在原本的設定檔中增加以下指令 設定好後再啟動ipython notebook,就可以run Spark了 $ ipython notebook --ip=sandbox --port=8088 --profile pyspark 啟動畫面~ 開一個新的notebook,來試試看(這是在本機執行唷~) 然後回到docker上看一下,果然可以順利執行!
![Bryan's Notes for Big Data Analysis and Marketing Research: [Apache Spark][教學] Spark x Docker x ipython Notebook !(四)-pyspark設定+commit images](http://cdn.pearltrees.com/s/pic/th/analysis-marketing-research-132006339)
設定好後就可以按exit退出container,把我們剛剛的設定儲存起來.看一下剛剛設定好的container 接著commit這個設定,把container存成image,這樣以後就可以直接呼叫他,不用重新設定了>"< Bryan's Notes for Big Data Analysis and Marketing Research: [Apache Spark][教學] Spark x Docker x ipython Notebook !(三)-Docker網路設定篇. 因為container是一個獨立的運行環境,我們要從本機連線進去必須透過docker的網路設定,相關的細節設定可以參考 這邊只就用得到的部分介紹.
![Bryan's Notes for Big Data Analysis and Marketing Research: [Apache Spark][教學] Spark x Docker x ipython Notebook !(三)-Docker網路設定篇](http://cdn.pearltrees.com/s/pic/th/analysis-marketing-research-132006332)
延續前一篇的狀態,我們可以透過docker ps來觀察container的狀態(我們可以開新的終端機,執行ssh boot2docker->sudo sh進入docker): 你會看到container的代號(先記下很常用到),原始的Image,以及最重要的port連結,這些port代表Docker與container溝通的port. $wget 接著我們要知道container的IP $docker inspect container_name | grep IPAddress. Bryan's Notes for Big Data Analysis and Marketing Research: [Apache Spark][教學] Spark x Docker x ipython Notebook !(一)-Docker + Spark安裝篇. [Apache Spark][教學] Spark x Docker x ipython Notebook !
![Bryan's Notes for Big Data Analysis and Marketing Research: [Apache Spark][教學] Spark x Docker x ipython Notebook !(一)-Docker + Spark安裝篇](http://cdn.pearltrees.com/s/pic/th/analysis-marketing-research-132006328)
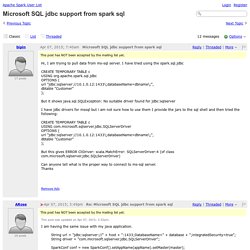
(一)-Docker + Spark安裝篇 文章開頭先感謝前輩們的貢獻: 我們可以在Docker上run Hadoop或Spark,把寫好的程式丟到上面執行,但是有沒有辦法直接在Docker的模擬出來的環境上開發spark程式,而且還是透過方便又強大的IDE介面(你當然也可以直接開vim寫,但是不在討論範圍內XD)? 本文要介紹如何在Docker上面運行spark,並且透過ipython notebook來編輯,並以互動式方式來使用Spark. 安裝 Docker的概念和一般VM的差異在於是以執行的APP為主,不會需要為了每個APP模擬一個OS,所以可以大量節省系統資源 當我們要建立自己的vm時,不需要從頭自己設定,Docker User可以把建立好的VM(又稱為image)放到網路上的Docker Repositories讓大家下載( pull sequenceiq/spark:1.2.0然後run他docker run -i -t -h sandbox sequenceiq/spark:1.2.0 bash這樣就會進入這個映像檔中(互動式介面) 在這裡運行spark也是沒問題的 不過這個環境是給spark用的,所以python不但是舊版的,甚至也沒有easy_install,更不用說python了. Ubuntu install R. Spark/SQLContext.R at master · apache/spark. Quick Start SparkR in Local and Cluster Mode. SparkR Practice. SparkR Practice. Apache Spark User List - Microsoft SQL jdbc support from spark sql. This post has NOT been accepted by the mailing list yet.

This post was updated on Apr 07, 2015; 3:52pm. I am having the same issue with my java application. String url = "jdbc: + host + ":1433;DatabaseName=" + database + ";integratedSecurity=true"; String driver = "com.microsoft.sqlserver.jdbc.SQLServerDriver"; SparkConf conf = new SparkConf().setAppName(appName).setMaster(master); JavaSparkContext sc = new JavaSparkContext(conf); SQLContext sqlContext = new SQLContext(sc); Map<String, String> options = new HashMap<>(); options.put("driver", driver); options.put("url", url); options.put("dbtable", "tbTableName"); DataFrame jdbcDF = sqlContext.load("jdbc", options); jdbcDF.printSchema(); jdbcDF.show(); It prints the schema of the DataFrame just fine, but as soon as it tries to evaluate it for the show() call, I get a ClassNotFoundException for the driver.
[Spark-User] Cannot submit to a Spark Application to a remote cluster Spark 1.0. Setting SPARK_HOME is not super effective, because it is overridden veryquickly by bin/spark-submit here< you should set the config "spark.home".
![[Spark-User] Cannot submit to a Spark Application to a remote cluster Spark 1.0](http://cdn.pearltrees.com/s/pic/th/cannot-application-cluster-131645233)
Here's why:Each of your executors inherits its spark home from the applicationdescription, and this is created by your SparkContext on your localmachine. By default, as you noticed, this uses your local spark home thatis not applicable to your remote executors. Getting Started with Spark on Windows 7 (64 bit) Lets get started on Apache Spark 1.6 on Windows 7 (64 Bit). [ Mac, Ubuntu, other OS steps are similar except winutils step that is only for Windows OS ] - Download and install Java (Needs Java 1.7 or 1.8, Ignore if already installed) - Download & Install Anaconda Python 3.5+.
(Extract to C:\Anaconda3 or any folder ) - Download Spark ( Download 7-zip to unzip .gz files) : Extract to C:\BigData\Spark making sure that all 15 folders go under C:\BigData\Spark folder and not in long folder name with version number - Download winutils.exe ( Put in C:\BigData\Hadoop\bin ) -- This is for 64-bit - Download Sample Data (Extract to C:\BigData\Data) 1. Create Environment Variables :- Apache Spark: How to use pyspark with Python 3.
Hello Spark ! (Installing Apache Spark on Windows 7) In this post i will walk through the process of downloading and running Apache Spark on Windows 7 X64 in local mode on a single computer. Prerequisites Java Development Kit (JDK either 7 or 8) ( I installed it on this path ‘C:\Program Files\Java\jdk1.8.0_40\’).Python 2.7 ( I installed it on this path ‘C:\Python27\’ ).After installation, we need to set the following environment variables: JAVA_HOME , the value is JDK path. In my case it will be ‘C:\Program Files\Java\jdk1.8.0_40\’. for more details click here.Then append it to PATH environment variable as ‘%JAVA_HOME%\bin’ .PYTHONPATH , i will set the value to python home directory plus scripts directory inside the python home directory, separated by semicolon. In my case it will be ‘C:\Python27\;C:\Python27\Scripts;’. Then append it to PATH environment variable as ‘%PYTHONPATH%’ .
OpenSSH for Windows – 透過Windows CMD快速建立SSH連線。 - Orz快樂學電腦. Untitled. 除了在Mesos或YARN集群管理器运行,Spark还提供了一个简单的独立部署模式。 你可以手动启动一个独立的集群,通过手动启动master和worker,或使用我们提供的启动脚本。 Setup Apache Spark-1.6.0 on Windows Full. 在 Windows 使用「非對稱金鑰」來遠端登入 SSH 的方法. 在 Linux Server 下使用 SSH 的「非對稱金鑰」來進行遠端登入的方式相信大家應該都不陌生 (沒實做過的可參考鳥哥或 study-area 的文件),下面我所要介紹的是在 Windows 下使用金鑰來遠端登入 SSH 的方法。 開始之前,先說一下「非對稱金鑰」: 「非對稱金鑰」是一種加密機制,由用戶端以特定的加密演算法產生兩把「非對稱」金鑰: 即「公鑰 (Public-Key)」與「私鑰 (Private-Key)」。 然後我們會把「私鑰」留在自己的電腦,再把「公鑰」傳送到遠端主機,當兩把金鑰碰在一起就會進行加解密比對,以確認是否彼此的身份是可以信任的,藉以執行特定的作業。 說得更簡單一點,與其說是「公鑰」與「私鑰」,不如說是「鎖頭」與「鑰匙」,由我自己來打造一組鎖頭及鑰匙,我把這個鎖頭裝在一個門上,然後我就可以用我的這一把鑰匙來打開這扇門了! 同時呢,我也可以把相同的鎖頭裝在很多的門上,那我就可以用這一把鑰匙來開啟很多門了…這樣子的概念是否有比較清楚了呢?! 在 Windows 使用「非對稱金鑰」來遠端登入 SSH 的方法. How to run Apache Spark on Windows7 in standalone mode. So far, we might have done setup of Spark with Hadoop, EC2 or mesos on Linux machine. But what if we don’t want with Hadoop/EC2, we just want to run it in standalone mode on windows.
Here we’ll see how we can run Spark on Windows machine. Prerequisites: Java6+Scala 2.10.xPython 2.6 +Spark 1.2.xsbt ( In case of building Spark Source code)GIT( If you use sbt tool) Now we’ll see the installation steps : Install Java 7 or later. 資料科學實驗室: 透過Python與Spark做氣象大數據分析. In this project, we applied Spark in weather data analysis. This application includes uploading data to Object Storage, establishing RDD, making data filtered, calculating the average of data, printing results and sorting. Spark standalone cluster tutorial by mbonaci. Getting started with Spark This tutorial was written in October 2013.
At the time, the current development version of Spark was 0.9.0. Uninstalling Cloudera Manager and CDH. Install a 4 node hadoop cluster-VMWare VMs-CDH5 - Cloudera Manager-pt-1-preparation. 安裝 Spark in Ubuntu 12.04 小記. Installing Cloudera on Ubuntu 12.04 Server.