
Paper crafts: make a panda gift candy box tutorial. Paper crafts: make a Panda Gift Candy Box tutorial Paper crafts: make a Panda Gift Candy Box tutorial In the summer times, let your kids make a special candy box, this crafts only needs paper Christmas craft ideas: paper snowflake flower tutorialChristmas craft ideas: paper snowflake flower tutorial Snowflake flower tutorial This snowflake is easy to do with the children.
Will need: Paper, A4 or A5, scissors, glue and Paper craft: mother’s day card and canvas Paper craft: mother's day card and canvas Whoa. Backlit Canvas Art. Do you have one project that you've been longing to do, but just haven't found the time yet?
This is it for me. I call it my Backlit Canvas Art and the inspiration piece has been pinned in my "Crafts to try" Pinterest board for ages. My "pin"speration is an artist's piece made from metal that has hand cut flowers all over it. Its backlit by Christmas lights, and I pretty much love it! 7710_32da.jpeg (435×3307) DIY Braided Bead Bracelet. It’s been awhile since our last bracelet DIY.

I don’t know about you, but our wrists have been begging for another colorful addition for months now. So after playing with some materials that were already on hand, we’ve created a tutorial for a braided bead bracelet, which is a not so distant cousin of the hex nut and wrap bracelet. Because honestly, you can never have too many . . . You’ll need: Cut the waxed linen cord into a 26″ and 19″ piece. Tie a knot about half an inch down from the loops. Start braiding the strands. Push the bead against the base of the braid, and cross the left strand over the middle. Keep a finger at the base of the braid, holding the beads in their place and keeping the braid tight. Finish the bracelet with another inch of braided cord, measuring it against the wrist. Make a DIY Laptop Skin!! {tutorial} <div class="greet_block wpgb_cornered wpgb_shadowed"><div class="greet_text"><div class="greet_image"><img class="enable-pib-img-under" src=" alt="WP Greet Box icon" data-recalc-dims="1"/></div>Thanks for coming by!
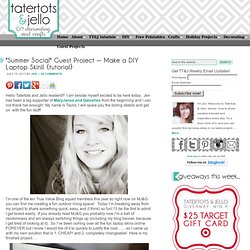
I try to feature a new creative tutorial every day -- and I'd love to have you follow along: <a href=" rel="nofollow"><strong>subscribe to my email updates</strong></a> or <a href=" rel="nofollow">come follow along on Facebook</a>. <div style="clear:both"></div></div></div> Hello Tatertots and Jello readers!!! I am beside myself excited to be here today. Jen has been a big supporter of MaryJanes and Galoshes from the beginning and I can not thank her enough!
Explore Cornell - Home Gardening - Introduction. The Technique Zone: Acrylic Paint Transfer. Supplies needed: Acrylic dabbers, photocopy of an image, water spritzer bottle, paintbrush, card stock, craft sheet and heat tool (optional) Take the lid off the dabbers and brush the paint onto the card stock, ensure you get a good coverage Take your photocopied image ( remember that you will get a reverse of the image, so don't use bold words), flip it over and place it in the acrylic.

Lightly press it down making sure it's smooth and not wrinkled Leave to air dry for at least 15 minutes and then if you wish give it a blast with the heat tool Only move onto this step when you are sure your paint is completely dryTake your water filled spritzer bottle, spray the back of the paper no more than two squirts, you don't want it too wet Next start to rub the paper very gently with your finger Keep rubbing and extra spritzing if you need too Eventually you will get rid of all the paper, but it does take a bit of patience as you have to be careful not to wet it too much and rub the image away.
Free Pattern - Felty Dinosuar from Toys to Sew by Claire Garland. Single Sock Dino Tutorial. Thank you to all the people who requested this tutorial, your encouragement made it happen!
So here is my favourite soft hearted beast for your sewing pleasure. To begin we need to gather supplies:A pair of scissorsA sock (This one is a bit thread bare and woolly and needs a new lease on life)Some red (or, really, any colour) felt2 buttons for eyesSome coloured thread for sewing together and making his faceSome filling ( I used standard fibre fill, but even scraps of fabric would do)Firstly, we need to cut the sock: In this pattern the heel of the sock becomes his nose/face/muzzle (what is appropriate for a T-Rex?) The part towards the toe of the sock is going to be the top of his head and the part towards the ankle is his body. The body part is about twice as long as the head part but don't be too worried about measurements etc. To do this I turn the tube with the heel of the sock inside out and then run a longish stitch very simply around the lip of the tube, then gather closed.
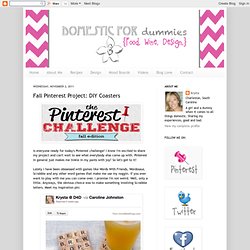
Styling / Hair and Makeup Tips & Tricks. Domestic for Dummies: Fall Pinterest Project: DIY Coasters. Is everyone ready for today's Pinterest challenge?
I know I'm excited to share my project and can't wait to see what everybody else came up with. Guest blogger - Sasha from The Guilded Bee: Here's another DIY project from our sweet friend, Sasha - from the The Gilded Bee.
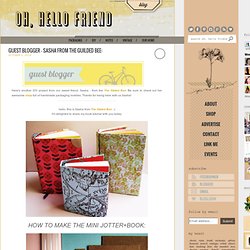
Be sure to check out her awesome shop full of handmade packaging lovelies. Thanks for being here with us Sasha! I'm delighted to share my book tutorial with you today: Supplies you’ll need to make this project: • One—8.5 x 5.5 sheet of cardstock. More Design Please - MoreDesignPlease. The 30 Minute $6 Dress Tutorial. Guest post by Rachael at Talk 2 the Trees.
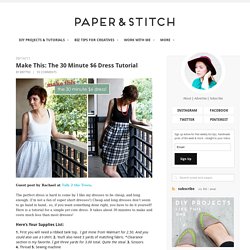
The perfect dress is hard to come by. I like my dresses to be cheap, and long enough. Teddy bear from a sock (Bearpina) The Mini Food Blog. Finally my Alice in Wonderland Tea Party table is ready!
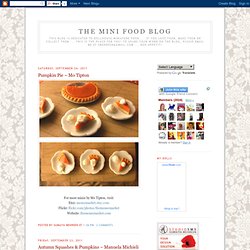
Two tables with all kinds of treats and tea cups, cake, butterflies and confetti.. This is how I imagine the tea party from my beloved whimsical story. Everything you see on the pictures except for the glass and ceramic ware, metal tea pot and forks is handmade by me - tables, cloth, food, tea and teapot, sugar.. Million photos...The scale is 1:12/one inch. Details from the first table.. For the first time I dared to put a signature on miniature - the tiny heart on middle photo. Details from the second table. Mini tutorials in other languages. There are way more tutorials available on the internet than those listed here. My criteria to choose them were: realism - the resulting miniature must be realistic and have a reasonable quality.plenty of pictures - so that the language they are in is irrelevant.
Most ARE in English, but some are not. So if you don't speak the language, you'll still be able to understand what to do. (Google translator is a great tool, but some translations make no sense at all!!!...) If you know of a tutorial that fits those criteria and should be here, please, let me know. Most Amazing Miniature Food Artworks by Shay Aaron. Shay Aaron is a brilliant artist from Israel who makes the most astonishing miniature food jewelry. These foodstuffs look so beautiful that we would desire to eat them. Actually, there’s a whole market out there for miniature food. Not actual stuff you can eat, but beautifully hand made designs of steaks, burgers, pies, vegetables, eggs and pretty much food artworks you can think of. Comments comments.