
Button Pad Hookup Guide. Favorited Favorite 4 Introduction This tutorial introduces matrix-scanning tecnniques, using the SparkFun 4x4 Button Pad to build an illuminated keypad. 4x4 Button Pad with Arduino Mega 2560 More importantly, we’ll introduce the concepts underlying the design and implementation of matrix scanning, so the reader can adapt and extend the techniques for their own projects.

Covered in this Tutorial This tutorial is structured as a series of progressive exercises. We’ll start by assembling the the keypad.Next, we’ll introduce matrix scanning by getting a single color of LED to light.From there, we’ll add the buttons as an input device.Finally, we’ll enable to other colors of the LEDs in the matrix. Along the way, we’ll explore some of the design decisions that contribute to the keypad, and look at some of the coding techniques that are used to control the hardware. Suggested Reading We’re going to be doing some low-level programming in this tutorial. Background A Classic Example How did they do it? Amazon. Arduino Schweiz - Bestellen Sie online bei Conrad. Turn cheap keyboard into a MIDI keyboard! (Add MIDI port to keyboard) DIY MIDI Controller Book - DIY MIDI Controller. Components & Parts. Homepage englisch. 5 Easy Ways to Make Your Own MIDI Controller on a Budget. DIY MIDI Controller Book - DIY MIDI Controller.
Id.arduino. Midi. This tutorial shows how to send MIDI notes from an Arduino or Genuino board to a MIDI instrument connected through the standard 5 poles DIN cable.
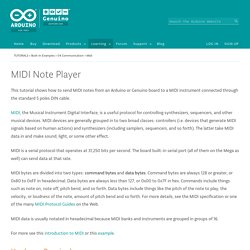
MIDI, the Musical Instrument Digital Interface, is a useful protocol for controlling synthesizers, sequencers, and other musical devices. MIDI devices are generally grouped in to two broad classes: controllers (i.e. devices that generate MIDI signals based on human actions) and synthesizers (including samplers, sequencers, and so forth). The latter take MIDI data in and make sound, light, or some other effect.
MIDI is a serial protocol that operates at 31,250 bits per second. The board built-in serial port (all of them on the Mega as well) can send data at that rate. MIDI bytes are divided into two types: command bytes and data bytes. MIDI data is usually notated in hexadecimal because MIDI banks and instruments are grouped in groups of 16. For more see this introduction to MIDI or this example. Hardware Required Circuit click the image to enlarge. SparkFun Electronics. Adafruit Parts Pal ID: 2975 - $19.95.
Notes and Volts. Notes and Volts: Arduino MIDI Controller: Potentiometers. Take Control In this installment of the MIDI for the Arduino series, we will apply the knowledge we have gained from previous chapters and begin the construction of a MIDI controller.
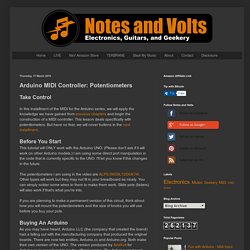
This lesson deals specifically with potentiometers. But have no fear, we will cover buttons in the next installment. Before You Start This tutorial will ONLY work with the Arduino UNO. The potentiometers I am using in the video are ALPS RK09L12D0A1W. If you are planning to make a permanent version of this circuit, think about how you will mount the potentiometers and the size of knobs you will use before you buy your pots.
Buying An Arduino As you may have heard, Arduino LLC (the company that created the brand) had a falling out with the manufacturing company that produced the original boards. The Software To make things simple, I have created a plug and play program that will allow you to customize your controller. Download the software HERE Part List (With Amazon links) Breadboard (63 pin width) Arduino Starter-Kit K000007 im Conrad Online Shop. An Intro to MIDI - Fayalab.