

Coffee Filter Roses. Back in my failed former days as a window dresser, I got some good advice from Tanja, the Grand Dame of the cosmetics department.
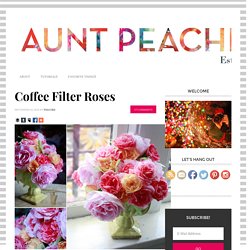
Originally from Romania, Tanja was widely renowned for her eyebrow waxing skills and had arrived at a point in her career when she only had to take one appointment a day, then happily dragged it out all afternoon. Most of the time was spent smoking and laughing and singing gypsy folk songs about beet salad, then more smoking and dispensing advice about important things like men, business, and unwanted hair. Of the many things I learned from Tanja, there are three golden nuggets that stand out; Never brush your teeth with blue toothpaste.Men with excessively bushy eyebrows are likely to cheat on their wives.Women will buy anything wrapped in roses.
*Women married to men with excessively bushy eyebrows should expect a lot of roses. Inspired by Yulia Brodskaya. I can't get over how amazing these are.
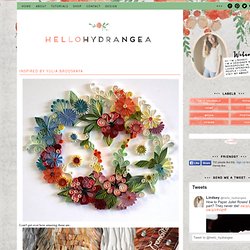
I wouldn't be surprised if Yulia invented quilling. She is a 28 year old artist from Moscow who creates beautiful designs from vertical pieces of thin paper and her website is full of inspiration in color, line, shadow and technique. You don't have to be a fellow quiller to wish you were like this great lady. Tile Coaster Tutorial. How to Make a Paper Orchid. My favorite ways to use this paper orchid are on top of a gift and to clip into your hair for a tropical event.
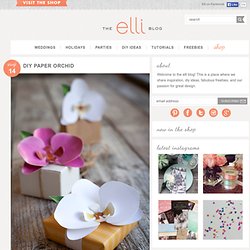
But I am guessing that you all have at least another dozen great ideas for using this ever blooming bit of bliss. Maybe napkin rings or added to a tropical centerpiece? With only 4 pieces, this is so far the easiest paper flower I have posted. So print either the bright pink or white PDF (or both) and follow the easy steps below! You can see the complete Luau Party Kit post by clicking this link. Lia. How To Make A Stylish Photo Frame For Several Photos. Here is a simple yet stylish photo frame that can accomodate quite many photos at once. The idea is very simple. Fasten twines on the empty frame and hang photos using clothes pins on them. Mason Jar Love. There are just too many fun uses for these jars.
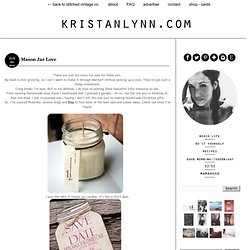
My stash is ever growing, as I can’t seem to make it through Walmart without picking up a case. They’re just such a cheap investment. An Interview with: Rebecca Long. I recently had the pleasure of discovering Santa Barbara, California-dwelling Rebecca Long’s shop The Rubbish Revival, where she sells a slew of decorative sea glass creations.
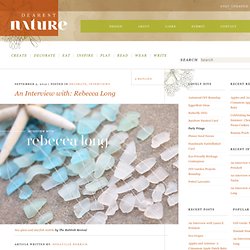
I am smitten by Rebecca’s ombre sea glass mobiles, that are a perfect representation of the ocean’s gradients. I emailed Rebecca to find out a little bit more about her, the inspiration behind her shop, and what she enjoys about nature. Read on for an inspiring and heartfelt interview with Rebecca. Tell us a little bit about yourself. Spring Scrapbook Paper Tree. Hello fellow crafters!
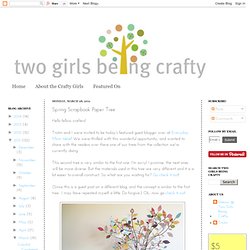
Tristin and I were invited to be today's featured guest blogger over at Everyday Mom Ideas! We were thrilled with this wonderful opportunity, and wanted to share with the readers over there one of our trees from the collection we're currently doing. This second tree is very similar to the first one. Drift Wood Orb Tutorial. Dear Chicago House, After a lovely vacation on the beach I am drawn (once again) to creating beachy thing.
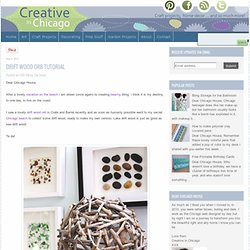
I think it is my destiny, to one day, to live on the coast. I saw a lovely drift wood orb in Crate and Barrel recently and as soon as humanly possible went to my secret Chicago beach to collect some drift wood, ready to make my own version. DIY Moss Animal Silhouette. DIY Paper Towel Flowers. By Jenny Batt.
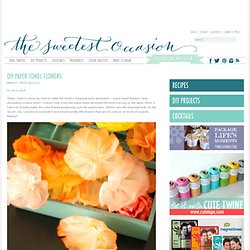
Pine Cone Flower Embellished Mason Jars. Can you feel it in the air?
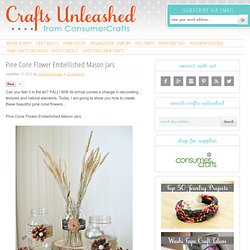
FALL! With its arrival comes a change in decorating… textures and natural elements. Today, I am going to show you how to create these beautiful pine cone flowers… Bastelidee: Fabrikschick-Vase aus rostigen Nägeln // Industrial Chic Vase Made With Rusty Nails. Rost zieht mich an.
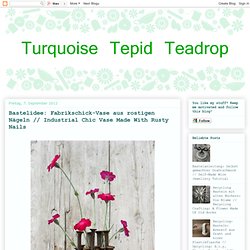
Ich musste diese langen Zimmermannsnägel einfach vor dem Schrottplatz retten, egal wie hoch der Rohstoffpreis auch sein mag. Die rostigen Nägel habe ich einfach um eine kleine braune Flasche arrangiert. Kleiner Tipp: Das geht am einfachsten, wenn man die Nägel zum Anordnen in Sand steckt und erst provisorisch den Draht fixiert. Dann mit weiteren Nägeln auffüllen und die Drahtschlaufen mit einer Krokodilszange anziehen. Schön fest. Fertig, Fabrikschick im selbst gemacht! Aber besser immer auf etwas stellen, das eventuell auch Rostflecken bekommen kann oder mit Klarlack überziehen, wer es mag. Passt die Katze nicht super zur Vase? Sniffed with approval. Lid Magnets. I've been collecting metal frozen juice can lids for months now and I gotta tell ya, my husband was starting to think I was becoming a hoarder, so I had to put them to use. This little lids have some possibilities. I thought about making some kind of sculpture or painting them.
But the best idea was to make magnets out of them. DIY: Papperslyktan Södermalm * Paper lantern Stockholm. Jag kan aldrig få nog av ljuslyktor som ni kanske märkt av mina Halloweenprojekt. Denna årstid behöver man ju dessutom alla ljus i mörkret man kan få, både bokstavligen och på det kreativa planet. Gift Ideas for Poor Creative Souls (17) Posted by: Cathy on Aug 04, 2012 Tagged in: Untagged. DIY: Wine Bottle Art. If any of you winos out there are anything like me, you’ve probably got a few, er, *cough* many empty wine bottles clogging up the recycling bin. Well, no more! Dig those puppies out and wash ‘em off, because it’s time for a little DIY! (If you’re not 21, just borrow a few empties from your ‘rents.)
With just a little TLC, these beautiful bottles can add ambient charm to any room and any occasion. Here’s What You Do: Step 1: Cut your bottle. Step 2: Gather tea lights, holiday lights, candles, wicks, flowers, spray paint – whatever you want to accessorize your bottles. Tutorial: Rolled Paper Flowers. Now that you've had a couple days to dye your coffee filters, I imagine that your crafty little fingers are itching for more coffee-filter-fun... First, plug in your glue gun and make sure you have plenty of glue sticks. Grab your favorite pair of scissors, and a big pile of your lovely coffee filters (or any paper of your choice) Since coffee filters are so thin, I usually layer and roll 2-3 at a time. For this flower, I'm using 2 filters. If you are using something other than coffee filters, you'll want to cut out a circle. Next, cut a spiral out of your coffee filter. And we're cutting...
Cutting files in SVG and DXF formats. Coffee Filter Rose Tutorial - Emmalee Elizabeth Design. 31 Insanely Easy And Clever DIY Projects. DIY Party Animal Candles. 20 Awesome Do It Yourself Projects. Thursday, June 14, 2012 4:30 am, Posted by Chris Groves | Internet 20 Awesome Do It Yourself Projects Topics: At Home Project Ideas , Creative DIY Home Projects , Do It Yourself Projects for 2012 , Fun How To Projects , What to Do with Extra Stuff.
How to cut glass. I posted a picture about 1 week ago on Instagram, Facebook and Twitter of me cutting glass using just string. Time. Tunnel Vision. I know you are invited to at least one wedding this summer. Bring your camera. Paper Flowers - Anyone Can Do That. Japanese Kusudama, this tutorial is featured on Craftuts. Oh Lovely Day: {DIY} 10 DIY Mason Jar Wedding Ideas. CWTS reveal - the book clutch + how-to. 25 Handmade Gifts Under $5. Rolled paper flowers {tutorial} Eco-Beautiful Weddings – The E-Magazine & Blog for Eco-Friendly and Green Weddings.