
Old Fashioned Lemonade: DIY Pom Poms - Justin & Mary - Photography. Happy Monday everyone!

Here is some more DIY goodness from Julia to kick off your work week: Pom poms are the perfect decoration (I know I just said that about flag garlands, but pom poms are right up there in my mind!). They add a pop of color, a splash of whimsy, and just look plain fun swinging in the breeze. Up until now, I had never considered the possiblity that pom poms were a true DIY project, one that you could actually do yourself and make look good. In short, pom poms intimidated me. Thankfully, the worst did not happen. Coolest Halloween Decorations EVER! - StumbleUpon.
How to Make a Number Pinata. Candles in Seashells. Stencil with freezer paper (harry potter tee)... - StumbleUpon. Yes, I am a nerd.

I came up with a brilliant idea for a Harry Potter t-shirt and I couldn't resist. "Expecto Patronum! " However, you can make whatever kind of design you want with a freezer paper stencil. It doesn't have to be Harry Potter related. (Although it would be awesome if it was.) I learned about the joys of freezer paper back in my early college days. Basically, freezer paper is backed with a plastic coating that will stick to soft surfaces when ironed, but it peels off cleanly and easily.
How To Make a String Tree Wall Mural Home Hacks. Bird and Text Collage Wall Art. [ Close Privacy Policy ] Privacy Policy / Your California Privacy Rights Revised and posted as of March 4, 2013 Prime Publishing, LLC ("Company," "we" or "us") reserves the right to revise this Privacy Policy at any time simply by posting such revision, so we encourage you to review it periodically.
In order to track any changes to this Privacy Policy, we will include a historical reference at the top of this document. This Privacy Policy will tell you, among other things: Your California privacy rights. ACKNOWLEDGEMENT/YOUR AGREEMENT Company websites are not intended for use by individuals under the age of 18 or those who are not legal residents of the United States. Lined Paper Tee by Maybe Matilda - StumbleUpon. I’m pretty dang excited to be guest posting on U Create, of all places, with an easy and fun project for you.
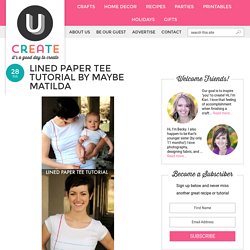
Just in time for heading back to school, I came up with this cute top: My name is Rachel, and I blog over Maybe Matilda. I’m from small-town New York, currently living in Utah with my soon-to-be-chiropractor husband and our soon-to-be-one-year-old son. When I’m not sweeping up Cheerios, I love sewing and crocheting for my etsy shop, and sharing what I make on my blog. I think this lined paper tee is such a fun way to bring out the inner student, and possibly even encourage a little bookishness in a little one (maybe that’s a stretch, but a girl can hope, right?).
It’s really simple to put together, and you can easily make it in any size. Always in Wonder: Living Room Makeover, Part 1: Herringbone Wall. Remember a couple of days ago when I posted the sneak peak picture, and told you that I went through 2 large rolls of Scotch Blue Painter’s Tape in one day?

Well today I am going to show you the finished product. Our hard work totally paid off, and the wall looks so good. I saw this picture on Pinterest, and it was love at first sight. I’ve always loved herringbone pattern in fabric. This wall was created by Laurie, and featured on Design Sponge. The first thing we did was paint all of our walls. After painting the wall gray we found the center of our wall, and began measuring, marking, and taping off our vertical lines. Next, on our vertical lines of tape we measured down every 10 inches. Once everything was taped off we painted every other row with Dutch Boy’s Refresh Ultra White. You can see how the gloss changed the sheen of the Modern Classic and adds a subtle dimension to the pattern.
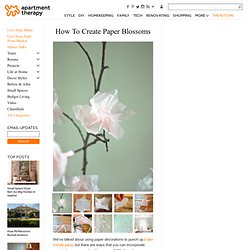
After brushing on the gloss we waited about 20 minutes before pulling off the tape from the wall. How To Create Paper Blossoms. Previous image Next image.
Holder for Charging Cell Phone (made from lotion bottle) My husband and I both have cell phones.

And both of us have phone chargers. And that means lots of obnoxious cords. You never know when one of us may be moving phone cords around, to give our phones an extra charge while we’re chatting away……… or trying to charge our phones up before running errands or something. Needless to say, those phone cords seem to be everywhere…..and are generally in the way and hanging all over the floor. (Okay, and how about when you’re in a hotel or visiting family/friends. Dream Big Butterfly Window - Resin Craft. Phew, what a week.
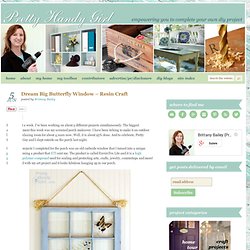
I’ve been working on about 5 different projects simultaneously. The biggest accomplishment this week was my screened porch makeover. I have been itching to make it an outdoor living and relaxing room for about 4 years now. Well, it is about 95% done.