
Time for a new tutorial... I found some spare time to finally write down the tutorial I promised last week.
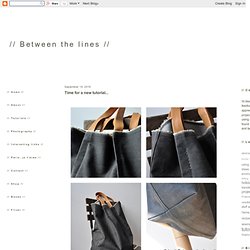
The bag has been used extensively lately, and I must say it's one of my favorites (didn't I say that of every single one of my bags?). It's sturdy, carries quite a bit and yet it still looks elegant, if I may say so myself. And it's so simple to make. Ready?! Here is what you need: - enough denim, canvas, or any other heavy-weight fabric you have at hand to cut two 54cm x 52cm pieces from - the given dimensions include seam allowances for side seams and bottom seam (note: since I wanted to make use of the denim's nice selvedge (Yes, Cindy, you got that right - that was of course on purpose!!)
Instructions 1. 3. Reversible Patchwork Bag. Print How to sew a simple backpack. Stow all your stuff in a mini rucksack Click here for a larger photo of the finished backpack.
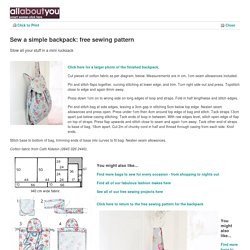
Cut pieces of cotton fabric as per diagram, below. Measurements are in cm, 1cm seam allowances included. Pin and stitch flaps together, curving stitching at lower edge, and trim. Turn right side out and press. Press down 1cm on to wrong side on long edges of loop and straps. Pin and stitch bag at side edges, leaving a 3cm gap in stitching 5cm below top edge. Stitch base to bottom of bag, trimming ends of base into curves to fit bag. Cotton fabric from Cath Kidston (0845 026 2440). You might also like... Find more bags to sew for every occasion - from shopping to nights out Find all of our fabulous fashion makes here See all of our free sewing projects here Click here to return to the free sewing pattern for the backpack.
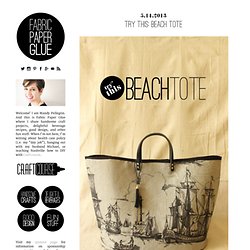
Beach Tote. Here in DC, our highs these days are in the 60s and our lows in the 40s, so other than the fact that I just returned from the beach, I would have a hard time believing that beach season is upon us.
A little glass box: Bag it {Beach beauty, low cost} It's my favorite day of the week!
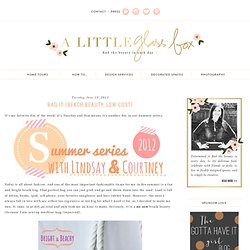
It's Tuesday and that means it's another day in our Summer series. Today is all about fashion. And one of the most important fashionable items for me in the summer is a fun and bright beach bag. That perfect bag you can just grab and go and throw down into the sand. Load it full of lotion, books, ipod, cell phone, your favorite sunglasses and hair rubber band. Wallet-to-Tote On the Go ~ Tutorial. Lorraine from ikat bag is a favorite around here… She has tons of fun tutorials on her blog and she’s joined us before with this wonderful Back to School Pencil Case tutorial.
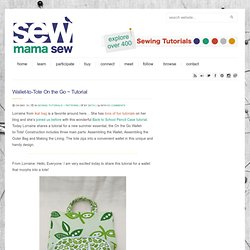
Today Lorraine shares a tutorial for a new summer essential, the On the Go Wallet-to-Tote! Construction includes three main parts: Assembling the Wallet, Assembling the Outer Bag and Making the Lining. The tote zips into a convenient wallet in this unique and handy design. From Lorraine: Hello, Everyone. Sling Bag Tutorial - Part 1. I tend to have a short attention span when it comes to projects, that's why I like making a variety of things.
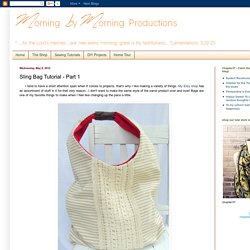
My Etsy shop has an assortment of stuff in it for that very reason...I don't want to make the same style of the same product over and over! Bags are one of my favorite things to make when I feel like changing up the pace a little. I whipped up a few of these hobo/sling bags to put in the shop. The fun thing about these totes are they are reversible! Skirt bag. This easy DIY project is made with two recycled fashion items: a skirt and a braided belt.
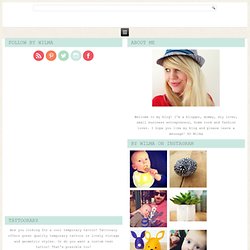
I love to create something new from something old. I bought both the skirt and the belt at a local thrift store for three Euro’s total. Gathered Clutch. A huge thanks to Dana and Disney for doing such a great job of rounding up all sorts of wonderful mother's day projects!
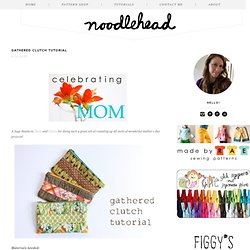
Materials needed: 1/4 yard each of three coordinating fabrics (you'll definitely have scraps leftover)8" zipper (you can always purchase a longer zipper and shorten it, just follow the directions on the packagescraps of medium weight fusible interfacingCutting the pieces: For the main exterior, cut two pieces, one 5.5" tall by 9" wide, and one 5.5" tall by 13" wide (this will be the gathered front) Pieces of medium weight fusible interfacing for exterior pieces of clutch: (2) 5.5" tall by 9" wide For the front band, cut one piece 4" tall by 9" wide. Seriously, the most time consuming part for me is always picking out my fabrics and cutting them, the rest goes together pretty easy, so let's go!
Take the front band piece and fold it in half the long way (right sides together) and sew together using a 1/2" seam allowance. Grab the 13" wide main exterior piece. Blossom Handbag/Shoulder Bag. Today we’re pleased to offer a free PDF pattern from Amy Butler’s Style Stitches: 12 Easy Ways to 26 Wonderful Bags, courtesy of Chronicle Books and Amy Butler!
Check out our book review, and a video from Amy Butler all about the book.
Akris Inspired Handbag. Suede Fringe Bag. Oh man, I’ve been so busy lately fangirling on The Avengers that I haven’t had the time to make anything new! But fear not fellow diy’ers, I have a very easy tutorial for you today! Summer is approaching and as it looks like the boho trend will get even stronger this season, what could be more perfect than a suede fringe bag on your shoulder? This tutorial will show you how to make your own. It requires almost no sewing and the finished product looks great!
What you will need: SuedeHole PunchScissors2 A4 paper sheets. The Grandview Bag. I know on Wednesday I said I'd have this up "tomorrow", but it's still technically Thursday SOME places, right?
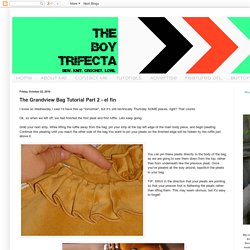
That counts. Ok, so when we left off, we had finished the first pleat and first ruffle. Lets keep going. Grab your next strip. While lifting the ruffle away from the bag, pin your strip at the top left edge of the main body piece, and begin pleating. You can pin these pleats directly to the body of the bag, as we are going to sew them down from the top, rather than from underneath like the previous pleat. TIP: Stitch in the direction that your pleats are pointing so that your presser foot is flattening the pleats rather than lifting them. Now, stitch down the bottom of the pleat. Zara Sequin Pouch. I said it would happen, so here it is! Just in time for christmas. A DIY version of the Zara Sequin pouch. Weekender Bag.
Featured: Lex Trip Bag So this weekend will have you jetting off to the coast for sun & surf? Bow Clutch. And fiiiinally... the tutorial you've been waiting for. A Bag Of Jeans.