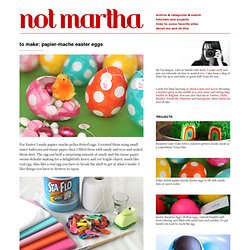

Not martha - to make: papier-mache easter eggs - StumbleUpon. For Easter I made papier-mache polka dotted eggs.

I created them using small water balloons and tissue paper then I filled them with candy and toys and sealed them shut. The egg can hold a surprising amount of candy and the tissue paper seems delicate making for a delightfully heavy and yet fragile object, much like real egg. Also like a real egg you have to break the shell to get at what’s inside. I like things you have to destroy to open.
You’ll need: water balloons (they make the egg-iest shape)white tissue paper (one sheet will make about three eggs)colorful tissue paper (one sheet will make many eggs, so you don’t need much)a 3/4 inch hole puncha paint brush you don’t care much aboutliquid laundry starcha sturdy shot glass to hold your egg while you’re working with ita way to hang the balloons to dryenough time to let these dry overnight, and a few hours to let them dry after filling and sealing them (you’ve been warned) Note: I tried a few variations on the starch.
Why the loop? - StumbleUpon. I love using mason jars for decorating and a seemingly endless supply of craft projects. But rainbow tinted mason jars, just like the vintage ones you can never find anymore? This one might be my favorite project with mason jars yet! Mason Jars Mod Podge in Gloss (buy it here) Food coloring Ramekins to mix colors Newspaper or paper bag Mix food coloring with a T or so of water into individual ramekins. You can do any color combination you like. Add a couple T of mod podge into your mason jar Add one ramekin of color into the jar and stir to incorporate it all together With a bowl underneath, carefully twist the jar around coating the whole inside with the mod podge/food coloring mixture.
Let dry upside down on the paper Do the same with the other colors. Place the jars face down on top of wax paper and a cookie sheet into an oven, set on warm. When they're ready, they'll look clear and the mixture should lose most of its streaks. How to Make Leaf Skeletons - The Idea Room - StumbleUpon. I wanted to share with you a project from one of my readers who shares with us how to make leaf skeletons.

I LOVE this! I have several leafs in various forms displayed in my home and knew I needed to make some of her leaf skeletons to add to my decor. I love how a pattern of leaves can enhance the beauty in your home. So I asked Heather if she would mind sharing her project with you. You can find more great projects from Heather at her blog The Other White House. I have spent hours and tried various ways of making these. You need washing soda, not baking soda! Gather your leaves. Washing soda is a strong base so you may want to wear gloves when handling the leaves. You will add 3/4 cup of washing soda and 4 cups of water to your pot of leaves. Judah Method - Bleaching Experemnet on the Behance Network - StumbleUpon. Print Hula Hoop Rug Page. Perfect Summer Bangle - StumbleUpon. Here's a fun tutorial on how to make a message bangle that's one-of-a-kind, done in the sun, waterproof and weatherproof.

Even after several trips to the beach, it won't fade or wash off! Essentially, it's the Perfect Summer Bangle. Used in this tutorial: Inkodye Red Prepare. All you'll need for this project is a raw wooden bangle (we got ours from DIYBangles.com), a black paint marker, plastic wrap, and some Inkodye! Transcribe. Perfect. Pour. Brush. Wipe. End of school treat for classmates (with printable)
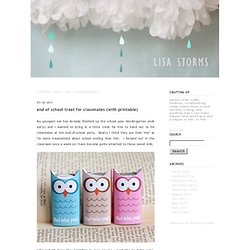
My youngest son has already finished up the school year (kindergarten ends early) and I wanted to bring in a little treat for him to hand out to his classmates at the end-of-school party.

Really I think they are from *me* as I'm more traumatized about school ending than him. I helped out in the classroom once a week so I have become quite attached to these sweet kids. I figured I'd share the printable in case anyone would like to make some, too. They are made to fit around Hershey Miniatures Chocolate Bars. Just cut out, fold at each vertical line, and adhere around bar on the adhesive tab. Print onto white cardstock and *be sure* to set the Page Scaling to None when printing or they won't be the right size. I also kept with the owl theme for "wrapping" the teacher gift. How to Make a Paper Snowflake. Happy Black Friday, everyone!

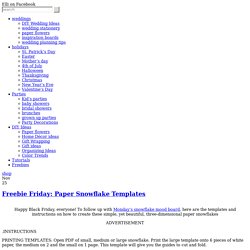
To follow up with Monday’s snowflake mood board, here are the templates and instructions on how to create these simple, yet beautiful, three-dimensional paper snowflakes PRINTING TEMPLATES: Open PDF of small, medium or large snowflake. Print the large template onto 6 pieces of white paper, the medium on 2 and the small on 1 page. This template will give you the guides to cut and fold. CUT & FOLD: Trim off extra paper then on the medium and small cut out the square pieces. FORMING THREE DIMENSIONAL SNOWFLAKE: Open and flatten each triangle back into a square. HANGING & DECORATING: Using a small punch, create a hole in top point so that you can run a string or fishing line through for hanging. Lia.