
Lightroom Myth Buster: When Resolution Matters and When It Doesn't. As I monitor forums and the Lightroom Help Group on Facebook, I see so much confusion about resolution and how to set it in Lightroom, that I thought it was time for a post on it.
Our photos are made up of pixels – squares of solid color that our camera sensor captures. For example, a photo from a 24 megapixel (MP) camera has 24 million pixels — 6,000 wide x 4,000 high: When we export, we specify how large our copies should be made – reduced for online sharing, possibly increased for large prints, or left at the same size as our master photos.
Lightroom is very intelligent in how it removes or adds pixels, to preserve the appearance of our photos. (On enlarging, this does have its limits – read my article, “How Large Can I Print My Photo? 10 Different Ways You Can Use a Single Softbox. When you’re just starting out in photography, you may not have a lot of money to invest in putting together a high-end arsenal of studio lighting equipment.

By being resourceful, however, you can do a lot with a little. In the 23-minute video by the lighting brand Sekonic, photographer Tony Corbell demonstrates how you can create 10 completely different lighting scenarios in the studio for products and portraits with a single large softbox. The main tools Corbell uses are the $180 Bowens Lumiair 80-100 Softbox and the $912 Bowens Gemini 500Pro monolight. Here’s a little table of contents for the different styles discussed, along with some example images and lighting diagrams that are shown. Delightfully Tacky: tips for taking great self portraits with a tripod + self timer.
This weekend I'm in Austin teaching a workshop at Texas Style Council about how to take your own self portraits with a tripod and self-timer!

For those of you who weren't able to make it out to Austin, I thought I'd repost (and update) this article I wrote over a year ago with some tips on how to take better self-portraits with just a tripod and self-timer. I take almost all of my own photos here on the blog, and anytime someone else takes my photos it's always noted right after the outfit details.
DSLR Autofocus Modes Explained. Most modern digital SLR cameras are equipped with advanced autofocus systems that are often hard to understand.
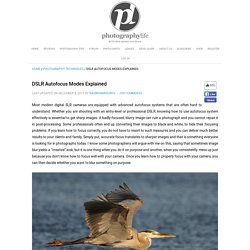
Whether you are shooting with an entry-level or professional DSLR, knowing how to use autofocus system effectively is essential to get sharp images. A badly-focused, blurry image can ruin a photograph and you cannot repair it in post-processing. Some professionals often end up converting their images to black and white, to hide their focusing problems. If you learn how to focus correctly, you do not have to resort to such measures and you can deliver much better results to your clients and family. Simply put, accurate focus translates to sharper images and that is something everyone is looking for in photographs today. NIKON D700 @ 420mm, ISO 500, 1/2000, f/5.6 In this article, I will teach you everything I know about focus modes on modern DSLRs. 1) How DSLR Autofocus Works 1.1) Active vs Passive Autofocus There are two types of AF (Autofocus) systems – Active and Passive.
Create double exposure photos in Photoshop. Introduction to Icc Profiles. Profiles are simply look-up tables that describe the properties of a color space.
They define the most saturated colors available in a color space; i.e. the bluest blue or deepest black your printer can produce. If you don't have a profile, the trio of Red, Green, and Blue values (or CMYK) that make up a color have no particular meaning — you can say something is blue, but not exactly which shade of blue. Accurate profiles are the key to a color-managed workflow. With accurate monitor and printer profiles, your prints will closely match what you see on your monitor. Without profiles, you need to rely on trial and error combined with good old-fashioned guessing.
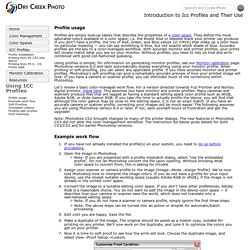
Using profiles is simple; for information on generating monitor profiles, see our Monitor calibration page. Let's review a basic color-managed work flow. Note: Photoshop CS2 brought changes to many of the printer dialogs. Example work flow Photoshop CS2, CS3 and above Photoshop 6, 7, and CS. Tutorial: How to Create Double-Exposures in Photoshop. While double-exposure photography all started in-camera – most likely by accident – it’s since become an actual style and genre of photography all its own.
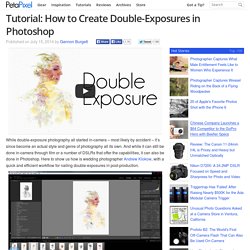
And while it can still be done in-camera through film or a number of DSLRs that offer the capabilities, it can also be done in Photoshop. Here to show us how is wedding photographer Andrew Klokow, with a quick and efficient workflow for nailing double-exposures in post-production. One step at a time, Klokow’s tutorial goes over how best to prepare the individual images for the eventual composition.
Once each image is tweaked as needed, Klokow shows off how to properly choose the blending modes to get your desired effect.