background preloader

Crafts

Facebook Twitter

Let's get organized... As I start this post I am giggling (and I think my mom would have a good chuckle too). Something you need to know about me sooner rather than later is that I am NOT very organized. I usually put stuff away in 'a-place-I-will-definitely-find-it'. Needless to say, I never find the stuff or will find it again when we move. One thing that always piles up in various areas of our house are our bills and receipts. Because my husband and I both get them I'm never sure what can go in the trash and what can't - so I make small piles in random places. So when I saw this tutorial in a Korean book that I have (its called 펠트소품 DIY - phonetically its peltuh sohpoom) I was quite excited.

I made some minor changes to details, here and there. You will need: 4 different colour sheets of felt (2mm). A small piece of ribbon Thread (beads are optional) Apologies in advance for the bad photo lighting (most of my crafting occurs at night.) 1. 2. 3. 4. 5. 6. 7. 8. Now find a place to hang it! Love and blessings. Page 7. Flip-Flop Refashion: Part 1 (Braided Straps) Summer is great. And warm. And full of outdoor activities and trips to the pool and random walks around the neighborhood. I love it. And my shoe of choice for these warmer months?? Sandals, of course. However, I have big feet. Big, as in, a size 12. So, I saw a tutorial for this flip-flop makeover (great work Mother Huddle), floating around the web…….and the wheels started turning. I decided to just string all of the ideas together and create a whole series.
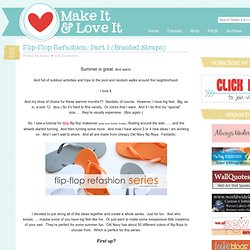
First up? A quick and easy flip flop…….made with some braided knit fabric scraps, using the 5 strand braiding technique, shown here. These soft braided straps streeeeeetch the perfect amount, right around the back of my heel……..keeping the flip-flop snug and in place. I added little loops of fabric to the sides, to keep the braided straps in place. These little sandals are so light, they’re soft and stretchy, and my favorite part……..they’re inexpensive. ($2.50 to be exact) These flip-flops make me think of the beach……and make me miss GA. DIY Rainbow Cut-Off Shorts. Rainbow Bubble Snakes | Housing a Forest. Summer is here and our family is SO excited! The kids are planning and scheming about what we are going to do this summer. Love it! One of the fun activities that they wanted to try was making bubble snakes that are all over. The best part is they are easy to make and use things that I had laying around my house. Perfect! Start by cutting the bottom of the water bottle off.
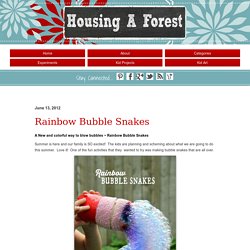
Pour some dish soap into a shallow container with a little bit of water and gently mix. We decided to add some color to the bubble snakes with food coloring. Annika added a rubber band to hers as well as the tape. Rainbow snakes were definitely a hit in our house! Please remind your kids to blow air out not suck air in! Walking on Eggs Packing Peanut Experiments Exploding Peep Geysers Shooting Water Experiment Exploding Art. Tinted Mason Jars in Rainbow. I love using mason jars for decorating and a seemingly endless supply of craft projects. But rainbow tinted mason jars, just like the vintage ones you can never find anymore? This one might be my favorite project with mason jars yet! Mason Jars Mod Podge in Gloss (buy it here) Food coloring Ramekins to mix colors Newspaper or paper bag Mix food coloring with a T or so of water into individual ramekins. You can do any color combination you like. Add a couple T of mod podge into your mason jar Add one ramekin of color into the jar and stir to incorporate it all together With a bowl underneath, carefully twist the jar around coating the whole inside with the mod podge/food coloring mixture.

Let dry upside down on the paper Do the same with the other colors. Place the jars face down on top of wax paper and a cookie sheet into an oven, set on warm. When they're ready, they'll look clear and the mixture should lose most of its streaks. Bits Of Everything: Wall Picture Collage. I have been wanting to hang something on the wall in my kitchen ever since we moved in. Between Emily and I, we finally dreamed up this Wall Picture Collage after looking at lots of other people’s photo collages- and I love the way it turned out.
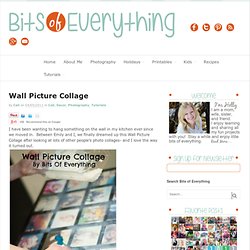
Here are all the things that I bought. (all found at walmart) This entire project was under $20. My kind of project! *pictures you want to use (I had free prints from Costco) * 2 20×30 foam core boards (I got two black ones $2.88 each) *poster hanger thingies ($2.44) *foam brushes ($.97) *double sided tape ($3) *mod podge (I already had some) This shows you how thick the foam core board is.. First I drew out a plan.. Then I cut some computer paper first, and made sure it would work before I cut up my pictures. Then I went to work cutting my 4×6 pictures into 4 inch squares. I then laid them all out on the floor in the order that I wanted them, and then taped them down with double sided tape. Then I took it in the kitchen and painted mod podge all over it. Crème de la Craft | DIY projects made from everyday objects. What I love most about technology is that it's all about customization.
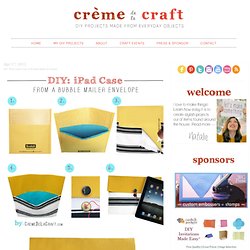
From your wallpaper to your apps, it's all about you. That's what inspired me to create a custom, one-of-a-kind sleeve for my favorite tech-cessory. A bubble mailer is the perfect object to upcycle for this DIY project, because not only is it the ideal size and shape for a tablet, but its very function is to protect your stuff! So next time you receive a package in the mail, keep the envelope, cover it up with your favorite fabric and you've got a custom case for your iPad, iPod, laptop or phone. Bonus: No sewing required. Materials: • Bubble Mailer (10.5in. x 11in.) • Fabric (or repurpose pieces from an old t-shirt, dress or jeans) • Adhesive (glue gun, tacky glue, stapler and/or small brads) • 2 Buttons • Needle & Thread • Piece of Ribbon or String (approximately 8 in.) • Scissors Steps: • To measure the correct size for your case, slide your tablet horizontally into the envelope. Crème de la Craft | DIY projects made from everyday objects.

I really can't get enough of neon. I've been wearing these neon chevron earrings all Spring and had to make another neon accessory for my wardrobe. Not only is this DIY project so easy to make, but you probably have most of the supplies at home. Grab a few straws, add some paint and paper and you've got a stylish and funky necklace. It's really that easy! Best of all, the gold spray paint gives a heavy, metal chain look and only you will know what's really hiding underneath! Get creative and craft up a matching bracelet, earrings or ring. Follow the steps below to make your own one-of-a-kind piece of jewelry. Materials: • 3 Straws • Gold Spray Paint • Colorful Paper (tip: look for interesting prints from a magazine. Steps: • Spray paint straws • Fold them into a triangular shape and insert one of the ends into the other to close. • Attach paper to each triangle with glue. • Run needle & thread through the back of the necklace to connect the triangles.

Crate Paper: January 2012. Only a couple more days until Crate Paper takes flight to CHA in Anaheim, California! To make the CP booth a splendid place to be during the BIG event, and to give our visitors a favorable view of the new collections, on display will be numerous projects from the Crate Paper Design Team. If you're one of the lucky ones attending the show, we welcome you admire and photograph them at your leisure while visiting our booth. For those of you at home, you can find the projects right here on our blog starting today, and throughout next week - be prepared, you're going to love them! Pretty Party won my heart immediately. From it's soft pastel hues, to it's subtle patterning, I just knew it was the kind of collection that would lead to something beautiful. The florals beckoned to be supported by a handcrafted paper terrarium made from bits and pieces of the collection.

I tied around the pink bundle of packages, a pink/white twine. How To Mix Chalkboard Paint in Any Color. We love using chalkboards as backdrops for displays and parties (like this one here!). So we were super excited to learn that you can create your own custom colors-and it's really easy!
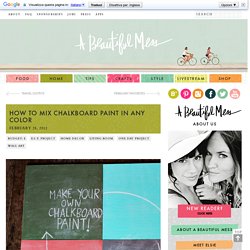
We first learned how from Martha Stewart whose tutorial you can read here. She recommends that you use latex paint, but we tried it out with acrylic paints with much success. Here's how you too can create your own chalkboard paint... Supplies: 1/2 cup acrylic paint (choose any color you like, or mix colors together to make the perfect shade!) 1. 2. Once your chalkboard has fully dried be sure to slate the surface before using it for the first time. Have fun creating any color combination you like!! Shrinky Bracelet. If you grew up in the 80's, like I did, you're probably already familiar with the awesomeness that is Shrinky Dinks...but did you know that you can still buy Shrinky Dinks?
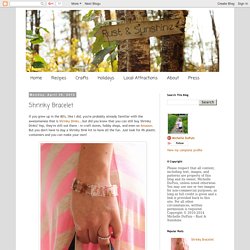
Yep, they're still out there - in craft stores, hobby shops, and even on Amazon. But you don't have to buy a Shrinky Dink kit to have all the fun. Just look for #6 plastic containers and you can make your own! There is a great tutorial on Instructables (courtesy of Dabbled) with all the instructions for making your own shrinky projects from #6 plastic containers, so I won't go into too much detail here. Most of this post is actually about turning these awesome little pieces of plastic into a sweet bracelet (and bonus pendant) to give to mom for Mother's Day.

(Attention Dads: This project involves permanent markers, melting plastic, and tools...and your kids will think it's totally cool.) 1. 2. 3. 4. 5. 6. 7. Use a pair of pliers to open the rings. 8. Cute, right? Craft Tutorials ~ Mod Podge Rocks!