

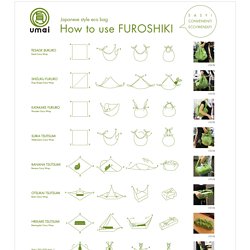
How to use FUROSHIKI. Click click click click click click click click click close window © Japan Centre Group Ltd 2009.
This Little Miggy Stayed Home: Gauze Swaddle Blanket Tutorial. Over a year ago I decided to make my own gauze type baby blanket for Lamp.
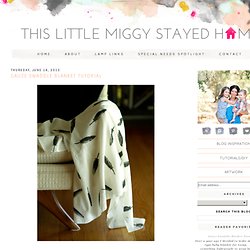
I wanted something lightweight to wrap her up in and decided I could definitely make something as cute as any aden + anais swaddle blanket. So I tried a star print using a sweet potato as a stamp. The color was wrong and the stars were either too big or too small, in short it was ugly, ugly, ugly. So I never posted it. However, I did end up using this blanket for Lamp anyway as it was still light and breezy like I needed. So even though I've been running around like a crazy woman with a crazy-long to do list, when inspiration struck I just had to stop and make her another blankie. 1. 2. 3. 4. East Coast Creative: How to Paint a Mosaic Accent Wall {Bedroom Makeover}
Yesterday, I shared my daughter Kira’s Colorful Bedroom Makeover with all of you.
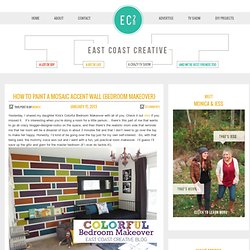
Check it out here if you missed it. It’s interesting when you’re doing a room for a little person… there’s this part of me that wants to go all crazy blogger-designer-nutso on the space, and then there’s the realistic mom side that reminds me that her room will be a disaster of toys in about 3 minutes flat and that I don’t need to go over the top to make her happy. Honestly, I’d kind of be going over the top just for my own self-interest. So, with that being said, the mommy voice won out and I went with a fun, yet practical room makeover. I’ll guess I’ll save up the glitz and glam for the master bedroom (if I ever do tackle it!). Today I’m going to share with you the focal point of the room… The Mosaic Accent Wall! I’m a total sucker for an accent wall. How to Create a Mosaic Accent Wall Since this is the room of my 5 year old, I asked her what she wanted, and she told me LOTS of colors. Base coat paint. Furniture : Decorating.
Nick Curtis @ typOasis. My Bamboo is Peacock Blue. I have to say thank you to all of you for your suggestions on what color to paint the faux bamboo chest I scored last weekend while out thrifting.
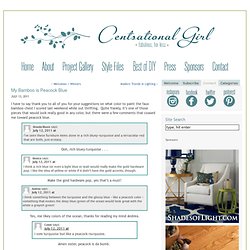
Quite frankly, it’s one of those pieces that would look really good in any color, but there were a few comments that coaxed me toward peacock blue. Ooh, rich bluey-turquoise . . . Make the gold hardware pop, yes that’s a must! Yes, me likey colors of the ocean, thanks for reading my mind Andrea. Amen sister, peacock is da bomb. So I busted out of my ‘just paint my furniture white’ box I fit so nicely into, and pulled off a bold shade of glossy peacock blue. Check out this hottie now: Now that’s what I’m talking about! I love it, don’t you? From the start, this find required some minor repairs. Next came the broken leg, with a piece of bamboo falling off. Now it looks like something you’d pay top dollar for on 1st Dibs (double fist bump to the chest, followed up by peace sign to the crowd): Bowl from Marshalls ($3 dolla, holla!)
Design Seeds®: For All Who Love Color. Bookplate Bonanza. HGTV - Decorating, Outdoor Rooms, Landscaping Ideas, Kitchen and Bathroom Design. DIY PROJECTS. Sweet DIY: Stretched Canvas Art - Blog - Hello My Sweet. Today we want to show you how easy it can be (and inexpensive of course) to create your own Stretched Canvas Artwork.
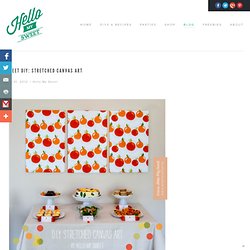
In our example you see that we used three of these pieces to create a modern and symmetrical backdrop for our Citrus Brunch buffet. However, you are not merely limited to backdrops, oh no, no. This technique could be used to beautify any space with stretched canvas art. I personally was really excited with the results of this little experiment. So much so that we plan to use these in our kitchen now as wall art! We are going to demonstrate for you how to build a frame and stretch the fabric across it. Step One: Lay your foam core down onto the fabric you chose. Step Two: Measure the width and height of your foam core. Step Three: Assemble your frame by laying our your wood pieces on top of the back side of the foam core.
Step Four: Place your fabric wrong side up and place your finished frame on top, wood side up, foam side down. Affordable Art Prints. Your home for all things Design. Home Tours, DIY Project, City Guides, Shopping Guides, Before & Afters and much more. Belle maison. Mydeco 3D : Design your rooms in realistic 3d. Lonnymag.com. Un coin travail soigné.