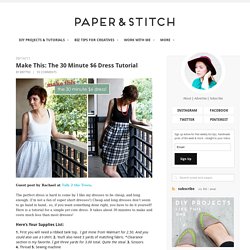

Turn Paint Chips into a Dry Erase Calendar. 101 Pretty Printables {free} The 30 Minute $6 Dress Tutorial. Guest post by Rachael at Talk 2 the Trees.

The perfect dress is hard to come by. I like my dresses to be cheap, and long enough. (I’m not a fan of super short dresses!) Cheap and long dresses don’t seem to go hand in hand.. so, if you want something done right, you have to do it yourself! Here is a tutorial for a simple yet cute dress. Here’s Your Supplies List: 1.
Here’s How you Make it: 1. 2. 3. 4. 5. 6. 7. 8. 9. 10. 11. 12. Here’s the tutorial in pictures… Diy {bird nest necklace} I have been seeing a lot of bird nest jewelry around lately.

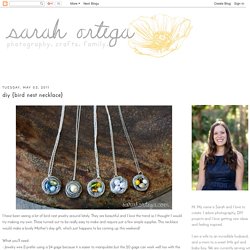
They are beautiful and I love the trend so I thought I would try making my own. These turned out to be really easy to make and require just a few simple supplies. This necklace would make a lovely Mother's day gift, which just happens to be coming up this weekend! What you'll need: - Jewelry wire (I prefer using a 24 gage because it is easier to manipulate but the 20 gage can work well too with the help of some round nose pliers) - pearls or glass beads - necklace chain - jump ring and a clasp Select the beads you want, string them onto your wire and arrange them as you'd like. then simply wrap the wire around the beads wrap some wire in the space between each bead (I like the look of three loops but you could just do one or two if you prefer) this is what the back looked like. Now attach a jump ring and a clasp to the end of a necklace chain. For the Love of: Mason Jars. <div class="greet_block wpgb_cornered"><div class="greet_text"><div class="greet_image"><a href=" rel="nofollow"><img src=" alt="WP Greet Box icon"/></a></div>Hello there!
If you are new here, you might want to <a href=" rel="nofollow"><strong>subscribe to the RSS feed</strong></a> for updates on this topic. <div style="clear:both"></div><div class="greet_block_powered_by">Powered by <a href=" title="WP Greet Box WordPress Plugin" style="text-decoration:none;">WP Greet Box</a><a href=" title="WordPress Plugin" style="text-decoration:none;">WordPress Plugin</a></div><div style="clear:both"></div></div></div> Every few weeks or when my overwhelming love for something needs to be shared… I have what I like to call, For the Love Of.
This week I’m crushing on Mason Jars! I’ve always loved them, but this week they’ve been glaring at me. Let’s check out some of the beauties I found… mostly with the help of my BFF, Pinterest . These are the mason jar candle holders I made a few years back. Lights. 20 Awesome Do It Yourself Projects. Thursday, June 14, 2012 4:30 am, Posted by Chris Groves | Internet 20 Awesome Do It Yourself Projects Topics: At Home Project Ideas , Creative DIY Home Projects , Do It Yourself Projects for 2012 , Fun How To Projects , What to Do with Extra Stuff Are you bored and have a bunch of extra little items hanging around here and there? Well we were in the same boat so we decided to round up 20 different awesome at home projects you can do. Anything from soda pop cap lids to spoons and more. You honestly don’t know some of the creative things you can do with what could possible be junk. If you know of any great at home Do It Yourself Projects please leave a comment to include your own and maybe we will add it to our list.
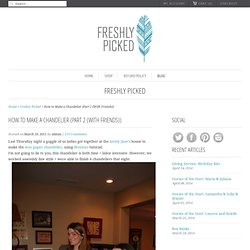
And for the upcoming holiday season we want to give all you do-it-yourselfers a head start with these incredible Christmas DIY for 2012. This to That (Glue Advice) How to Make a Chandelier (Part 2 (With Friends)) I'm not going to lie to you, this chandelier is both time + labor intensive.

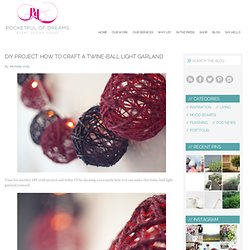
However, we worked assembly line style + were able to finish 4 chandeliers that night. 1. Tear off your wax paper into long pieces. We used 2 - 2.5 foot pieces. (Ann + Amy) 2. 3. 4. 5. 6. 7. Jane's finished light. Amy's finished + installed chandelier. Next → ← Previous 25 Responses. DIY Craft Project: How to craft a twine-ball light garland {As featured on Rock n Roll Bride} Time for another DIY craft project and today I’ll be showing you exactly how you can make this twine-ball light garland yourself.

It’s one of those projects that’s a little bit messy and does take quite a bit of time, but it is so much fun. Plus you have a really cool piece of decor at the end of it. Perfect for parties or around the home, you can paint it up in any colour you want to match your design scheme, and when lit, it looks so pretty, casting lots of patterned twinkly light everywhere. Mine is now taking pride of place in my office.
Making the ordinary EXTRAORDINARY! A Beautiful Mess. I love using cloth napkins to dress up our dinner table, and through the years I've grown even more fond of their sustainability and cost effectiveness.

Though, I'm not sure how cost effective it is if you keep buying more and more cloth napkins each year! This holiday season I thought it would be fun to look at how I could dress up the napkins I already own to give them an extra festive vibe. Check out three simple ways you can give new life to your table linens. And hey! Two of them are even no sew! Ribbon Trimmed Napkin This look is so (no sew) simple! Supplies:-ribbon-heat bond in width of ribbon-cloth napkin (buy mine here)-iron-fabric scissors (not shown above) Step One: Trim pieces of your ribbon to be about 1.5 inches longer than the width of your napkins.
Step Two: Fold down the edges of each ribbon segment about 1/4" and iron flat. Step Three: Iron the heat bond to the ribbon (pressing with hot iron for two seconds), then peel off the paper backing. Pom-Pom Trimmed Napkin. Flamingo Toes » Jewelry, Sewing, Crafts, Tutorials, and Fun! Print Hula Hoop Rug Page.