

Joseph Azzam's Blog - The Workflows of Creating Game Ready Textures and Assets using Photogrammetry. The following blog post, unless otherwise noted, was written by a member of Gamasutra’s community.
The thoughts and opinions expressed are those of the writer and not Gamasutra or its parent company. A couple of month ago I wrote an article on how I was able to scan an entire castle for $70, and at the end I mentioned how I was porting that castle into the Unreal Engine to use in my game World Void. Working with a huge structure with millions of polygons can bring the most powerful software solution to its knees, and a lot of people have showed interest in the creative process that I am using to port the castle into a game engine. Making the castle game ready is a very tedious and long process, and before I can explain the work that goes into splitting the castle into game assets, I found it essential to first explain the challenges of manipulating 3D scans in general. For these results it’s worth noting my computer specifications. Realtime 3D Face Scanning. 3D Printering: Scanning 3D models. Building your own 3D scanner out of off-the-shelf parts.
So you have an animation and simulation project, and want to scan people to get their high-resolution 3D meshes.
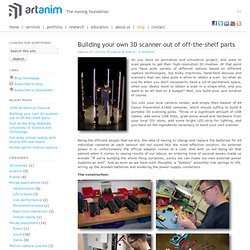
At that point you have wide variety of different options based on different capture technologies, big bulky machines, hand-held devices and scanners that can take quite a while to obtain a scan. So what do you do when you don’t necessarily have a lot of permanent space, when you ideally want to obtain a scan in a single shot, and you want to do all that on a budget? Well, you build your own solution of course. You visit your local camera vendor, and empty their basket of 64 Canon Powershot A1400 cameras, which should suffice to build 8 portable 3D scanning poles.
Throw in a significant amount of USB cables, add some USB hubs, grab some wood and hardware from your local DIY store, add some bright LED strip for lighting, and you have all the ingredients necessary to build your own scanner. Automate your Meshlab workflow with MLX filter scripts. Meshlab is a great program for loading and editing XYZ point cloud data and creating polygon meshes.
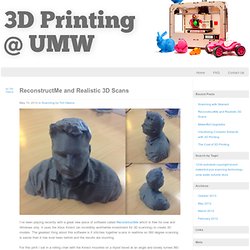
ReconstructMe and Realistic 3D Scans. May 10, 2012 in Scanning by Tim Owens I’ve been playing recently with a great new piece of software called ReconstructMe which is free for now and Windows only.
Testing ReconstructMe - how to use Kinect to capture 3D models in real-time. 3D Scanning Made Easy. Demonstration of RGB Demo0.7 on UBuntu12.04 - 3d reconstruction using kinect. Installing Libfreenect Installing Open-NI, Sensor kinect, Avin2Sensor patch and NITE ( Note : only 1.5xx versions work with RGB demo source not the github) Installing PCL-1.6 Installing OpenCV-2.3.1 Installing RGB demo Installing QT Note: PCL-1.6, OpenCV2.3.1 and QT libraries should be downloaded from Ubuntu repositories, otherwise there will be a conflict Getting started with OpenKinect (Libfreenect) Here are the list of Ubuntu Kinect Installation commands.
Install the following dependencies.The first line in each of the listings below takes care of this step: DSLR + DEPTH Filmmaking. SLAMDemo - rtabmap - Demo of 6DoF RGBD SLAM using RTAB-Map - RTAB-Map : Real-Time Appearance-Based Mapping. In this example, we use a hand-held Kinect sensor: we assemble incrementally the map depending on the 6D visual odometry, then when a loop closure is detected using RTAB-Map, TORO is used to optimize the map with the new constraint. We did two loops in the IntRoLab robotic laboratory of the 3IT . The first image below is the final map without optimizations.
The second image is the final map with TORO optimizations with RTAB-Map detected constraints. The third and fourth images are closer examples of before and after map optimizations. The ROS bag for the demo is here : kinect_720.bag . This only works with ROS, tested under Ubuntu 12.04 / ROS Fuerte (edit: work also on Groovy). Www.decom.ufop.br/sibgrapi2012/eproceedings/tutorials/t4-handouts.pdf. Rendering results with Meshlab. Posted: 26th February 2012 by hackengineer in Computer Vision Tags: 3D , meshlab , point cloud Meshlab is pretty great for 3D point clouds and its free! Here are a few steps that help really make the point clouds look good.
Open Meshlab and open the .xyz file from the 3D camera Delete any points that look like they dont belong ( if you only see a small group of points you are probably zoomed out really far dude to a rogue point; delete it and zoom in) Orient the pointcloud so that it represents the original scene (looking straight at it). We will now compute the normals for each point.
Lets add some color to the depth to make it stand out (darker as depth increases). We should have a good looking pointcloud at this point. 3D Scanner. KinectFusion - Real-time 3D Reconstruction and Interaction Using a Moving Depth Camera [28C3] by CCCen 21,171 views KinectFusion Real-time 3D Reconstruction and Interaction Using a Moving Depth Camera This project investigates techniques to track the 6DOF position of handheld depth sensing cameras, such as Kinect, as they move through space and perform high quality 3D surface reconstructions for interaction.
While depth cameras are not conceptually new, Kinect has made such sensors accessible to all. The quality of the depth sensing, given the low-cost and real-time nature of the device, is compelling, and has made the sensor instantly popular with researchers and enthusiasts alike. SCENECT 5.1 Tutorial MeshLab Create a mesh for 3D printing. 123D Scanner - Home made 3D Scanner. Hey - have a look at my new project HERE In this project I built a 3D Scanner, that enables generating 3D models of physical objects.
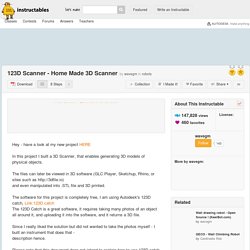
The files can later be viewed in 3D software (GLC Player, Sketchup, Rhino, or sites such as and even manipulated into .STL file and 3D printed. The software for this project is completely free, I am using Autodesk's 123D catch, Link:123D catch The 123D Catch is a great software, it requires taking many photos of an object all around it, and uploading it into the software, and it returns a 3D file. Since I really liked the solution but did not wanted to take the photos myself - I built an instrument that does that - description hence. Please note that this document does not intend to explain how to use 123D catch (this can be found here) VirtuZoom Microscope 3D-Scanner by virtumake. Www.diy3dscan.com. Mesh.brown.edu/dlanman/research/3DIM07/lanman-SurroundLighting.pdf. Update: Realtime 3D for you too! 3D Printed Photograph. All of these 3D models were generated algorithmically from Processing using the ModelBuilder library by Marius Watz.
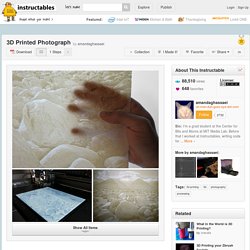
This library allows you to save 3D geometries in the STL file format, STL files that form a watertight mesh can be printed by a 3D printer. To get started using this code yourself, download the latest version of the ModelBuilder library, unzip the file, and copy the folder into Processing's "libraries" folder. If you have installed the predecessor to the ModelBuilder library (called the Unlekker library), you will need to delete it. Once this is done restart Processing. Download the latest version of the Processing sketch from GitHub (download as a zip by clicking on the cloud button). To run the sketch, replace the part in quotes in following line: String name = "your_file_name_here"; with the name of your greyscale image. Guest blog Deepak Mehta: (123D)Catch it if you can!