
Icings Recipes at Bake Decorate Celebrate! How to: Day of the Dead Cookie Deco. How to : Marshmallow Fondant. How to Make Marshmallow Fondant I am not a pastry chef, nor do I own a bake shop.

However, I can show you How to Make Marshmallow Fondant. This easy recipe tastes better than most fondants and will definitely impress your friends. Why Make Fondant? It looks cool. For years I was terrified of fondant. Then I heard a rumor from a chef that you could make fondant out of marshmallows and powdered sugar. Now that I’ve conquered fondant, I feel invincible. How to Make Marshmallow Fondant: The most important thing to remember is grease, grease, grease.
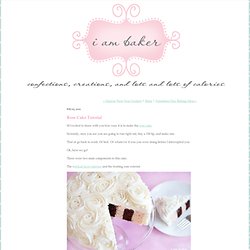
Melt the marshmallows with a little water in a GREASED microwave-safe bowl. Then GREASE the counter and yourself, and knead until smooth. Believe it or not, that’s it. Then you can use your amazing fondant to cover cakes, mold into critters and cut fun shapes for cupcake toppers. Fondant is best used to create a smooth layer over cakes, for FLAT decorations, and for squatty shapes that aren’t top heavy. No fancy tools here. Print Save Yield: 3 lbs. How to: Make roses on a cake. SO excited to share with you how easy it is to make the rose cake.

Seriously, once you see you are going to run right out, buy a 1M tip, and make one. That or go back to work. Or bed. Or whatever it was you were doing before I interrupted you. Ok, here we go! There were two main components to this cake. The vertical layer interior and the frosting rose exterior. I am going to do a vertical layer tutorial at a different time, (updated: you can see it HERE) as I did not get any pictures of it this go around and it is IMPOSSIBLE to explain without pictures. Now for the frosting rose tutorial! I promise you, this could NOT be easier.
(I need to mention... before I froze my cake I poured a simple syrup over it. Start with your cake. Put your 1M tip (or any large open star tip) into the pastry bag then fill it up with buttercream frosting. If you have an appropriately sized coupler you can use that, or you can just insert the tip into the bag and cut off the excess. How to: Perfect Buttercream Icing.
You know the scene – you’re at a party, and it’s time for the cake to be served.

The cake sure looks beautiful, but the frosting … well, you never can tell with frosting. On the cake it all kind of looks the same. The flavor is a mystery. Will it send you running for your toothbrush with its sweetness? Or even worse, will it taste like a dollop of butter? Both can ruin a good cake and cause people to doubt the skills of the cake baker. Last week I was roped into asked to coordinate last-minute baby shower for one of our temps whose last day was Friday. Megan’s Perfect Buttercream makes enough to fill and frost a 9-inch two-layer cake 2 sticks (8 ounces total) butter, softened 6 cups sifted powdered sugar 4 tablespoons milk (I use whole) 1 tablespoon vanilla extract 1 teaspoon almond extract Dump everything into a large bowl (preferably stand mixer bowl with whisk attachment).
How to: Decorate Cookies with Royal Icing. I’ve had many questions regarding decorated cookies since I began 7-ish years ago, so I thought I’d share some of my favorite decorating tips I’ve learned over time.

By no means am I an expert, but I hope you find my top 10 suggestions helpful. There are so many ways of decorating cookies; you can cover them with fondant, rainbow sprinkles, delicious melted chocolate… I could go on, but one of my favorite ways is to flood a cookie with royal icing (flood icing). To basically cover the cookie with a smooth, glossy, sugary coating; piped in such a way that your icing becomes a design – instant sugar art! How to: Decorate with Royal Icing. How to Decorate with Royal Icing I have posted many times about sugar cookies I have decorated with royal icing.

I just don’t think you can beat the gorgeous detailing and smooth finish that royal icing provides. Though I have done my best to share all my tips and tricks in other posts, many readers have requested a “how to” post with step-by-step photos. So for those of you who need the visual guide, let’s decorate with royal icing! Once you have all your supplies together, invert the pastry bags so that they will be ready to be filled with icing. Divide the batch of royal icing between the various airtight containers and color each as desired. Transfer the colored icings to the prepared pastry bags. Pipe outlines around the edges of your cookies. Let the icing outlines set for at least one hour before proceeding.
With any of the piping bags that are not in use, store them upright in a drinking glass with a very small amount of water in the bottom. And you’re done!