
Houdini cloud rendering & simulation Houdini render farm. iPhone6で入道雲 【タイムラプス】 Houdini Clouds. I was working on creating a day-night cycle using Unity and figured it would be best to generate volumetric cloud data rather than attempting to approximate cloud shading from a sky texture.
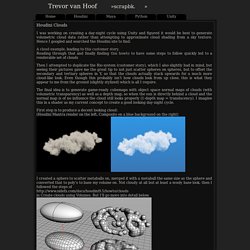
Hence I googled and searched the Houdini site to find: A cloud example, leading to this customer story. Reading through that and finally finding this howto to have some steps to follow quickly led to a renderable set of clouds Then I attempted to duplicate the Rio system (customer story), which I also slightly had in mind, but seeing their pictures gave me the great tip to not just scatter spheres on spheres, but to offset the secondary and tertiary spheres in Y, so that the clouds actually stack upwards for a much more cloud-like look. Even though this probably isn’t how clouds look from up close, this is what they appear to me from the ground (slightly stylized) which is all I require. After copying the formula given at the houdini howto I did increase the Uniform sampling to 30. Dynamic Cloud Generator Example 1. Vortex Cloud rnd. Volume shade test. » Rendering clouds with the Mie phase function Matt Ebb .
One of the things I’ve been wanting to investigate more since rendering clouds on Happy Feet 2 is using more physically based phase functions for volume lighting.
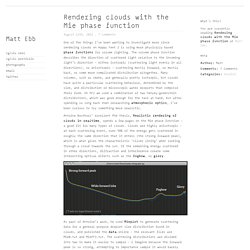
The volume phase function describes the direction of scattered light relative to the incoming light’s direction – either isotropic (scattering light evenly in all directions), or anisotropic – scattering mostly forward, or mostly back, or some more complicated distribution altogether. Many volumes, such as smoke, are generally pretty isotropic, but clouds have quite a particular scattering behaviour, determined by the size, and distribution of microscopic water droplets that comprise their form. On HF2 we used a combination of two henyey-greenstein distributions, which was good enough for the task at hand, but after spending so long back then researching atmospheric optics, I’ve been curious to try something more realistic.
Cloud Shader. I started with the basic smoke shader and built it from there.

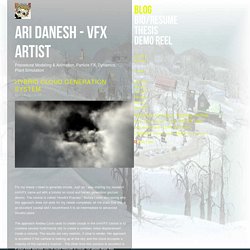
You could even use Matt's modified shader as a starting point. The light setup was pretty much the same as the setup in the paper(section 7.4 and 7.5). One light for the sun, one for sky illumination and for the ground bounce illumination. You could add more if needed but that is enough to get you started. Because each light is representing such a large light source you could get away with using directional lights. So an initial render generates the photons using pbr, then a second render generates the image using micro poly renderer. Hybrid Cloud Generation System. Apr/20/11 19:46 For my thesis I need to generate clouds.
Just as I was starting my research cmiVFX came out with a tutorial on cloud and terrain generation (picture above). The tutorial is called “Houdini Fractals.” Before I start discussing why this approach does not work for my needs completely let me state that this is an excellent tutorial and I recommend it to all intermediate to advanced Houdini users. The approach Andreu Lucio uses to create clouds in the cmiVFX tutorial is to combine several multi-fractal otls to create a complex noise displacement inside a volume.
British Airways 'Clouds' Working Towards A Higher Porpoise!
Clouds is a new spot for British Airways. Created by Ed Edwards and Dave Masterman at BBH, and directed by Daniel Kleinman for Kleinman Productions, the spot is currently appearing in 30 and 40 second versions in markets that include the UK, the Middle East and Africa. Framestore created the spot's ethereal and lovely visual effects. Clouds emphasises both the value and the customer care offered by BA, and it does this by showing the pleasure and wonder still inherent in the miracle of flight - pleasures available to the carefree, pampered BA customer. The spot starts with establishing shots of a BA jet speeding through and above a sea of clouds. The one-day aerial shoot took place in March 2006, with the aim of capturing as much backplate material as possible.
There were two main 3D elements in Clouds - the jet which we see cruising the skies, and the dolphins themselves. Trevor van Hoof. I was working on creating a day-night cycle using Unity and figured it would be best to generate volumetric cloud data rather than attempting to approximate cloud shading from a sky texture.
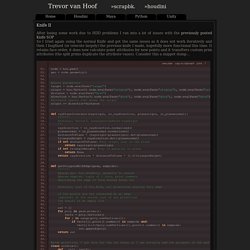
Hence I googled and searched the Houdini site to find: A cloud example, leading to this customer story. Reading through that and finally finding this howto to have some steps to follow quickly led to a renderable set of clouds. Cloud FX Tutorial ? Cloud FX Tutorial ? "Pyroclastic noise" demystified - Page 2 - Shaders - od. Flying THrough Clouds. Smoke from particles to "fat" and "blobby" "streching" noise in a fog volume. Volume vops + noise. Cloud Rig with density control by a Volume VOP. Flight. FPV. Clouds. Cloud shape creation. Affect Volume Density by Geometry Distance. "streching" noise in a fog volume. Basics : Volumes II. Volumes in Houdini – 1. Volumes in Houdini – 1 In this post I want to have a closer look at volumetric rendering in Houdini.
Introduction There are different ways to invoke volumes in Houdini. For example “Volume Primitives” and “Metaballs” rendered as volumes. Volume Primitives are used for example by the “Pyro FX tools” from the shelf, but I will focus on Metaballs. Unlike surfaces, density has a soft falloff but you have to enable volume rendering for your Metaball geometry. Volume Basics Presets are a nice start, and we will focus on rebuilding and enhancing this preset from scratch now.
The Illuminance Loop Now we want to calculate the illumination of the volume at first and there is a VOP node called “Illuminance Loop” to do this. The node needs following inputs: Optional we add a toggle parameter to switch the self shadowing on and off. After this is setup we dive inside the illuminance loop and go on.
When the condition is “true”, the shadow shader is called. The next part is the opacity calculation. Houdini Cloud FX tweaks » Toadstorm Nerdblog. Side FX added a new Cloud FX toolkit a version or two ago, and I recently had a chance to mess around with it.
Their Cloud Rig shelf tool is pretty great out of the box… pick a shape, turn it into a cloud, done. The Cloud Noise and Cloud Light SOPs that are built into the rig setup can get some pretty good results, but it’s not exactly what I wanted… I was looking for a solution that would be a little less dependent on the volume container resolution, and more based on textures instead. It’s not necessarily the greatest solution for swirling, dynamic simulations, but for more-or-less static clouds, it gets resolution-independent nice results that are quick to generate.
Maya’s fluid shader supports textures by default, but the Cloud Shader that Houdini uses doesn’t have much in the way of textural control, so I had to make some customizations, and that’s what this post is about. Check the link below to keep reading… Fig. 1.) Drop down an Anti-Aliased Noise VOP. Fig. 2). Fig. 3.) Cloud shape creation. Cloud Pirates - wip. Maya. Cloud FX (チュートリアル) - sidefx.jp.
Www.museth.org/Ken/Publications_files/Miller-etal_SIG12.pdf. Rio. In the movie Rio, Blue Sky Studios takes the opportunity to live up to their name and create a skyscape filled with playful clouds for Blu the macaw and his feathered friends.

In CG, clouds can be quite complex and need to exist in wide varieties. Blue Sky turned to Houdini to help them build cloud tools which would provide the team with an efficient pipeline and the necessary creative control. Blue Sky needed a system in place that would both create and then manage a large quantity of clouds. Because the movie would be projected in stereoscopic 3D, matte paintings wouldn’t work. Additionally, the movie’s bird characters were required to interact with the clouds during flight. Train your Dragon 2. In order for CG artists to be successful, it is important to have access to a flexible work environment that allows them to build and transfer tools from one department to the next, with quick access to other pipeline tools and without having to write complex code.

At DreamWorks Animation, Houdini is used as a pipeline framework providing talented VFX artists with tools for creating fluids, fire, smoke, and destruction. In How to Train Your Dragon 2, you can see the impressive results from deep integration of Houdini in the studio’s pipeline. » Rendering clouds with the Mie phase function Matt Ebb . Cloud FX Animation. 'TomRaynor', on 16 May 2013 - 11:42 PM, said: Myself and another guy, Christian made the cloud system for the Guinness Ad. Annoyingly it as about 3 months before the launch of Houdini 12.5 so we have to build our system from scratch. It is based on the same kind of stuff though extracted from the Tessendorf papers.I haven't yet had a chance to check out Houdini's new cloud fx toolset. It does look very promising, and is at the very least a good starting point to build upon and customize. It's cool that it uses VDB grids...We bolted on a lot of simulated wisp elements to help bring our cloud to life.
Wow, that's epic Tom! The new CloudFX tools are great at first glance, though I'm struggling to get any kind of realistic, natural movement in them. If you've any tips on where I could start, I'd be hugely grateful.