background preloader

Tutoriales

Facebook Twitter

Ilustrator

PSD Box – Think Outside the box. Can We Survive? – Photoshop Tutorial. This is a quite simple manipulation that we’ll create today.We’ll use a few stock images,some texture,some brushes and we’ll change some tones to create a dramatic feeling.So let’s enter into the apocalyptic mood. Final Result Stock used Step 1 In this step we take our two backgrounds,the desert image and the city skyline to create the apocalyptic background for our manipulation.Cut the city line (you can use the Quick Selection (W) to cut it ) and drag it over the desert image,and using a soft brush and the Eraser Tool(E) erase the lower part of the skyline to create a sandstorm effect where the two backgrounds meet. Step 2 Now take the road and drag it on the background.Again using the Eraser Tool(E) remove the edge of the road to make the destroyed look and also using the brushes create some crack effect on the road.

Step 3 Step 4 Step 5 Step 6 Step 7 Final Result. 3 Fantastic Uses of the Photoshop High Pass Filter. Photoshop CS's high pass filter is very versatile. There are three ways you can put it to use. One, it's a great sharpening tool. Two, contradictory as it sounds, you can use it to soften portraits and other photos. Three, you can use it to create a high contrast portrait effect. In this tutorial, I'll show you how to do all three. Step 1. This is the image that I want to sharpen. Sharpening is always the last step in post-processing. Right click on the Background layer and choose Duplicate layer. Go to Filter > Other > High Pass...
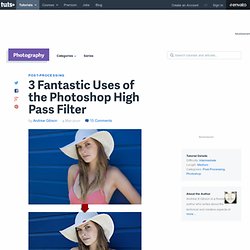
Set the Radius. Go to Image > Adjustments > Hue/Saturation... and set the Saturation to zero. Change the Blending Mode to Overlay. Here you can see the difference after sharpening. Step 2. The high pass filter isn't just for sharpening - it can be used to soften skin tones as well. This is a technique that's good for softening the skin in your portraits. This is our starting portrait. Go to Filter > Other > High Pass... and set the radius to around 15.

Step 3. After Effects Tutorial | Animate an indie graphic novel. The Art of Pho is a motion comic based on the graphic novel by Julian Hanshaw. You can buy a copy of the book, published by Random House, on Amazon and watch the movie in eight episodes on artofpho.submarinechannel.com. If you're short on time, watch the trailer below. Like all the best comics, The Art of Pho combines off-kilter characters – such as the hero Little Blue, who as well as being blue is somewhere between a pig and a dog in looks – with an unvarnished view of the world steeped in both hope and pathos (something we’ve seen a lot of recently in indie comics from the likes of Luke Pearson and Tom Gault).
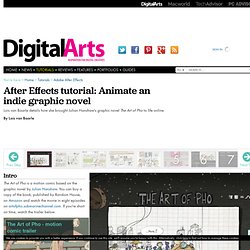
The plot involves Little Blue, who boasts a childlike innocence and charm, travelling to Ho Chi Min City (aka Saigon) in Vietnam. There he learns how to make the perfect pho, the Vietnamese rice-noodle soup much enjoyed as street food. Produced by Dutch collective Submarine Channel, The Art of Pho was directed by illustrator and animator Lois van Baarle.

Html

Uncovering Toy Cameras and Polaroid Vintage Effects (With Photoshop Tutorials) Advertisement Since its emergence, the digital photography market has gradually supplanted the traditional one. Digital compact and SLR cameras entered our lives, and some people announced the death of silver-based images. This is not all lie, and yet old-fashioned images have been particularly popular in the past few years. All we do seem to do now is try to recreate the atmosphere of those bygone times anyway. Blurry, distorted and over-saturated images are not just a fad anymore. People have became familiar with the style and even consider it a full-fledged photographic genre. And this is where toy cameras play a role. Photo credit: Pirouetting, by helenannsia How does this apply to modern design? What you can do, though, is use the magic of Photoshop to make your ultra-sharp, high-definition images look like they were taken with one of these cameras.
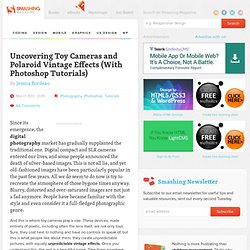
Famous Toy Cameras Toy cameras are cheap, low quality and yet functional. Diana Let’s start where it all began. Photo credit: elZekah Holga. Photoshop Tutorial: Getting that great X-PRO LOMO look. HDR Tutorials Roundup. Photoshop Quick Tips #6: Cloudy Text. Last year I wrote a tutorial showing how to create clouds using Adobe Photoshop. However, I have received quite a few emails asking me how to create a text made with clouds. Because of that I decided to write a very quick tutorial showing how to do it. Following our Quick Tips series, in this tutorial I will show you how to create a text with clouds, using brushes and other few interesting light effects.

Step 1 Create a new document in Photoshop, I used 1920x1200 pixels for the size. Step 2 With the Horizontal Type Tool (T) type CLOUDS, all caps. Step 3 With the marquee selection from the previous step, go to the Path Palette and click on the icon Make Work Path from the Selection (1). Step 4 With Direct Selection Tool (A) let's edit the path. Step 5 Let's create a brush that will be used to create the clouds. Step 6 Again with the Direct Selection Tool (A), click with the right button of the mouse over the path in the image and select Stroke Path.

Step 7 Also let's add some light effects. 70 Amazing Text Direction Photoshop Tutorials. In this tutorial author’ll show you how to easily create a wooden text effect. We will start from a polygon, then we will play with wood textures and with layer styles to achieve a really funny result. author’ll go in depth with each step so that Photoshop beginners will find the process easy to follow. Floral 3D Text Effect Learn how to create turn a simple 3D text into a beautiful yet simple floral design . This tutorial will show you how to retouch and apply effects to 3D text and use floral Photoshop brushes as a quick way of enhancing the look. Create a Cool 3D Graffiti Text Effect using Line Art in Photoshop In this tutorial, you’ll learn how to take a line art sketch of text and turn it into a 3D graffiti style text effect using some simple techniques and stock images. Create Awesome Splashing Water Text Effect in Photoshop In this tutorial, author will show you the steps author took to Create Awesome Splashing Water Text Effect in Photoshop. 3D Valentine’s Day Typography.

12 Fantastic Photoshop Tutorials for Designers. We all know Photoshop is a tool that can produce practically any effect you want with images. However in order to produce the effect you want, you will need lots of practices and the right guidance. Luckily in this information age, there are lots of free Photoshop tutorial around to teach you how to achieve some amazing effect via Photoshop. In this post, I will showcase you 12 Fantastic Photoshop Tutorials for Graphics Designers. Hopefully they will be of use to you and inspire you in whatever you’re trying to make. Here are the best web design photoshop tutorials. Here goes the list, enjoy! Don’t forget to subscribe to our RSS-feed, follow us on Twitter and like our facebook Fan page for recent updates. Create A Dynamic Shattering Text Effect Colorful Plexi Text Effect using Photoshop Photoshop & Illustrator Tutorial: Add vector flair to model shots Create an Explosive Abstract in Cinema 4D and Photoshop Create an Awesome Funky Text Effect Creation of “Get Digitised” – Photoshop CS tutorial.

Html5

30+ Breathtaking Adobe Photoshop Tutorials. Photoshop is probably one of the most indispensable pieces of software in a designer’s toolbox. It can be used for everything from retouching photos to creating entire web layouts or original artwork and specific design tutorials are a great way to familiarize yourself with what Photoshop can do and how to do it. A designers, of course, is gifted with large amounts of imagination that helps to create cool and unique images. We tend to formulate meaningful images that expresses conscious and sub-conscious desires and wants. Equipped with useful gadgets, softwares, proper techniques and creativity, amazing results are created. In This post of 30+ Breathtaking Adobe Photoshop Tutorials you will be able to learn cool techniques that will be helpful in your designs. Read through this cool tutorials and learn new ways of manipulating photos, creating awesome effects and many others with Photoshop.

If you like this post, share it with your friends through email and social networks. Naaz. 55 Ultimate Round-Up of 3D Studio Max Tutorials. Advertisements Autodesk 3ds Max, (formerly known as 3D Studio MAX) is a software that models, animates and renders any design to look more realistic. With the power of 3D Max in your hands, you can give wings to your imagination. 3D or Three Dimensional Model gives a life to to any object and it looks stunningly real. 3D Max is a pioneer tool in computer graphic animation industry and its knowledge and skills are highly in demand.

Thus more and more 3D Max tutorials are being floated everyday.At present, more and more designers are into mastering this software to widen their skills and explore the design possibilities especially nowadays that almost everything is 3D. The list is composed of several techniques that you may need to use in creating 3D graphics with the help of other software like Photoshop, Zbrush and special plugin like V-ray to enhance the result. If you like this post, share it with your friends through email and social networks.

Subscribe to our RSS-feed, Making of Cafe. 85 Basic To Expert Level Photo Editing Tutorials. Photo Editing Tutorials is a best way to improve your Photoshop skills make the design more exciting. With Adobe Photoshop you can create amazing results are possible. Retouching is important part of Photoshop and commonly used in magazines, books, advertisements. Photoshop provides photographers and designers with almost unlimited potential to edit photographs to achieve the desired results. It is not too exaggerated when saying that you see this kind of work every day even if you are not a graphic designer. Many methods can be used to achieve stunning effects, sky is the only limitation. However, it is definitely hard to master and requires you to have strong understanding about layers, color and brightness, sometimes filter effects as well.

Photographic Levitation – The Prop Method. Remember this article? Here’s one of the follow-ups! Today, I’m going to show you how to use props to aid you in your flying ambition. What you will need: A cameraA tripodA prop to sit/stand/recline on Optional: Trigger releaseFlash (entirely up to you)Other props to add to the look of the photo So what can you use? Yup. I’ll be the first to admit that this potentially isn’t the comfiest method of achieving levitation (depending on your prop), but it’s one of the most frequently used methods and one of the most convenient to boot.
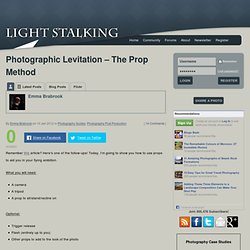
First, choose your location. Next, set up. Frame your shot the way you want it, get it focused and then before you do anything else, take a photo of the scene without you or your prop in it (I call this the canvas image). I even do canvas images in the studio! Once you have your canvas image, don’t move the camera or the tripod. I'll admit, I've been comfier Load your images and sift through them until you find the ones you want to use.

Removing the box. Vector Graphics: Transforming Sketches Into Vector Art. Consider yourself an artist? Have a talent in drawing or inking? These skills can actually transfer over to graphic design extremely fluently. If you have a lot of drawings already lying around doing nothing, there are a variety of ways to digitize these images for the web or even put them in a digital form that allows you to blow them up into massive prints (this is essentially what vector graphics do best). What Are Vector Graphics For those of you new to all of this, vector graphics are different from raster graphics (jpeg, bitmap, etc.) because, rather than representing an image as an array of pixels, vector graphics use geometrical primitives such as points, lines, and curves to represent images.
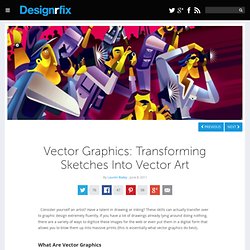
This means that vector graphics don’t suffer from pixilation when blown up like raster graphics. This makes them extremely versatile, allowing you to use a sketch in multiple projects demanding multiple file and print sizes. From Sketch to Vector Live Trace Using live trace Alessandra. Making of Yuka. Introduction After receiving some positive feedback to my last work “yuka” I decided to write a detailed tutorial about creating process. My main goal was to create a painting which was really detailed. I knew that I wouldn’t be able to do it without a real photograph so I started to look for something that would interest me and make me want to spent a lot of hours painting it in photoshop. And I found a perfect picture on .

Tools For this work I used Adobe Photoshop CS2 and Wacom Intuos 3 tablet. Preparation I had to decide with what resolution I want to work. Sketch I start with creating a sketch in order to define the shapes, which will be later filled in with colours . I like keeping everything simple so I will use these brush settings through the whole creating process.

Ilustración y pintura digital | Tutoblog: weblog de tutoriales.