
Power Meter pulse logger with ESP8266 running NodeMCU. This device is installed in my home to monitor the usage of electricity.
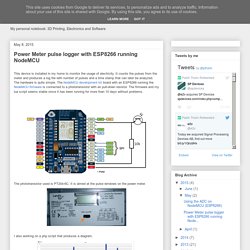
It counts the pulses from the meter and produces a log file with number of pulses and a time stamp that can later be analyzed. Wifi Esp8266 Solid State Relay SSR Board for IOT from Armtronix on Tindie. Node MCU ESP8266 WIFI board with 4 Relay for IOT from Armtronix on Tindie. Wifi Esp8266 Solid State Relay SSR Board for IOT from Armtronix on Tindie. ESP8266 Module w/u.FL + Chip Antenna (incl mating cable + antenna) – Hackaday Store. Product Info SDIO 2.0, SPI, UART.32-pin QFN package.Integrated RF switch, balun, 24dBm PA, DCXO, and PMU.Integrated RISC processor, on-chip memory and external memory interfaces.Integrated MAC/baseband processors.Quality of Service management.I2S interface for high fidelity audio applications.On-chip low-dropout linear regulators for all internal supplies.Proprietary spurious-free clock generation architecture.Integrated WEP, TKIP, AES, and WAPI engines.Includes external u.FL + coax / PCB antenna!

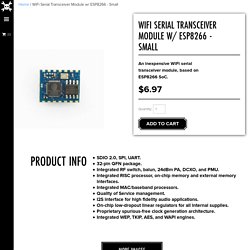
Hackaday Review [Hackaday Full Review Pending] WiFi Serial Transceiver Module w/ ESP8266 - Small – Hackaday Store. Product Info SDIO 2.0, SPI, UART.32-pin QFN package.Integrated RF switch, balun, 24dBm PA, DCXO, and PMU.Integrated RISC processor, on-chip memory and external memory interfaces.Integrated MAC/baseband processors.Quality of Service management.I2S interface for high fidelity audio applications.On-chip low-dropout linear regulators for all internal supplies.Proprietary spurious-free clock generation architecture.Integrated WEP, TKIP, AES, and WAPI engines.
Hackaday Review [Hackaday Full Review Pending] Meet the Arduino Killer: ESP8266. Advertisement Wi-Fi is an essential bit of kit for any Internet of Things (IoT) DIY projects, but our favorite Arduino doesn’t come with Wi-Fi, and adding in a Wi-Fi shield can bring the total cost to around $40.
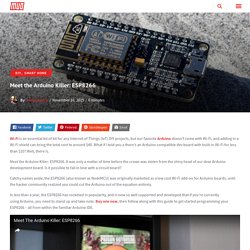
What if I told you a there’s an Arduino-compatible dev board with built-in Wi-Fi for less than $10? Well, there is. Meet the Arduino Killer: ESP8266. It was only a matter of time before the crown was stolen from the shiny head of our dear Arduino development board. Installing and Building an Arduino Sketch for the $5 ESP8266 Microcontroller. Installation of the custom build of the Arduino IDE really couldn’t be simpler.
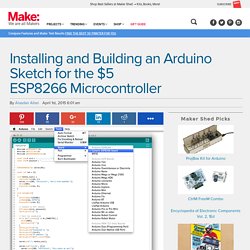
I’m on a Mac, and at that point it comes down to downloading the pre-built binary release from GitHub. The custom binary will live quite happily alongside your existing stock Arduino development environment — in fact, as well as the ESP8266 build, I think I’ve got six or seven other versions of the environment installed at the moment, with version numbers ranging from 1.0.x up to to latest 1.6.x build. Which is exactly what Sandeep Mistry has now done with the ESP8266. Installation is almost as simple as before — download it and move the esp8266com folder included in the release inside the hardware folder of your Arduino sketchbook directory.
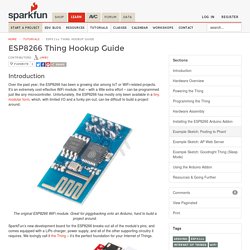
Wiring up the ESP8266 Module The pin out for the header block of the ESP-01 module As I mentioned before, probably the most common breakout board you’ll come across for the ESP8266 is the ESP-01. Nodemcu-v2-lua-based-esp8266-development-kit. ESP8266 THING Breakout and Development Board for ESP8266 Wi-Fi Soc. The ESP8266 Thing is essentially a breakout and development board for the ESP8266 WiFi SoC.

Why the name? We lovingly call it the Thing due to it being the perfect foundation for your Internet of Things. Over the past year, the ESP8266 has been a growing star among IoT or WiFi-related projects. It’s an extremely cost-effective WiFi module, that – with a little extra effort – can be programmed just like any microcontroller. The only unfortunate part is: the ESP8266 has mostly only been available in a tiny, modular form, which, with limited I/O and a “unique” pin-out, can be difficult to build a project around. ESP8266 Thing Hookup Guide. Favorited Favorite 5 Introduction Over the past year, the ESP8266 has been a growing star among IoT or WiFi-related projects.
Home Automation Using ESP8266. This eBook is my step-by-step guide designed to help you get started with this amazing $4 WiFi module called ESP8266.
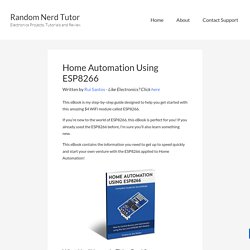
If you’re new to the world of ESP8266, this eBook is perfect for you! If you already used the ESP8266 before, I’m sure you’ll also learn something new. This eBook contains the information you need to get up to speed quickly and start your own venture with the ESP8266 applied to Home Automation! What You’ll Learn In This eBook? Here are a few of the things that this eBook covers (keep reading this page for more details): Technical specifications of your ESP8266Where to buy the ESP8266How to establish a serial communication with your ESP8266What’s NodeMCUHow to flash and install a new firmwareHow to install ESPlorer and how it worksHow to blink an LED with NodeMCULua programming languageHow to interact with the ESP8266 GPIOsHow to create a web serverHow to send emails with your ESP8266How to create an email notifier with a PIR Motion SensorAnd a lot more… Hey There,
Nodemcu/nodemcu-firmware. ESP8266 WiFi/WLAN Module. ESP-ADC DIL18 Modul mit ESP8266EX, In-Circuit Online Shop.
ESP8266 - NURDspace. "File:" cannot be used as a page name in this wiki.
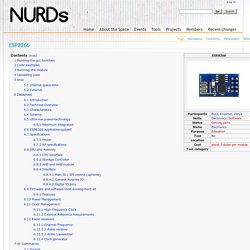
Building the gcc toolchain have a look at the github wiki Code examples Running the module The modules pins only allow 3.3v (use a multi meter to check your serial lines if you are not sure) Connect CH_PD to VCC to make it boot Uploading code The modules pins only allow 3.3v (use a multi meter to check your serial lines if you are not sure) see links Internal space links External. ESP8266. Note: This page contains information on using an ESP8266 module with an Espruino board.
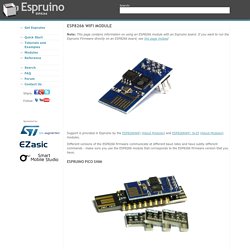
If you want to run the Espruino Firmware directly on an ESP8266 board, see this page instead Support is provided in Espruino by the ESP8266WiFi (About Modules) and ESP8266WiFi_0v25 (About Modules) modules. Different versions of the ESP8266 firmware communicate at different baud rates and have subtly different commands - make sure you use the ESP8266 module that corresponds to the ESP8266 firmware version that you have. Espruino Pico Shim The Shim available for the Espruino Pico helps to adapt the ESP8266 to fit onto the Pico, while still keeping all of the IOs intact. Wi07c - ElectroDragon. Specification Module power 3.3V, regular current consumption at 70ma, peak current at 240mA (300mA must be able to provided) +20Dbm power, 100M max transmitting distance on ideal circumstance.
It is common and correct to see some random error data when module is power up, and end up with "ready" (Turn baud rate to 115200 can see this actual debug data, this is used for firmware updating) IC Features AT Commands. EasyIoT server automation - part III. This tutorial will describe helper functions as part of automation in EasyIoT server. With helper functions you can access to EasyIoT server internal structure, trigger events and hook events. EasyIoT server v0.7 released. Sensor low battery status alarm. In this tutorial we will show how to set up sensor low battery alarm in EasyIoT server automation function.
We will be notified by email when one of sensors batteries is low. Battery powered sensors can report it's battery level from 0 to 100%. ESP8266 WiFi temperature and humidity sensor. ESP8266 Wi fi module explain and connection : Talking to the ESP8266. To comunicate with the ESP8266, I used Arduino IDE( ) and don't be confused of the version 1.5.8. I have Arduino DUE, so I need that version. So, when you open the IDE, choose the correct serial port for your FTDI and click on the Serial monitor. Once you have opened the Serial monitor, you must set the first option to NL & CR and the baud rate. ESP8266 Retro Browser. Getting Starting - Changes to the Seeed Tutorial After a 3 or 4 week wait, your ESP8266 Serial Wifi modules have finally arrived from China. Now what? For a first program, most people head for the short tutorial at seeedstudios The Seeed tutorial is written for the version 1 module with a 57600 baud rate serial link.
Hackerspace / ESP8266. Some of this info is available elsewhere on the web, some is (as far as I know) not documented elsewhere.