
The Photoshop Playbook: 50 Short Video Tutorials on Fundamental Skills in Photoshop. Photoshop Tutorials, Free Photoshop Tutorials, Adobe Photoshop Tutorials. Www.stumbleupon.com/su/2SAiaI/14o2oy@I:844DWPOb/laughingsquid.com/you-suck-at-photoshop-by-donnie-hoyle/ How to Color Inked Line Art in Photoshop. In this Photoshop tutorial, I’m going give you a general overview of how I digitally color an illustration.

We’ll go over scanning, cleaning, flatting, coloring, rendering, and texturing techniques. There’s just as many ways to coloring a drawing digitally as there is to painting a picture. This tutorial won’t focus on any specific way to blend or choose colors; we’ll assume you have knowledge of the basics. Preview Click the image below to see it in full size. Step 1: Scanning Your Inks In this tutorial, I’m going to use my own illustration. Make sure you are scanning in black and white. Step 2: Isolating the Line Art Now that we have our image scanned, open it in Adobe Photoshop. Press Ctrl/Cmd + Alt/Option + 2 (for Photoshop CS4 and up) or Ctrl/Cmd + Alt/Option + ~ (for Photoshop CS3 and below). Tip: I encourage you to know and use Photoshop shortcut keys; it saves a lot of time. Then press Delete to remove the selected white areas, leaving us with just the line art on this layer. Katrin Eismann Selecting Detail, Removing Backgrounds.
A note from Fred: I've promoted Katrin's books many times, and after the 1001st reader asked the "how do I select hair" question and "How do I remove this person from the background?

, I decided it was time to get Katrin in here, and have her answer the question correctly once and for good. This is the ultimate tutorial on selection of fine details because it uses no selection tools. It's based on isolation of "values" to let the image itself build your mask. Selection tools are used only for rough selections.
If you hear anyone ask how to do this -- well, bookmark this page. From Photoshop Masking & Compositing by Katrin Eismann It would make my life a lot easier if all the portrait photographs I work with had an evenly lit, texturefree, contrasting background -- but life has a tendency to be complex, and our snapshots reflect that. We'll begin with a classic snapshot of a happy mother with an even happier baby, standing in front of the family car. Selecting Hair and Fine Detail. 30 Watercolor Tutorials and Brush Sets for Photoshop. Create Vintage and Grungy Digital Art Work in Photoshop. Follow this step by step design process for my recent digital art work, High Voltage.
The design process involves photo manipulation, creating patterns, mixing images, textures and blend modes to to create a vintage and grunge theme. Learn how a range of Photoshop techniques pull together the various elements to create the final design. Open up your chosen image in Photoshop. Here I’ve picked out a nice Pylons near wheat field shot from DepositPhotos. Make small Levels adjustments to increase the contrast slightly. If you are planning to use your work for poster printing, use a high DPI (between 150-300dpi) and CMYK Color Mode. Add Curves Adjustment Layer (go to Layer > New Adjustment Layer > Curves) and change the drop down menu to select the Red channel and make adjustments. Change the drop down to the Green channel and make adjustments to the tones controlled by this channel, and finally adjust the Blue channel.
Change the Blend Mode to Linear Dodge (Add) and Opacity to 50%. 3200% zoom. Free High Resolution Textures - Lost and Taken. Remove a Person From a Photo With Photoshop CS5's Content Aware Feature. With the launch of the new Adobe Suite of programs comes the long awaited Adobe Photoshop CS5.
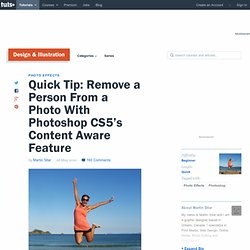
Packed with new features to speed up your workflow it truly is the most advanced edition of Photoshop to date. One of the new features we will be looking at today is called Content Aware. This feature allows you to quickly fill in a selection with surrounding content making it look like a part of the original image. In this case we will choose to remove a person from a photo, this can be done in less than five minutes. With the additional image enhancements this tutorial will take you less than 10 minutes to complete.
Original Image Before we begin, download the image that we will be working with. Step 1 Using the content aware tool on different images produces different results. Step 2 We are extracting the person on the left from this photo. Notice in the image below how far I am drawing the path from the subject. Step 3 Once you complete the path around the subject, turn it into a selection. Learn the Basics of Photoshop: The Complete Guide.