background preloader

DIY

Facebook Twitter

Valentines

{No Sew} Felt Bows. These felt bows are so easy to make and turn out very cute. 
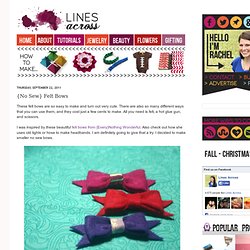
There are also so many different ways that you can use them, and they cost just a few cents to make. All you need is felt, a hot glue gun, and scissors. I was inspired by these beautiful felt bows from {Every}Nothing Wonderful. Also check out how she uses old tights or hose to make headbands. I am definitely going to give that a try. I decided to make smaller no sew bows. I made them as hair bows for Lyla's hair, but I think I will use them in a lot of other projects as well. 1. 2. 3. 4. 5. 6. There are so many variations you can make. 1. 2. 3. 4. To make larger or smaller bows in the same shape and proportions of the first red bow, make sure that your strip is 1 unit by 4 units. XS bow (1 inch wide): 1/2 inch by 2 inches S bow (1 1/2 inches wide): 3/4 inches by 3 inches M bow (2 inches wide): 1 inch by 4 inches L bow (3 inches wide): 1 1/2 inches by 6 inches XL bow (4 inches wide): 2 inches by 8 inches 1. 2. 3. 4.

Hair n Make up

DIY / roses from fall leaves. Christmas crafts. The Magic With Corks. If you enjoy in good wine and you didn’t trow away the old corks you can create interesting home gadgets that are both interesting and creative. Home decorating can be improved using one of the 25 home ideas with corks we presented here. You don’t need to spend money for your home, you can easily recycle and reuse the old corks for coasters, maths and much more. Stamps Thread Spool Corks Wreath Magnetic Cork Planters Cork Ball Key Chains Coasters Cork Letter Placecard Holders Trivet Bathmat Plant Marker Cheese Knives Cork Candles Cork Candle Votives Simple Cork Necklace Embroidered Cork Necklace Wine Corkboard Champagne Cork Knobs Wine Charms Lampshade Fridge Magnets Animal Sculptures Cork Pen Journaling corks arts, corks usage, diy corks.

How to Recover an Umbrella. These umbrellas were pieced to create new designs. Piece the fabric before cutting out the canopy segments. Jack Deutsch Sloan Howard Make an umbrella canopy that’s as bright and detailed as you like. Photo: Jack Deutsch by Sandra Ericsonexcerpted from "Umbrella Recovery" Threads issue 145There is something captivating about umbrellas; the way they open with arms outstretched and then close back down into perfectly compact forms can seem downright magical. They keep us dry on rainy days and shield us from the bright sun on hot ones. If the cover of your favorite umbrella is ripped or torn, don’t just toss it in the trash.

The process is simple to master and enables you to re-cover any umbrella frame you find, including tattered antique or vintage finds from your local thrift store. Umbrella Anatomy Each rib has a corresponding seam in the canopy. Click to enlarge image. 1. 2. 3. 4. Butterfly Bracelet. Ruffled Streamers. Hello color-loving friends! Today I’m helping kick off the summer series over at Delia Creates and Kojo Designs.We’re going to COLOR my SUMMER (and yours!)

Because summer feels a rainbow of never-ending fun. Swimming pools are open, flowers are in bloom, berries need picking, vacations are planned, the sun stays up late, and we celebrate our nation’s birthday with fireworks and friends. So to color my summer, I’m sharing a rainbow-inspired party decoration that’s easy to make and fun to stream around the house: Standard streamers feel like the oldest party decor in the book. I first spotted the idea two years ago on My Paper Crane and the colorful image was burned into my brain. I’ve even got a tricky shortcut to help you go from standard crepe paper streamers: to colorful ruffled ones! And then you’ll be ready for any party that comes your way.Cinco de Mayo plans this week?? And hopefully the Lime Chicken Fajitas to go along. Okay, let’s get started. Let’s cheat! And sewed them up!

Organasing tips

DIY Basics: The Matchbook Notebook. While I love all things digital, it’s always nice to have a pen and paper around to jot down ideas and notes. In fact, there are more than a dozen awesome notebooks out there that I’ve been coveting lately. But, none of them are small enough to toss in my pocket or clutch, hence the inspiration for today’s DIY, the matchbook notebook. This project literally took me no more than 2 minutes and was made using super basic materials I already had lying around the house. Materials: - Cardstock or magazine tear-out - Paper (lined, unlined, whatever!) - Stapler - Scissors For the “matchbook,” I used thick paper from a magazine tear-out. It really is as easy as it looks to create this little pocket notebook. Keep making as many as you want. Would you use a matchbook notebook?

How To Make Pine Cone Magnets. In spite of e-greetings left and right, the holidays still mean a plethora of cards, invitations, photos, and announcements. But, the idea of dedicating a mantel, dining table or bureau solely to holiday cards is tough to do and, if you live in a city, probably impossible. In today’s project, we set about creating a way to display cards and photos on the fridge in a festive way that combines found objects in nature and magnets. As it is, magnets tend to fall into two categories: novelty and not really magnetic or boringly functional but super magnetic. So, why not make your own? Pine cones and their cousins are a great combo of charming, rustic, winter-y and surprisingly flexible for crafting. Materials: - pine cones (which will turn into roses!) To turn the pine cones into roses, just use a hand saw or very sharp knife to saw off the top (the pointed end) leaving only 1-2″ of the bottom left, turn over, and you’ve got your rose.

Let dry for a few minutes and huzzah! Use Binder Clips As Accessory Organizers. I travel quite a bit and am always annoyed at how hard it is to keep my small accessories organized and untangled. So today, I experimented with a set of binder clips and found that they are so amazingly useful at keeping things uncluttered. Try it for yourself. First, if you don’t already have some, buy these multi-size binder clips ($4). I found that different sized clips were useful for different accessories. Instructions: Hairbands: If you’re like me, you typically toss a few of these in your make-up bag, which makes them tough to find and leaves them open to get dirty if something explodes inside the bag. Bobby Pins: These are probably the hardest to keep together. Chain Necklaces: THE MOST ANNOYING THINGS TO UNTANGLE. Rings: Create a ring holder using two clips.

Clip them onto your make-up or accessory bag and you’re done! Want more?

HOLIDAYS

Nokti. - StumbleUpon. Schnell bemalt. Ruck-Zuck bemalt waren diese Tassen hier. denn bis jetzt hab ich immer nur relativ umständlich mit Pinsel auf Porzellan gemalt. 
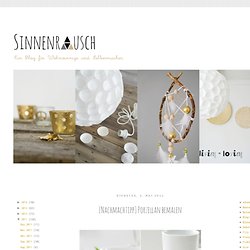
Laut Herstellerangaben benötigt es auch kein Einbrennen im Ofen mehr, sondern ist spülmaschinenfest nach 24 Std. Trocknung. Na, da bin ich ja gespannt, ich harre jetzt der Dinge, die da kommen, insbesonders der ersten Spülmaschinenwäsche. :-) Personalized Etched Glasses. For a family of three, we produce a whole lot more dirty glasses in any given day than seems humanly possible. I thought etching our names in glasses would be a great way to reduce washing and make table setting more entertaining with Henry.

I was a little scared of etching but it was easier than I thought and really fun. Wouldn’t it be a sweet wedding gift to give the bride and groom a set of etched wine glasses? Would you like to see how to make your own? Keep reading to see the full tutorial… Etching powder. Its a little scary and requires using rubber gloves since it’s highly toxic if it comes in contact with skin. For $6 I wanted it to be script (which is also better for stencils) so printed out some script names. I don’t have any fancy stencil cutting machines, so I simply taped the printed names onto clear contact paper and spent some quality time with my exacto knife. After a few minutes (check your bottle’s instructions) you can just wash it off and tear off the contact sheet. m5l0v0GSnN1qihh0eo1_1280.jpg (1280×1656)

FOOD

DIY travel notebook with pocket. Just a quick and simple craft share this lovely Friday. I found these darling notebooks at the bookstore the other day and couldn't resist them. Aren't they so sweet? They're relatively small, lightweight and will be perfect to take along on my trip next week! I want to take a notebook with me to jot down ideas for blog posts, to make notes during our two blogging workshops and to keep track of contact names, important phone numbers and such.

I know I'll have some loose papers that will need a safe place as well, so I added a quick little pocket inside the back cover of one of the notebooks to contain things like: - ticket stubs and other memorabilia from the trip - - photocopies of important documents - - anything else I collect that needs a safe place - I simply found an envelope that fit nicely inside the back cover of my notebook.

For more fun travel inspired projects visit my brand new travel pinterest board. Have a great weekend everyone! Linked up this past week and I can't wait! 52 Weeks Project. Crafts & DIY Inspiration. CRAFTS. How To Mix Chalkboard Paint in Any Color. We love using chalkboards as backdrops for displays and parties (like this one here!). 
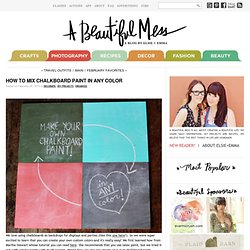
So we were super excited to learn that you can create your own custom colors-and it's really easy!

We first learned how from Martha Stewart whose tutorial you can read here. She recommends that you use latex paint, but we tried it out with acrylic paints with much success. Here's how you too can create your own chalkboard paint... Supplies: 1/2 cup acrylic paint (choose any color you like, or mix colors together to make the perfect shade!) , 1 tablespoon unsanded grout (this can be purchased at most hardware/home improvement stores, we got ours at Home Depot), mixing cup or bowl, spoon, paint brush and an object or board you plan to paint on. 1. 2. Once your chalkboard has fully dried be sure to slate the surface before using it for the first time. Have fun creating any color combination you like!! Mini Magazine Notebook DIY. I always keep at least two or three notebooks in my purse. I jot lists on them, keep ideas safe and tear pages out to leave notes for my friends. Today I want to share a quick (and budjet friendly) way to make your own pretty journals.

You can whip up a batch in an afternoon and use them for months. Enjoy! Supplies Needed: Pretty magazine pages, paper (graph, lined or plain), embroidery thread and a needle, scissors and washi tape. 1. Trim pages to the size of your choosing (remember they will be folded in half) Add as many or as few pages as you wish. 2. Cut a magazine page to size (slightly larger than pages) to create a cover. 3. These notebooks make great gifts and are perfect for carrying in your purse!

SEWING

Past Projects. Click on the name of the item to direct you to the project.