background preloader

Crafts

Facebook Twitter

DIY Father’s Day Shirt & Tie Gift Boxes. A little while back, I was brainstorming Father’s Day craft ideas, and I had one of those “a-ha” moments. Don’t you just love those? These Father’s Day Shirt & Tie Gift Boxes actually make use of the favor box template that I created for my feature in the first issue of Nonpareil, with an alteration made to add a “collar”. I’ve provided a necktie template (and a bow tie template, in case your dad or husband is a bow tie kind of guy) that you can use with any patterned or solid colored paper to put the finishing touch on your own box(es). And now I’m thinking about all of the other holidays for which I can customize the template, so don’t be surprised if you see more projects that make use of it in the future! Father’s Day Shirt & Tie Gift Boxes Print the box template onto lightweight cardstock, cut out along the solid lines, and assemble according to the directions found in the template file.

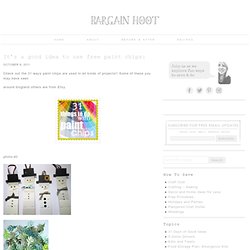
. * The patterned paper I used for the ties is Flannel from Cosmo Cricket’s Mr. It’s a good idea to use free paint chips: Check out the 31 ways paint chips are used in all kinds of projects!! Some of these you may have seen around blogland others are from Etsy. 1.PaintswatchWall2.SnowmanOrnaments3.cut leaves 4. 7. 10. 13. gift boxes 14. 16. 19. 22. 24. 26. 29. 31. Hi my sweet bloggie friends!!! Neighbor Gift Week: Shelley at How Does She. Sentimental gifts are always the best, right?! One of my most treasured gifts was a simple board with words on it. Yep words. My dear friend Alison made 'subway art' with words that reminded her of me. It melts my heart every time I look at it.
When thinking about gifts for my neighbors, I wanted it to be something sentimental, easy, and inexpensive. My family and I sat down and made a list of words that described a family in our neighborhood. If you've never used Wordle before, you simply plug in words, and it creates a word collage. We wrapped the 'family word art' around a can of hot chocolate. We then wrapped the 'individual word art' around a Styrofoam cup for each member of the family. We attached a little note to the can of hot-cocoa that said... I like to imagine the family gathering around, having a cup of hot cocoa, and discussing all the sweet words that describe them.

I hope it makes them smile. Thank you for the opportunity to be on the fabulous U-create today! Cheap Craft Ideas - Inexpensive Crafts. Tea Towel Market Tote Adapted from Clare Youngs’s The Perfect Handmade Bag ($19.95; Cico), this cute carryall requires little more than a pair of small wooden spatulas and two tea towels ($15 each; motherlindas.com). Cut six strips of fabric from one towel. Two, measuring 33⁄4"W x 141⁄4"L each, will serve as the decorative horizontal bands at the top of the tote and should incorporate the towel’s graphics (as shown, left).
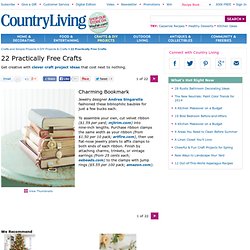
The other four, measuring 31⁄2"W x 8"L, will form tabs for the bag’s handles. To make a tab, topstitch one of the long sides of a 31⁄2"W x 8"L strip near the edge. Lay the second towel on a flat surface, right side up. Flip the towel right side down. Fold the towel in half, wrong sides together. Teacup Lights - Martha Stewart Good Things. Blueprint Crafts » Tile Coaster Tutorial. Tile Coaster Tutorial April 7th, 2010 So my good friend Emily just moved into her completely redone house a few weeks ago, and she asked me to make her some unique coasters. I love the look of these from Target, but $15? Get real. UPDATE! For this tutorial, you’ll need a set of tiles – I got a handful from Home Depot for $0.20 a piece, some scraps of scrapbooking paper or any kind of paper really, some mod podge, clear acrylic spray, and felt pads for the bottom. First, cut and measure you paper to the fit your tile. Next, clean and dry your tiles – they are much easier to work with if you clean them off thoroughly.
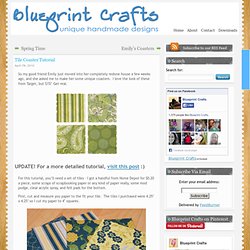
After you’ve applied your mod podge top coats, take your tiles out to a well ventilated area and apply two coats of your acrylic spray (I sprayed mine outside in the grass). Cute right! Today I’m going to finish up Emily’s – so excited to see how they look in her new house! And, I’ve got a few big projects that I am STILL working on, and I CAN’T wait to show you all! DIY Book Clutch. I love things that are quirky, and if they boarder on the nerdy side of quirky I love them even more. Olympia Le-Tan’s handmade embroidered book clutches are so perfectly and quaintly quirky that I immediately fell in love.
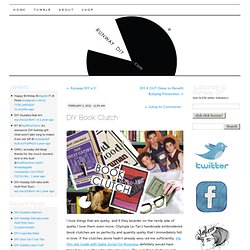
If the clutches alone hadn’t already woo-ed me sufficiently, the film she made with Spike Jonze for Nowness definitely would have tipped me over the edge into obsession. The real thing starts around $1,300, but you can DIY for about $15! I used one of these newly reprinted classics from Barnes & Noble, they’re perfect for this with whimsical hardcovers and sturdy pages. Like this: Like Loading... Hand Embroidered Cards. Look what I found in my desk drawer! I made these embroidered cards so long ago and then just tucked them away in a drawer to be forgotten about. What a shame! I thought these cards would make a great DIY for the blog because they're easy and fun to make, and you probably have all the supplies on hand already.
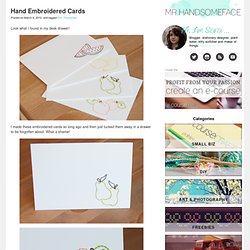
If you're anything like me you have waaaaay too many colors of embroidery floss tucked away somewhere. What you'll need: Pencil for drawing your designPiece of thick cardboardEmbroidery flossSheets of blank paperEmbroidery needle and a pin with a headBlank Card Start by drawing out your design on a piece of thin blank paper. When I made my fruit cards, I actually used an iron-on transfer from Sublime Stitching, which is a really great book that you should all run out and buy right this very second. Now you can start poking holes along the lines using the pin with a head. Now comes the fun part! Once you're done, admire your work! Button Bookmarks « Quiver Full of Blessings. Oct18 Christmas gift ideas are totally swirling around in my mind. If you, like me, are also thinking of pretty little gifts that you can make ahead, here’s another quick idea for you.
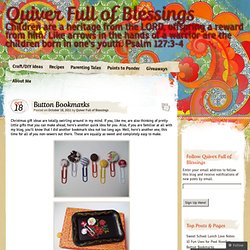
Also, if you are familiar at all with my blog, you’ll know that I did another bookmark idea not too long ago. Well, here’s another one, this time for all of you non-sewers out there. These are equally as sweet and completely easy to make. Thinking of trying to make some for yourself? All it takes are a few simple steps: 1. 2. 3. 4. 5. 6. Like this: Like Loading... Page corner bookmarks | I Could Make That. This project comes to you at the request of Twitterer @GCcapitalM. I used to believe that a person could never have too many books, or too many bookmarks. Then I moved into an apartment slightly larger than some people’s closets (and much smaller than many people’s garages) and all these beliefs got turned on their naïeve little heads.
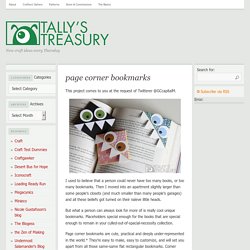
But what a person can always look for more of is really cool unique bookmarks. Placeholders special enough for the books that are special enough to remain in your culled-out-of-spacial-necessity collection. Page corner bookmarks are cute, practical and deeply under-represented in the world.* They’re easy to make, easy to customize, and will set you apart from all those same-same flat rectangular bookmarks. If you like this tutorial, here are a couple others that might be up your alley. For the monster-loving adults in the room, try some googly-eyed paper monster wine charms. What you’ll need: Putting it all together: 1) Follow steps 2 and 3 from above. Bokmärken – Craft of the Day, bookmarks. Du behöver: Kuvert (återanvänd gärna gamla kuvert), ett ark med vitt papper (för mallen), sax, penna, lim och ett mönstrat papper.
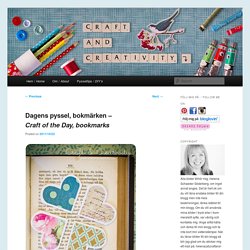
Inspiration till detta pyssel kommer från The Creative Homemaker. Fler varianter på samma tema finns här och här. Gör så här: Vik ett enkelt vitt papper diagonalt. Rita en en hjärtbåge i hörnet av papperet, som på bilden. You will need: Envelope (why not reuse old envelopes?) The inspiration for this craft comes from The Creative Homemaker. How-to: Fold a sheet of plain white paper diagonally.

Upcycling

Lined Paper Tee by Maybe Matilda. I’m pretty dang excited to be guest posting on U Create, of all places, with an easy and fun project for you. Just in time for heading back to school, I came up with this cute top: My name is Rachel, and I blog over Maybe Matilda. I’m from small-town New York, currently living in Utah with my soon-to-be-chiropractor husband and our soon-to-be-one-year-old son. When I’m not sweeping up Cheerios, I love sewing and crocheting for my etsy shop, and sharing what I make on my blog. I think this lined paper tee is such a fun way to bring out the inner student, and possibly even encourage a little bookishness in a little one (maybe that’s a stretch, but a girl can hope, right?).
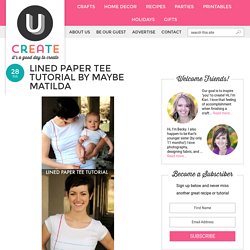
It’s really simple to put together, and you can easily make it in any size. Here’s what you’ll need to make this tee: a white tank, tee, or onesie masking tape foam brush blue and red acrylic paint fabric painting medium (available at craft stores–you’ll find it with the paint supplies)