
Summer bracelets DIY. When M. came home from her camp with school, she showed me this yellow bracelet she made with 'scoubidoo' strings.

One of her friends taught her how to make these and of course I wanted to have a go at it too. Instead of scoubidou string I used strips of fabric for one and leather - what did you think?! - shoelaces in offsetting colors for another one. I believe both resulting bracelets look really nice. The possibilities in terms of material to braid with are endless. So, in case you 're in need of a fun summer project here's a how-to in 16 pictures with a short description below. This is what you'll need for an adult size leather bracelet. Steps: 1. This is the kind of craft you could easily do with kids - have them cut strips of fabric, no need to worry about the strips being straight and regular, and teach them how to braid.
Paper Flowers - Anyone Can Do That. Japanese Kusudama, this tutorial is featured on Craftuts Anyone can do that, I assure you.

The proof: I can, just take a quick look at my result below. And, believe me, I am neither meticulous nor particularly patient. You could even say I’m the opposite. DIY : LE BRACELET BRÉSILIEN REVISITÉ. Wednes-diy - Free People Blog. A couple of weeks ago, inspired by a tutorial on honestly…wtf, one of my coworkers was inspired to bring back her love for making friendship bracelets, and created this masterpiece :) personally, i’ve only ever been able to do the straight line across or the V pattern, so i had to know how to do this. for this tutorial we’ll learn how to make a smaller scale version of the bracelet, and once you get the basic steps down you can start experimenting with more string and lots of colors!

What you need: embroidery thread, scissors and tape. click read more to see the full tutorial! Start by selecting four colors of string and cut two long pieces of each one – remember, you always need more string than you think you will ;) knot them together and tape down. separate the strings so you have one of each color on each side, and make sure they’re in the same order on each side. repeat this step on the next two strings and stop at the middle. knot the purple strings together to complete the V. BeyondBracelets. Howtomakejewelry. Hollistergirl1O1. Review of the Best Embroidery Floss Friendship Bracelets. Advanced Zig Zag Friendship Bracelet. Love this website?

Give us a "like" How to Make the Advanced Zig-Zag Friendship Bracelet A few days ago, Jordan in Ontario, Canada asked us how to make this advanced zig zag friendship bracelet. Well, Jordan, here you go! ~Cassandra In an effort to keep this simple, I've labelled the threads 1-7, designated by color. Please note that this is also the order you'll put them in when you get set up. Criss Cross Friendship Bracelet, Friendship Bracelet Pattern, Video. Waves and Loops Friendship Bracelet Pattern. Advanced Friendship Bracelet Pattern Can you feel the waves undulating in your mind as you look at this Waves and Loops friendship bracelet?
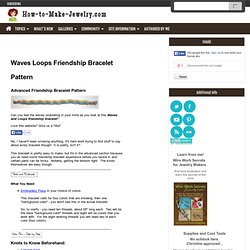
Love this website? Give us a "like" No, I haven't been smoking anything. Friendship Bracelets. Macraméd friendship bracelets were all the rage when I was growing up in the eighties.
All the girls at my school would obsessively make them for one another in a dizzying variety of colors, widths, and patterns. It's amazing, thinking back, that such young girls could make such beautifully intricate accessories. I, of course, tried my hand at making them as well. I would ride my bike down to the five-and-dime store and pick out the most sophisticated color combinations of embroidery floss I could find, but when it came to the actual macramé I never got beyond plain stripes.
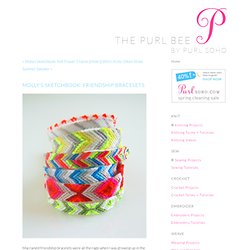
There was nothing wrong with plain stripes, except that the other girls seemed so much more advanced with their diamonds and chevrons. Fast forward 20 years: Purl Soho started carrying DMC Cotton Embroidery Floss in every conceivable color (including fluorescents! Making friendship bracelets is a surprisingly easy craft, and best of all, in the end you'll have a bunch of cute summer bracelets to give to your pals. How To Mix Chalkboard Paint in Any Color.
We love using chalkboards as backdrops for displays and parties (like this one here!).

So we were super excited to learn that you can create your own custom colors-and it's really easy! We first learned how from Martha Stewart whose tutorial you can read here. She recommends that you use latex paint, but we tried it out with acrylic paints with much success. Here's how you too can create your own chalkboard paint... Supplies: 1/2 cup acrylic paint (choose any color you like, or mix colors together to make the perfect shade!) 1. 2. Once your chalkboard has fully dried be sure to slate the surface before using it for the first time.