

How-To: &Stained Glass& Votive Holders. By Jenny Ryan Many times when I’m at the grocery or drug store, I can’t resist throwing a few scented votive candles in my cart.
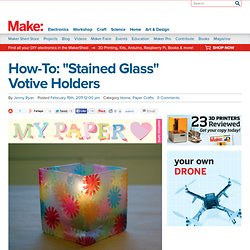
When I’m ready to burn them, it’s easy enough to sit one on a cute little vintage china saucer, but I recently decided to try and find a fancier display solution for them. I also wanted the project to be inexpensive, and the materials used to be things I already had on hand. I was inspired by memories of making faux-stained glass in elementary school and came up with these fun little glass votive holders. This project is quick and easy, and a great way to whip up custom party décor on the cheap. Materials Tissue paper in your desired colors Mod Podge (matte finish), in a pinch you can also use school gluePaintbrush Scissors Glass containers to fit your candle(s), I used thrifted vases and wine tumblers Paper punches in various shapes Q-tips, optional Directions Step 3: Start affixing the punched-out paper shapes to the glass using your paintbrush. More: Related. DIY Picture Tiles - You Will Never Buy a Photo Frame Again.
Lately I’ve been having this huge urge to decorate the house.
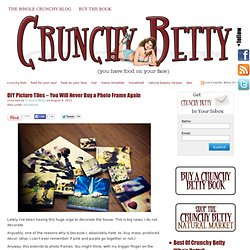
This is big news. I do not decorate. Arguably, one of the reasons why is because I. absolutely. hate. to. buy. mass. produced. decor. (Also, I can’t ever remember if pink and purple go together or not.) Anyway, this extends to photo frames. Nope. Long story short, I discovered this method of transferring my photos cheaply, quickly, and beautifully to something uncommon and unique.
Tiles. Turn Paint Chips into a Dry Erase Calendar. Make Typographic Gift Wrap. This year, I vowed to only make or buy handmade holiday gifts for my friends and family, and I've kept to it so far.
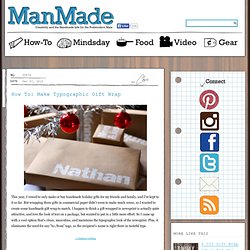
But wrapping these gifts in commercial paper didn't seem to make much sense, so I wanted to create some handmade gift wrap to match. I happen to think a gift wrapped in newsprint is actually quite attractive, and love the look of text on a package, but wanted to put in a little more effort. So I came up with a cool option that's clean, masculine, and maintains the typographic look of the newsprint. Plus, it eliminates the need for any "to:/from" tags, as the recipient's name is right there in tasteful type. Once I figured it out, it was actually quite easy and quick - less than ten minutes per gift.
Explore more. Web pages, photos, and videos. DIY envelope clutch. (vintage romper, river island feather headband) I’ve been wanting an oversized clutch for a while now, especially since I laid eyes on that Celine clutch shot by Tommy Ton for style.com.

Its minimalism is so beautiful. Then, I saw the Clare Vivier La Pochette on ofakind.com and instantly knew what my next DIY would be. Button and String Mini Journal. I've been trying to decide on what to make my hubby for a Valentine's gift and decided that I wanted to write more than a letter - so I decided to make him a mini journal / album / book of things I love about him, different memories I have of our life together, things like that (hopefully he won't read this before next weekend ;)).
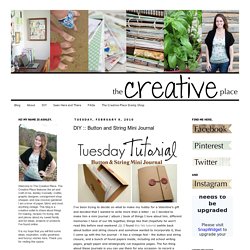
I found this fab tutorial awhile back about button and string closure and somehow wanted to incorporate it, thus I came up with this fun journal - it has a vintage feel - the button and string closure, and a bunch of found papers inside, including old school writing pages, graph paper and strategically cut magazine pages.
The fun thing about these journals is you can use them for any occasion- to record a special event, to keep as a personal journal, to write a note to a friend, many possibilities! Take your cover sheet and score a line 1.5" in from the right side (see below). Then score a line 4.75" in from the left side (see below). Felt Bookmarks {Tutorial} – Back-to-School. It seems like I make everything I can out of felt and this is my latest little project…felt bookmarks!
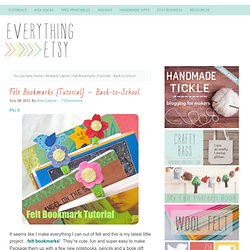
They’re cute, fun and super easy to make. Package them up with a few new notebooks, pencils and a book gift card for a great back-to-school gift. They make sweet teacher gifts and since I’m a homeschool mom I made some just for me. Here’s a quick little tutorial for these bookmark beauties… Start with a package of colorful 2 inch paper clips, wool felt, embroidery floss,a needle and a sharp pair of scissors for detailed cuts. Cut a two inch strip of felt and wrap it around the end of the paper clip. Time for Tea Soap. Drinking tea is such a lovely ceremony, what with the dainty cups and small spoons and little dishes reserved only for steeped tea bags.
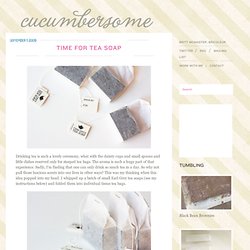
The aroma is such a huge part of that experience. Sadly, I’m finding that one can only drink so much tea in a day. So why not pull those luscious scents into our lives in other ways? This was my thinking when this idea popped into my head. What I Made. A blog about art and visual ingenuity. Wind-up paper butterflies are my fave (guest post from amelia) I had a baby so I’ve invited some fave guests to take over for me while I spend time with the little guy.
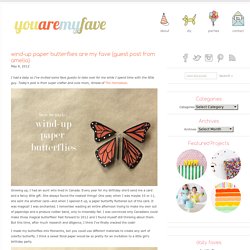
Today’s post is from super crafter and cute mom, Amelia of The Homebook. Growing up, I had an aunt who lived in Canada. Every year for my birthday she’d send me a card and a fancy little gift. She always found the neatest things! One year, when I was maybe 10 or 11, she sent me another card—and when I opened it up, a paper butterfly fluttered out of the card. I made my butterflies into Monarchs, but you could use different materials to create any sort of colorful butterfly. Materials: You’ll need heavy cardstock, 24 gauge wire, silicone rubber bands (I found mine in the hair aisle at Walgreens) needle-nose pliers, scissors, tape, a paintbrush, a black marker, and a white ink pen. Step 1: Measure and cut your wire. Step 2: Find the center of the longer wire. Step 5: Find the center of the shorter wire, and wrap it around the base of the paintbrush.
Crazy Awesome Paintings by Vladimir Kush. Here is a collection of the incredible paintings of Vladimir Kush.

Vladimir has been creating these surrealistic paintings since the late 80’s. I’m extremely impressed by his work, and you should be as well! Related. Myoats - Create something. Woven gift-wrap // pastel edition ^_^ By Kate on August 8, 2012 I noticed that the woven gift-topper I made last year was doing the rounds again on Pinterest so I thought I would make an updated pastel version (pastels seem to be the new neon at the moment).
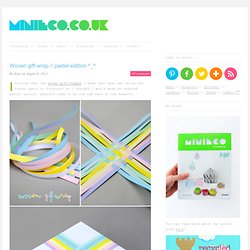
I bought some quilling strips (0.5cm) to use this time which reduces the labour by about half (I’ve also been working on some more intricate woven ‘things’ for another project…more to come soon). Anyway check out the previous post if you want full instructions. Above: Mischevious hands – the unseen backdrop in all my photo’s ^_^ While I took photos today my boys were making their own presents by wrapping boxes in newspaper. Finally, the font used on these images is called soymilk and it’s free to download …yay! Welcome to the wonderful world of creative recycling...Milomade gives discarded, unwanted items a new lease of life. Stuff No One Told Me.