
DIY Leather Friendship Bracelets. New Year's Needlepoint Clutch. It is an undeniably magical night, and happily, it is just around the corner… New Year’'s Eve, the glitz and glamor night of the year!
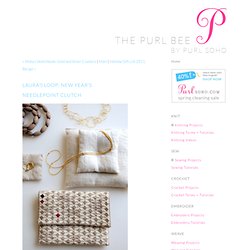
Shoes shined and lips glossed, we'll all wave a fond farewell to 2011 one minute and the very next, greet 2012 head on. We'll celebrate the accomplishments of last year, while we bubble over with hope for what's to come. I haven't picked out my dress yet, but no matter what I wear, I will definitely be holding my New Year's Needlepoint Clutch. It has such a feeling of whimsical elegance, I know that I'll be gracefully prepared for whatever the night may bring!
With a practical form and minimalist style, this clutch is perfectly finished with the gorgeous, simple and rugged Koigu Premium Merino. This year, I plan to dance the night away, clutch in hand, ready for any adventure 2012 might bring. Materials To make a 6-inch tall x 8-inch wide clutch: Cut From the needlepoint canvas, cut one 16-inch by 9-inch rectangle. How About Orange.
Here's a look at our upstairs guest bathroom.
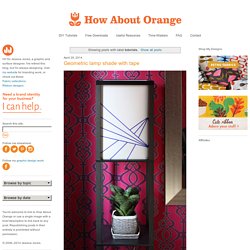
Last night I covered an accent wall with removable wallpaper. I love it! This bathroom has a peculiar layout. You walk in past the shower stall on the right, and when you hit the sink, you turn right to get to the toilet. Which is under a lovely arch at the end of a passage that is almost long enough to feel like a hallway.
The kind folks at Walls Need Love sent the product to review. Like the Sunburst wallpaper I designed last year, this paper is essentially a giant self-adhesive wall decal, and it's easily to peel off and reposition. Earth Day Craft– T-Shirt Weaving. Apr16 by Ellen Luckett Baker by Ellen Luckett Baker Earth Day is April 22, so help your kids celebrate with an upcycled weaving project using old t-shirts.
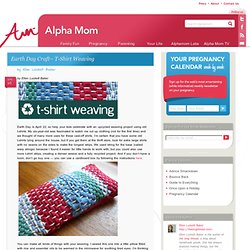
My six-year-old was fascinated to watch me cut up clothing (not for the first time) and we thought of many more uses for these cast-off shirts. Little Bird School of Stitchcraft: Finger Knitting. Finger knitting is a really good way of getting children interested in wool crafts, and it is very easy to learn.
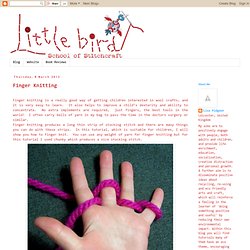
It also helps to improve a child’s dexterity and ability to concentrate. No extra implements are required, just fingers, the best tools in the world! I often carry balls of yarn in my bag to pass the time in the doctors surgery or similar. Finger knitting produces a long thin strip of stocking stitch and there are many things you can do with these strips. In this tutorial, which is suitable for children, I will show you how to finger knit. To cast on, begin with the palm of your hand facing you with the tail end of the yarn between your thumb and index finger.
Pinterest Challenge: AZ Love / Nail and String Tribute to the Grand Canyon State. So I found Curiously Wrought's work through her Etsy on Pinterest the other day--how cute are these?!
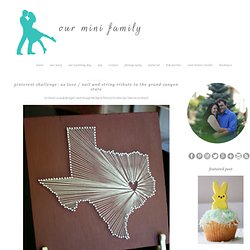
Click through the link below to check out my step-by-step tutorial: So although mine isn't PERFECT like hers are, I seriously love how it came out! Wool and the gang™ — watch the videos. Raised fishbone stitch. 2011.09.01. - 2011.10.01. Sailor’s knot doorstop & paperweight. I guess it’s time to come clean and admit that i am not what you would call an outdoors person; sailing, camping, hiking, exploring…i can’t say i have much practice or expertise in any of those areas. but it’s never too late to learn new things, and i must say that after spending a good chunk of the day learning various sailor’s knots, i feel pretty psyched about my new abilities and very motivated to learn more. if you haven’t tried it, i can tell you that trying to learn knots is the cheapest entertainment there is. you can chuck the video games and crossword puzzles out the window, because knots are just as frustratingly time consuming and way more satisfying to complete. this particular project should be EXTRA satisfying because i’ve seen these doorstops on the market for forty or fifty dollars(!)

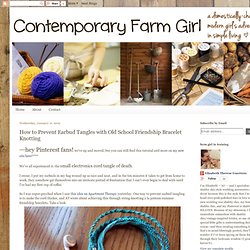
, but if you can channel your zen mind and complete this knot (called the monkey’s fist), then this ultra chic decor item can be yours for only eight dollars! Materials: cost: How to Prevent Earbud Tangles with Old School Friendship Bracelet Knotting. ****hey Pinterest fans!
We've up and moved, but you can still find this tutorial and more on my new site here! **** We've all experienced it: the small electronics cord tangle of death. I swear, I put my earbuds in my bag wound up so nice and neat, and in the ten minutes it takes to get from home to work, they somehow get themselves into an intricate pretzel of frustration that I can't even begin to deal with until I've had my first cup of coffee. So I was super-psyched when I saw this idea on Apartment Therapy yesterday. Pretty sweet, huh? Aestheticoutburst.blogspot.com/2010/05/projects.html. I found these beautiful paper plate circles via Fine Little Day.

Doesn't this look like a fun project? The photos are from Fem Manuals and she also has an incredible blog. How To: Rolled Fabric Flowers. So I am jumping on the bandwagon and loving all the rolled fabric flowers I've seen here and there.
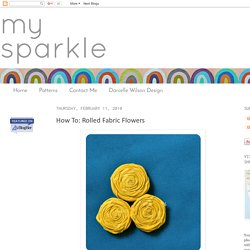
We decided to make some with the girls in our church youth group, but I couldn't find a great tutorial on how to make them so I played around and this is what I came up with.Enjoy! Start with about a 1" ripped strip of fabric (you can use any width...this was the width I liked best). The length and weight of your fabric will dictate the end diameter of your flower. Fold the strip in half and dot a little fabric glue on the end 1/2" or so. Roll the glued end a few times to get a nice tight center. Then, once you have a center you like, start twist/folding your fabric away from the center as you roll.
Wire weaving 101. Because so many have asked.
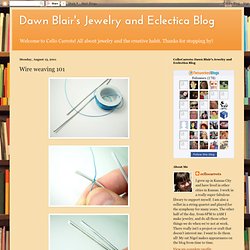
*For your very first weaving, I suggest you use a very large gauge wire that will be stiff and easy to handle for your two base wires. Here I have used 10 gauge aluminum. I have chosen 24 gauge aqua color enamel coated copper wire so you can easily see the process. * The direction of the wire when weaving on two wires will be, from the outside, over the top, through the middle, under the back, coming back to the outside, then around the outside and over the top, through the inside and ACROSS to the back of the 2nd wire, around the outside, over the top of wire 2, through the middle, around the outside of wire 2 again, through the middle and ACROSS the back of wire 1, and so on.... * You may want to use a piece of blue painters tape to hold the two main wires in place when you first start the weaving.
. * Starting the weaving near the ends of the wire gives you more control from the very beginning. Weave a Jump Rope. This photo originally appeared in FamilyFun Magazine Total Time 2 to 3 hours Ages school-age With this classic finger-weaving project, kids can get a jump on outdoor playtime by recycling their old socks and outgrown tights into a colorful homemade toy. What you'll need 3/4-inch-wide loops of fabric cut from socks and tights (our 6 1/2-foot jump rope required 157) Helpful Tip: 吉祥结diy手工教程 来自L君在堆糖网的分享. 中国结艺——盘长情侣符号♀ ♂教程②男生版。 来自忆清江在堆糖网的分享. DIY Tangle-Free Headphones with Embroidery Floss. In our post about The Science Behind Earbud Tangles, we showed you that making cords thicker is one of four ways to keep wires from knotting up in your pocket or purse.
So we're not surprised to see that one Pinterest user figured out that a super-easy string-knotting technique keeps her 'buds from bunching up. Sick of seeing tangled earbuds? How to Make the Chinese Staircase Bracelet: 9 steps.