
BioLite HomeStove Overview Half the planet cooks on smoky open fires, causing over 4 million premature deaths annually. This is more than AIDS, malaria, and tuberculosis, combined. These smoky open fires also contribute to climate change, releasing more black carbon into the atmosphere than all the cars and trucks in the world. Using our patented technology, BioLite has created The HomeStove, a low-cost biomass cookstove that, by converting waste heat into electricity, reduces smoke emissions by up to 95% while simultaneously providing users with the capability to charge mobile phones and LED lights. How To Build An Outdoor Cob Oven For $20 | Home Design, Garden & Architecture Blog Magazine Technology has brought the art of making food to a new level which may in fact ruin someone on the long term if they don’t have the necessary knowledge of dealing without the appliances and devices at our disposal nowadays. Try baking something without fossil fuels or electricity for a week and you’ll find out how really hard that is. But if you’re lucky enough to have the space for a cob oven, you can make it just fine. For building the oven from scratch, you will need some hard work, positioning the stones for the foundation, continuing with filling with clay mortar, making the arch doorway and cob dome, and finishing with clay or sand mortar between the bricks. It could take you days, but with recycled materials, you would only spend some 20 $ on the entire structure.
Build a dry stack wood-fired pizza oven comfortably in one day! – Page 2 – Your Projects@OBN Last Updated on June 29, 2018 Step 1: Build your base As with any construction, your base (or foundation) is the most critical element. Ensure your stacks are on firm ground and that they are level or your oven will not be! Your chosen height will be dependent on both your block size and also personal preference. Step 2: The cooking base This layer of bricks allows air to circulate beneath the flames and also is essential in building and retaining the heat needed for great pizza and breads. Step 3: Constructing the oven walls Ensure you use a running bond pattern for your bricks or your walls will lack stability. Step 4: Adding the dry-stacked brick roof Your oven won’t get hot without a way to trap the heat. Step 5: Find your favourite pizza and bread recipes and start cooking! A quick search is going to find lots of great recipes you can cook in a wood-fired pizza oven. Thanks to our friends at Fix.Com for allowing us to share this great project.
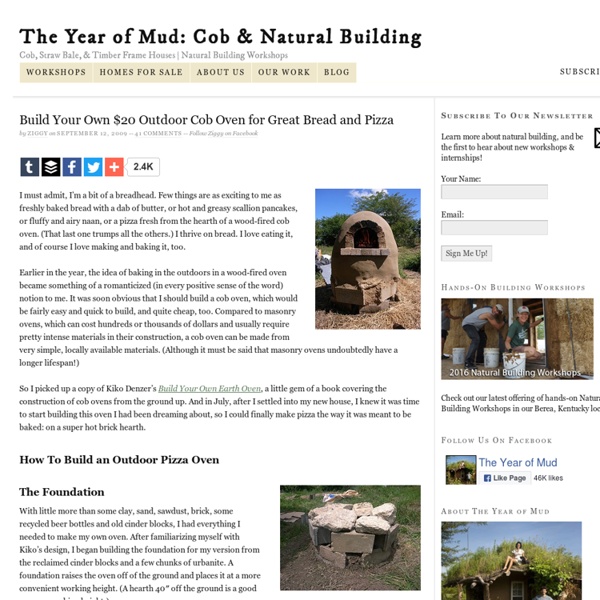
Better Outdoor Pizza Oven Building Plans | The Year of Mud Learn how to build this outdoor oven in this new how-to Several years ago, I wrote about how to build (the now-infamous) $20 outdoor cob oven. That oven I built worked decently, produced a lot of delicious meals, and advanced my pizza baking fever to new heights. This newer model is slightly bigger, allowing for easier access to the oven interior, it has even more food baking potential, and the insulation is vastly superior. This is a very achievable, low cost, and effective oven that will not cost you thousands of dollars to build. The Better Outdoor Pizza Oven Plans: Overview The oven I will propose and outline below is a highly insulated cob oven. The oven is no slouch in the baking department, either. Ok, let’s get on with the building plans… Don’t Just Throw it Anywhere: Siting Your Oven Questions to consider include: how close will it be to your existing indoor or outdoor cooking space? Build a Sheltering Roof Dig a Drainage Trench Cob ovens are extremely heavy.
Egloo heats your room without electricity for 10 cents a day Can you heat your room for just 10 cents a day? Egloo can. Egloo is a clever little heater that harnesses candle power to heat a room without wasting electricity. Egloo works by concentrating the heat from the flame of a few candles inside a terracotta dome, radiating warmth into a room even after the candles are blown out. The concept was developed by Marco Zagaria, a student at the Academy of Fine Arts in Rome. The the brilliant little heater was successfully funded through Indiegogo, and you can get your own in a variety of colors to start heating your office, dorm or bedroom without using electricity today. + Egloo The article above was submitted to us by an Inhabitat reader.
The Cob Oven Project: DIY Outdoor Kitchen/Pizza Oven About | offgridcabin This blog is about the design and construction of an off-grid system in Upper Michigan. The purpose of the offgridcabin is to contribute to the off-grid community by basically saying, “well, that worked out pretty well” or, “well, that wasn’t such a good idea. I think next time I’d… ” The quick statistics on the system (as of July 2011) 3000 Watt Xantrex MS3000 inverter with control panel14 x 225 Ah deep cycle lead-acid batteries (Johnson Controls)810 Watts of solar (6 x 135 Kyocera LPU 12V panels)3000 Watt Honda EU3000 generator with RF remote starter4 x 350 Lumen 12V LED security lights with motion sensorVictron BMV 600s battery monitor (meter 103′ from shunt)Liquid propane refrigeratorGas heater in garage and cabinFree-standing wood burner in cabin And one more thing… My parents are retired Wisconsin elementary teachers. And yet another thing (2014)… I’m now an alumni of UW Oshkosh and UW Madison. Cheers, Sam Like this: Like Loading...
1. Building a Clay Oven – The Basics | The Clay Oven Welcome to the first installment of building a clay oven. This post will cover: Background – including what is a clay oven?, what can you use it for? can I build a clay oven? Background The Finished Clay Oven in My Garden I assume that most people who have found this site will already know what a clay oven is, however it is probably useful if I define what I mean by a clay oven for the purpose of this blog. In my definition then, a clay oven is any hollow, dome-shaped structure constructed out of clay, clay and sand or clay and straw, used for the purpose of baking and roasting food. Clay ovens are amazing things. Building your own clay oven is not difficult. What you will need – Materials and equipment OK lets crack on with getting this baby built! Materials Builders sandClayWaterRubble / hardcoreWood shavingsNormal building bricks (e.g. Equipment Saw (chainsaw?) The Build Order So you have your equipment and materials list. How Long Does it Take to Build a Clay Oven? Like this: Like Loading...
Downdraft Barbeque | Improved Biomass Cooking Stoves Downdraft Barbeque Peter Verhaart (Feb 7,99), Water Boiling Tests (Mar 6, 2002) We have used it quite a few times now (we are not great barbecuers), it is quite convenient to operate. It typically takes 12 minutes to settle into smokeless and odourless combustion, our official propane fired bbq takes longer. The fuel is bits of wood, 30 * 30 * 100 mm max size.The fire is lit on the grate, with a slide to adjust the active grate area. Since there are a few cheat holes in the riser pipe, the downdraft mode of burning starts automatically. Downdraft Barbecue water boiling test 3/6/2002 Fuel as was 162 g Fuel oven dry 140 g Start Fire 9:48 Start Cook Time 10:05 End time 10:53 Initial fuel 2.6 kg Remaining fuel 1.2 kg Big pan dry 0.6 kg Big pan + water 3.5 kg Same after 2.8 kg Small pan dry 0.7 kg Small pan + water 2.2 kg Same after 2.1 kg Water temp start 26.2 C Start boil big pan 10:28:00 Start boil small pan 10:48:00 Combustion value dry 21 MJ Average power output 8.82 kW
Multifunctional Crib Furniture Concept: 5 in 1 bundle Bam b. 5 in 1 is a furniture concept that has lots of multifunctional advantages from Gro Furniture. The gro crib offers the possibility to be used as crib, toddler bed, daybed, desk and the playtable, all bundled together. The furniture is made from solid amber bamboo plus solid birch ply with low-VOC non-toxic, organic, plant-based, fully biodegradable white finish. The white components are 100% hardwood baltic birch 13 ply solid core plywood with non-toxic low-VOC durable finish.