
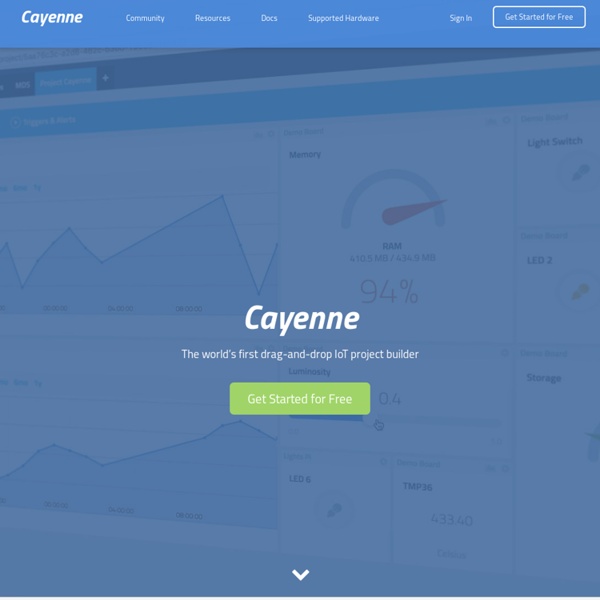
How to control a Window Blind using IOT enabled hardware (Part 1) This is part one of a series of articles where I will be showing you how to create a home automation system using Components and hardware which can be purchased from the RS Components website. Also, we will show how you can build your own casing and gears on DesignSpark Mechanical. In this application, we will be controlling window blinds. Home Automation Project Details: We will use a Cayenne application to send a signal to an Arduino UNO WIFI which will control the motor rotation, this will pull the blinds up or down. It’s not necessary to use an Arduino UNO WIFI as we have but also an Arduino Uno will do just fine for this project too. In this case, we must connect the Arduino UNO WIFI to our laptop for the whole time of the project, as cayenne uses a computer as the main communication point. So, what is Cayenne? Hardware & Components needed: Below is our step by step tutorial. First, visit the link below and, sign up for a Cayenne account.
orionrobots/Bounce ESP8266 Projects Tinkering with Technology – playing with possibilities ESP8266 Web Server Tutorial (Code and Schematics) This tutorial is a step-by-step guide that shows how to build a standalone ESP8266 Web Server that controls two outputs (two LEDs). This ESP8266 NodeMCU Web Server is mobile responsive and it can be accessed with any device with a browser in your local network. If you want to learn more about the ESP8266 module, first read my Getting Started Guide for the ESP8266 WiFi Module. This tutorial covers two different methods to build the web server: Part 1: Create a Web Server Using Arduino IDEPart 2: Create a Web Server Using NodeMCU Firmware This part shows you how to create a web server to control two outputs using Arduino IDE. This tutorial is available in video format (watch below) and in written format (continue reading this page). Prepare the Arduino IDE 1. 2. 3. 4. 5. 6. Code Copy the following code to your Arduino IDE, but don’t upload it yet. View raw code const char* ssid = "";const char* password = ""; Uploading the Sketch Uploading the Sketch to the ESP-12E Uploading Sketch to the ESP-01
Getting Started with NodeMCU Board Powered by ESP8266 WiSoC Since ESP8266 is now so popular, I’ve recently bought a NodeMCU board to try it. I selected this board because the latest version of the board is breadboard-friendly, integrates a USB to serial chip, and it can be powered by a simple USB to micro USB cable. I also noticed a ESP8266 tutorial with NodeMCU firmware by SwitchDoc Labs the other day (using ESP-12 and Adafruit Huzzah), which I applied to my NodeMCU board, but since I encountered a few issues, I decided to report my findings, and write my own little getting started guide to switch on/off LED and GPIOs using a web interface. NodeMCU v0.9 and NodeMCU v1.0 If you are going to purchase a NodeMCU board it’s important to know there are two official versions: NodeMCU v0.9 with ESP-12 moduleNodeMCU v1.0 with ESP-12E module NodeMCU v0.9 vs NodeMCU v1.0 (Click to Enlarge) I’ve bought mine for just above $6 on eBay advertised as “NEW Version NodeMcu Lua ESP8266 WIFI Internet Development Board Latest Firmware”. NodeMCU v1.0 Pinout
From Kickstarter to Home Depot: Edyn smart garden sensor brings IOT to your garden The emerging Internet of Things (IOT) is enabling the use of smart devices, such as Edyn, in surprisingly down-to-earth places. And because this crowdfunded smart garden gadget is now available on the shelves of one of the biggest home improvement stores in the U.S., it's not just for early adopters anymore. One of the most entertaining parts of covering technology and gadgets is reading the press releases and pitches from startups that are convinced that they've built the next best thing, and which could really change the world... as long as changing the world consisted of turning your phone into a remote control for your lights, or turning your trash can into your grocery list maker. The Edyn sensor is a solar-powered device that measures soil moisture, pH, temperature, humidity, light levels, and soil nutrient levels, in both real-time and over the long term, helping gardeners to accurately assess what their soil needs in order to support strong healthy plant growth. Here's the spiel:
hackerspace / ESP8266 Some of this info is available elsewhere on the web, some is (as far as I know) not documented elsewhere. First, some links to other sources of information Module Variants The most common module with printed PCB antenna: 2x4 2.54 mm pitch headerbuilt-in PCB-printed antenna3 GPIOs: GPOI0/2/16UART URXD/UTXDRESET and CH_PD (powerdown)VCC/GND14.2 mm W x 14.2 mm L ESP-01 ESP8266 WiFi Module Pinout Note: In the above diagram, GPIO16 is not shown (it is replaced by RST). Note: On some pinout, GPIO2/GPIO0/RST and CH_PD are shown as NC ESP-02A less common module with antenna connector, that may be compatible with breadboards: Dual 1x4 2.54 mm pitch header in DIP form factorbuilt-in U-FL connector for external antenna2 GPIOs: GPOI0/2UART URXD/UTXDRESET and CH_PD (powerdown)VCC/GND14.7 mm W x 14.2 mm L ESP-02 ESP8266 WiFi Module Pinout ESP-03A SMT (Sufrace Mount Technology) module with all pins broken out to castellated pads with built-in ceramic antenna: ESP-03 ESP8266 WiFi Module Pinout AT Command Mode
NEW PRODUCT – Espressif ESP32 Development Board – Developer Edition September 21, 2016 AT 11:25 am NEW PRODUCT – Espressif ESP32 Development Board – Developer Edition The ESP8266 started a small revolution by bringing WiFi to a small and cheap package that also had enough processing power and enough pins to get small things done. The development board breaks out all the module’s pins to 0.1″ headers and provides a CP2102 USB-TTL serial adapter, programming and reset buttons, and a power regulator to supply the ESP32 with a stable 3.3 V. Please note we have a limited quantity at this time. Sold out but more are on the way! Get the only spam-free daily newsletter about wearables, running a "maker business", electronic tips and more! No comments yet. Adafruit has a "be excellent to each other" comment policy.
Enginursday: First Impressions of the ESP32 An overview of Espressif's sequel to the ESP8266 - a new WiFi/Bluetooth-enabled system-on-chip, with a massive GPIO count. Favorited Favorite 3 Last year, the ESP8266 took the embedded IoT world by storm. For less than $10, you could get a programmable, WiFi-enabled microcontroller with just enough GPIO to wiggle some LEDs and monitor some sensors. I spent a good chunk of the year working with the chip – laying out a handful of boards, and mostly wrestling with the lightly-documented SDK (to put it nicely). This year Espressif – the semiconductor company behind the ESP8266 – is releasing a new Internet-capable microcontroller: the ESP32. The ESP32 doesn’t replace the ESP8266, but it does improve on it in every aspect. Block diagram from the ESP32 spec sheet. There are 36 GPIO pins, which can be assigned to all sorts of peripheral duties, including: Analog-to-Digital Converter (ADC) – Up to 16 channels of 12-bit SAR ADC’s. ESP31B Development Board Tips For Using the ESP31B Dev Board Summary
WeatherBug: ESP8266 WeatherStation with IFTTT and HomeKit support I assume you're familiar with Daniel Eichhorn's ESP8266 Weather Station. I modified it to do a little more. Hardware changes Used a WeMos D1 mini with the DHT shield Software changes Added IFTTT support for getting notifications when indoor temperature is too high or low.Publish indoor temperature over MQTT, so it is accessible via HomeKit with Siri.Made it work with Arduino 1.6.7 by using NTPclient library. As you may know, we're having a baby soon! WeatherStation First thing I would recommend is to get the original WeatherStation code working by following the instructions here. Go enable the IFTTT Maker channel here: ( your API key.Paste the key here in my WeatherBug code.Make two recipes like this one with an event name of Nursery_Temperature_Low and Nursery_Temperature_High HomeKit If you're wondering how HomeKit fits into the picture here, first go read this and try to get that working. Done! Try to get Helvetica on this screen.
ESP8266: Weather Station V2 Code published | Squix TechBlog This is a total make over of the earlier weather station. Instead of building my code on the NodeMCU lua firmware I decided to switch to the Arduino IDE based development setup. The reason for this was the constant problems with heap memory running out and other instabilities. When I finally found code that demonstrated the use of my beloved SSD1306 based OLED 128×64 displays the final piece was in place. I tried to separate the building blocks of the code into different classes, so they can be reused easiley for other purposes. This class interfaces with the display over the I2C bus. WeatherClient I’m using the forecast.io API to retrieve localized weather information. If you find any bugs or code with room for improvement please let me know. You find the code here: Update: The WeatherStation Kit! Order all components needed for the WeatherStation in one Kit.
A very cheap ESP8266 WiFi smart car controlled by phone based on NodeMCU DoitCar is designed and developed by Shenzhen Doctors of Intelligence & Technology (SZDOIT), which is the most cost-effective. It is widely applied in many fields, sucha as the electronic lover, college students, Internet of Things (IoT), mobile data collection, etc. DoitCar has a great temptation for the smart car solution. The DoitCar kit is including the car chassis, 2 pieces of 6V motors, NodeMCU WiFi board, motor driven shield board. Especially, all the codes and hardwares are open for all people. The develop computer language is Lua for DoitCar with large API encapsulation, which can make users design and exploit their products quickly and conveniently. Online Documents: Free get the Android APP source code.
The Ultimate IoT Challenge Using ARTIK Cloud Full rules Eligibility criteria: Contestants must (a) be at least 16 years of age, (b) be a resident of a country other than Cuba, Iran, North Korea, Sudan or Syria, (c) not be involved in the execution or administration of the Contest, and (d) not be an employee (or the immediate family member or a household member of an employee) of Hackster.io, or Samsung Semiconductor, Inc. (“Samsung”) or a Samsung affiliate. To be eligible for judging, an entry must meet all of the following content and technical requirements: Contestants must create a free Hackster.io account and register as a participant for this contest.Contestants must create an account on ARTIK Cloud to build a working submission.Contestant must submit their Samsung ARTIK Cloud project as well as deliverables listed below (via the Hackster.io project template).ARTIK Cloud account email must match your Hackster.io accountContestant must submit their project on this contest page by filling out the form "Submit my final entry."