background preloader

4 Simple Steps to Grow a Hundred Pounds of Potatoes in a Barrel

4 Simple Steps to Grow a Hundred Pounds of Potatoes in a Barrel
Container gardening isn't only for savvy urban gardeners and folks with limited space to grow, it can also be for folks who want to maximize their yields in a controlled environment. Not only does growing potatoes in a barrel reduce the amount of weeding and exposure to pests and fungi, you don't even have to risk shovel-damage to the tender potatoes by digging them out of the ground when they're done, just tip the container over! After extensive research to plan my own potatoes-in-a-barrel, I've boiled all of the recommendations down to 4 simple steps to a winning potato harvest. 1. Select and prepare a container You'll need to pick out a container such as a 50-gallon trash barrel or one of those half whiskey barrel planters. Good drainage is critical for the cultivation of healthy potatoes so you'll want to cut or drill a series of large drainage holes in the bottom and bottom sides of your container. 2. 3. 4. Other tips to grow bushels of barrel potatoes More gardening tips Related:  Gardening/Community GardensGARDENING

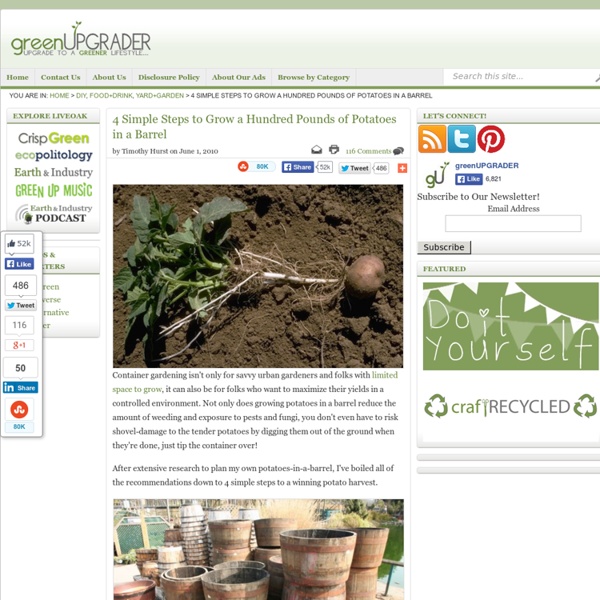
The Art of Weeding: Part 2 In Part One of this series on organic weed control we learned about how weeds affect our garden and tips to prevent them in the first place. In this article, we'll learn how to get rid of weeds, naturally, tools for the job and how weeds can even be good for you and your garden. Real tips for getting rid of weeds As the saying goes, the bigger the elephant, the harder it is to move it. In the garden, the bigger the weeds, the harder it is to control them. The best--and worst--times to weed Some gardeners prefer to pull weeds early in the morning while the soil is still damp with dew and after they've had a cup of coffee. Develop your own strategy Let's say you return from vacation only to find the garden overrun with strange plants. Still overwhelmed? Dry soil vs. damp soil You only have to try pulling weeds once from dry, compact soil to know that it it's hard work. Small is beautiful Younger weeds are easier to pull because they haven't established a strong root system.

16 Kitchen Scraps That You Can Re-grow All of us want to be able to have fresh fruit and vegetable at our disposal when working in the kitchen, preparing a delicious meal. The truth is you can have your veggies and eat them too! There are a number of plants which you can throw away after eating, not knowing they can be re-grown in the most easy of methods. • Fennel, Scallions, Onions and Leeks can be re-grown if using the white root end. • Cabbage, Celery, Romaine Lettuce and Bok Choi are very similar to the previous category. • Lemongrass is not much different than a normal grass. • Potatoes are maybe the easiest of the foods to re-grow at home. • Ginger is also very easy to work with.

Indoor Water Gardens - Martha Stewart Home & Garden As anyone who has snorkeled can attest, the cool aquamarine light underwater casts an enchanted glow on everything in its domain. Perhaps this explains the allure of water gardens. Small freshwater gardens are fun to create and simple to care for. And all you need are a few floating or submerged greens in a vintage aquarium, an apothecary jar, or a sleek glass cylinder. You'll find appropriate containers at antiques shops, garden centers, or in your own cupboards. Those that can remain entirely submerged in water, such as anubias and parrot's feather (Myriophyllum), are known as true aquatics. When choosing plants, keep in mind that some will need twelve hours or more of bright light daily. Rinse gravel thoroughly to remove dust, which can cloud the water, and salt, which can damage roots and leaves. A few plants, such as black taro (Colocasia) and bamboo plant (Calamus), may be sold potted in plastic containers.

10 Gardening Tips For Beginners The rewards of gardening are great — fresh air, exercise, beauty and relaxation, to name a few. But designing and planting your very first garden can feel like an overwhelming task. Luckily, gardens are surprisingly forgiving creations, and the best way to learn is by simply diving in. Here are 10 tips to help get a new garden off on the right foot. 1. Take a leisurely stroll around your property with a notebook and make a rough sketch of the existing planting areas.Add notes to your garden “map” about which areas get the most sun and which are shaded.A simple soil test from your local garden center will tell you whether your soil is well-balanced in nutrients and pH.If you’re thinking of growing edibles (vegetables, fruit or herbs), it’s a good idea to have your soil tested for lead. 2. For instance, maybe you’ll decide your style is Industrial Zen or Playful Modern or Simplified Cottage. 3. 4. 5. 6. 7. 9. 10. Tell us: Are you a newbie gardener?

5 Secrets to a ‘No-work’ Garden | Eartheasy Blog It took over 20 years of gardening to realize that I didn’t have to work so hard to achieve a fruitful harvest. As the limitless energy of my youth gradually gave way to the physical realities of mid-life, the slow accretion of experience eventually led to an awareness that less work can result in greater crop yields. Inspired in part by Masanobu Fukuoka’s book, One Straw Revolution, my family experimented with gardening methods which could increase yields with less effort. Fukuoka spent over three decades perfecting his so-called “do-nothing” technique: commonsense, sustainable practices that all but eliminate the use of pesticides, fertilizer, tillage, and perhaps most significantly, wasteful effort. Here are the strategies we used which enabled us to greatly increase our garden yield, while requiring less time and less work. 1. With ‘no-till’ gardening, weeding is largely eliminated. 2. Gardeners are always on the lookout for free sources of clean organic mulch to add to their garden.

Alan Titchmarsh's tips on creating a hidden hideaway | Garden From left: A sunken garden at the Chelsea Flower Show in 2009 A patio with potted plants and a trellis The last thing you want, when you fancy some quiet time in the garden or you’re entertaining friends outdoors, is to feel as if you’re living in a goldfish bowl. We all enjoy our privacy, but in a small garden surrounded by other houses, even the least nosey neighbour can’t help but be aware of your every move as you enjoy a glass of wine, do a spot of weeding or – when the weather allows – slide into a sun lounger to top up your tan… Screening That’s why the first thing a lot of people do on moving to a new garden in a town or a modern housing estate is to put up six-foot fence panels. If it’s essential to have a solid barrier between yourself and the outside world, try hurdle-style panels made of hazel, willow, bamboo or heather. There’s no need to rip out any existing chain link fencing; just wire the new panels on to it. Living curtains Tight corners That sinking feeling Far pavilions

How to Turn a Pallet into a Garden Good news and bad news. I had planned to film a short video showing you how to make a pallet garden, but the weather didn’t cooperate. I was stapling the landscape fabric onto the pallet when it started drizzling and got really windy. That’s the bad news. So keep reading my pallet loving friends, instructions on how to make your own pallet garden are just a few lines away… Find a Pallet The first thing you need to do is–obviously–find a pallet. Don’t just take the first pallet you find. Collect Your Supplies For this project, you’ll need the pallet you found, 2 large bags of potting soil, 16 six packs of annual flowers (one six pack per opening on the face of the pallet, and two six packs per opening on the top of the completed pallet garden), a small roll of landscape fabric, a staple gun, staples, and sand paper. Get Your Pallet into Shape Once you’ve dragged your pallet home, give it a once over. Let the Stapling Begin! Lay the pallet face down. Now for the sides. Caring For your Pallet

END OF SEASON LIVING WILLOW PROJECTS STILL POSSIBLE - WITH 10 DISCOUNT OFFER. Why I Use Epsom Salt in the Garden *Why I Use Epsom Salt in the Garden*By: LL4e14 June 2004 I wanted to show everyone what a difference it makes with and without with only water being added all of these plants was planted on the same day and time. I am showing you ones I am growing with the sq. ft. method. All of these photo's were just taken today. I do have several baby tomatoes now. However now the non Epsom salt plants will be fed it also this was only to show those what a difference it makes. In the Garden House Plants Mix one teaspoon per gallon of water and feed to the plants every two to four weeks. Garden startup Sprinkle approximately one cup per 100 square feet. (10’x10’) and mix into soil before planting. Tomatoes Apply one tablespoon per foot of height for each plant every two weeks. Roses Apply one teaspoon per foot of height for each plant every two weeks. Evergreens, Azaleas, Rhododendrons Apply one tablespoon per nine square feet (3’x3’) over the root zone every two to four weeks.

Living Sculpture Website Template Printable PDF version Related videos: In turf works, we create living sculpture by shaping soil and covering it with grass or moss. These sculptures take on many shapes and sizes, from sod animals and other figures, to more abstract creations. One of the most popular forms is a very literal translation of the term “lawn furniture.” No matter what shape the sod seating takes, the basics of construction are the same. Design The sky’s the limit when it comes to design and there is plenty of inspiration in the home and lawn furniture that we encounter every day. Another design consideration is to carefully examine the space at hand. Almost any site with adequate drainage and sun exposure will work. Materials Soil Sod Shovels Water Ground staples A large, knife for cutting sod Hammer or mallet Some notes on materials: Soil quantity: The biggest question when it comes to soil is: how much do we need? Sod: You can expect to pay about $.40/square foot of sod from a sod farm. Construction

Related: