background preloader

Crochet

Facebook Twitter

One&Two Company. Flower Power Valance Tutorial. Alfo the Monster pattern by Stacey Trock. Free crochet patterns amigurumi monsters. I’m so excited… today, I get to show you 2 monsters that I actually finished a little while ago, but were secret! You see… I was commissioned to do a 10 monster collection for Elle Rae Classic Wool, and I couldn’t say a ‘peep’ until the monsters were revealed! Did I mention that they’re FREE patterns?

How awesome is that! Don’t let his bright-purple body fool you… Alfo’s actually quite quiet and likes to think about ‘big issues’. He’s not at all shy about his big teeth… in fact, he thinks it’s great for a laugh! Love Alfo? Bixi’s fun, sassy and LOVES showing off bright colors! And, she isn’t afraid to do a little screaming… Love Bixi? I’m so excited about spreading the monster love… thank you so much to Ella Rae for providing these two (plus 8 more!) Thanks for stopping by and reading! If you want to see more great finished items… make sure to visit Tami’s Amis blog, the organizer of this great FO Friday theme! I hope you have an awesome and craft-filled weekend! Crochet Advice for Beginners From an Expert. I learned to crochet during a childhood visit with my father’s sister, known to me as "Aunt Nancy.

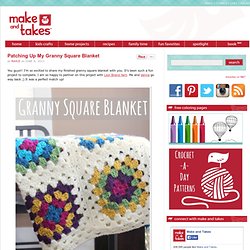
" After that delightful visit, Aunt Nancy sent me home with a lovely gold-colored size G crochet hook, along with several balls of acrylic yarn. I crocheted with that hook, and that hook only, for years. It did not even occur to me that I could, or should, try hooks in other sizes or brands. I knew other sizes existed; Aunt Nancy had given my sister a hook in a larger size, but I didn’t borrow hers often. I liked mine! The yarn available to me locally at that time was mostly limited to worsted weight acrylic, so even if I had purchased other hooks, the selection of materials with which to use them was dismal. Later, when I was in college, I grew interested in expanding my horizons. At that point, working with different hooks was a challenge. Persistence was the only solution to those problems, and I almost gave up before I adapted. A Solution I Was Unaware Of: Lessons Learned: Patching Up My Granny Square Blanket. You guys!! I’m so excited to share my finished granny square blanket with you.

It’s been such a fun project to complete. I am so happy to partner on this project with Lion Brand Yarn. Me and Vanna go way back ;) It was a perfect match up! I’ve talked about crocheting granny squares before, but I wanted to dive into changing colors for each layer and stitching squares together to form a blanket. I’m calling this my lapghan, as it’s perfect for a lap. But we could also call it a granny patch blanket, as it was fun to bring in a quilting aspect to this blanket as I patched the pieces together.

Crafter heaven!! Here is what you need to make this Granny Square Blanket: yarn (3.5 oz, 170 yd) 4 skeins of cream, 1 skein each of 6 colors: purple, dark blue, green, berry, yellow, aquacrochet hook Icrochet needlescissors ** I’ve shared this before, but watch this video for a great tutorial on a basic granny square: I waited to hide all my tails in until the end. This was super simple to do. Tada!! A Simple Discovery: Arm-Chair 'Catch-All' Pocket Finished! Crochet bag with hearts tutorial. This bag is a combination of two patterns. 
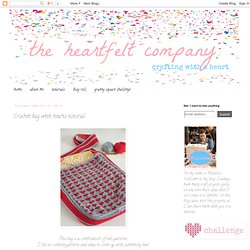
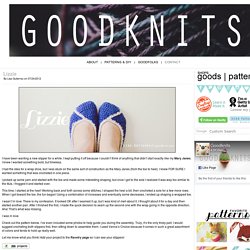
I like to combine patterns and ideas to come up with something new. You`ll need: *yarn, cotton. I forgot to write down how much I used but I`m guessing I used 200 gram grey and 100 gram red.

*crochet hook, I used 4 mm *fabric, depends on the size of the bag but you don`t need much *sewing thread *sewing machine This is what you`ll need to crochet. A front and back and the sides/strap. You also need to cut this in fabric. 1. I started with 64 ch. Edging, start with a 1 ch then sc (US), dc (UK) in every stitch, corners 1 sc, 1 ch, 1 sc, 1 ch, 1sc. The finished measurement is 30 by 34 cm ( approximately 12 by 13,5 inches). If you want you can make them bigger or smaller, adjust your strap if necessary. 2. Make a chain 180 cm long (70 inches). Round 1: 1 sc in 2nd ch from hook, 1 sc in every stitch to the end. Round 2: 1ch, 1sc in each stitch to the end. Repeat round 2 until the strap measures 7,5 cm (3inches). but I promise you`ll get there. 3. 4. 5. PS. Lizzie. I have been wanting a new slipper for a while. I kept putting it off because I couldn’t think of anything that didn’t start exactly like my Mary Janes. I knew I wanted something bold, but timeless. I had the idea for a wrap shoe, but I was stuck on the same sort of construction as the Mary Janes (from the toe to heel).

I knew FOR SURE I wanted something that was crocheted in one piece. I picked up some yarn and started with the toe and made some interesting shaping, but once I got to the sole I realized it was way too similar to the MJs. I frogged it and started over. This time, I started at the heel! I wasn’t in love. I was in love. Check out the pattern below. Let me know what you think! MATERIALS MC— 2 oz (100 yards) Vanna’s Choice yarn (100% acrylic, worsted weight; 3.5 oz/100 g—170 yards per skein) in “Colonial Blue” CC– less than 1 oz Vanna’s Choice yarn in “Linen” 5mm (US H-8) hook safety pin or other removable marker yarn needle NOTES Common U.S. terminology used in this pattern.

We Love Grannies! 30 Free Granny Patterns and Projects. Granny squares, stripes, hexagons and more are easy, pretty and a great way to use up all of your beautiful yarn scraps. Here are thirty granny patterns, all free, that celebrate our love of the granny! Note: Click on the link below each photo to go directly to the pattern. Happy crocheting lovelies! Eva's Doodlings: Bavarian pattern.

Well my lovely readers....here is the post about a beautiful and unusual pattern. And I should say it's a rare one! It is called Bavarian or there is one more name "yarn eater". It was my Mommy who wanted to try this pattern first! So I had to find out what pattern it was and how it should be crocheted. I didn't find a good pattern in the internet so I draw my own. Here is my first experience in Bavarian crocheting :)) and I succeeded I believe :) It was a cushion cover for my lovely friend I began crocheting.

I took these colours because my friend loves them and they go with her room perfectly! Dotted Doubles Crochet Tutorial. I think that I tend to prefer crochet patterns and stitches that don’t lend themselves well to changing colors for a very lazy reason. 
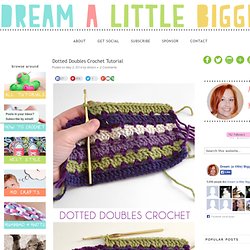
I hate weaving in the ends. In fact, my grandmother doesn’t even do it, instead knotting the ends like crazy and trimming them up. I must admit in my earlier days of crochet it is what I did as well, not knowing any better, and I’d get frustrated when an afghan I worked ages on unraveled after a couple of rounds in the washer and dryer. Which is why I now weave in my ends religiously. But I prefer pretty patterns full of color appearance-wise.

And this lovely pattern, the dotted doubles is chock full of pretty color that’s simple to achieve with some single and double crochets and totally worth the end weaving time… I use an H hook but use whatever is comfortable for you. Make your chain in multiples of 3. Turn and in the fourth chain from the hook, begin double crochet stitches all of the way to the end. **Change colors and chain 3. See where I link up. Thank you for joining. You're almost done! Crochet School. Sorry I've taken so long to post this very last post of the crochet school series. Would you believe me if I said I don't want it to end? Haha That's not the real reason, although it is a little weird to be writing the last crochet school post (for now).

I've just been busy designing new patterns and crocheting my butt off for the craft show I'm in next month, Deluxe. I was also waiting for all of you to have time to put in questions you want answered in this post. Let's cover those questions first: Carly asked "I think you mentioned that you can weave in ends with a hook. I have completed a blanket with super bulky yarn that will not fit in my yarn needle - would you suggest I weave in the ends with a hook and if so how"? Hi carly, Since you're making a blanket, I would probably just try to find a bigger needle. Nia asked "I understand how to make the corners when seaming horizontally but what about vertically.. do we skip the corners and just seam the sides? Remember crochet is fun! Before You Get Started... Ready to crochet? 
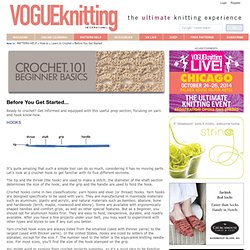
Get informed and equipped with this useful prep section, focusing on yarn and hook know-how.

It’s quite amazing that such a simple tool can do so much, considering it has no moving parts. Let’s look at a crochet hook to get familiar with its five different sections. The tip and the throat (the hook) are used to make a stitch; the diameter of the shaft section determines the size of the hook; and the grip and the handle are used to hold the hook.

Crochet hooks come in two classifications: yarn hooks and steel (or thread) hooks. Yarn hooks are designed specifically to be used with yarn. Yarn crochet hook sizes are always listed from the smallest (used with thinner yarns) to the largest (used with thicker yarns). You might want to explore finer crochet projects someday, so it’s a good idea to be familiar with steel hooks as well. You’ll be like a kid in a candy store when you step into a yarn shop. Yarn is available in three forms: pull-skein, pre-wound ball and hank. Crochet Pattern Organization. All things considered, I’m probably not the world’s most organized person. 
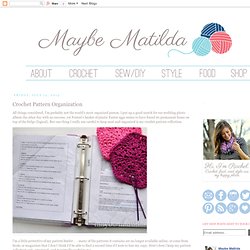
I put up a good search for our wedding photo album the other day with no success, yet Forrest’s basket of plastic Easter eggs seems to have found its permanent home on top of the fridge (logical).

But one thing I really am careful to keep neat and organized is my crochet pattern collection. I’m a little protective of my pattern binder . . . many of the patterns it contains are no longer available online, or come from books or magazines that I don’t think I’d be able to find a second time if I were to lose my copy. Here’s how I keep my pattern collection safe, organized, and maximally useful to me. 1) Keep patterns in one spot.

This tip may seem like a no-brainer, but crocheting is way less fun if it starts out with an hour-long search to find that one pattern you’re sure you printed, and you thought it was in your desk, but maybe it’s in your closet? No? 2) ALWAYS print out your patterns. 4) Keep notes. Crochet -- All About Crocheting -- Free Patterns and Instructions. Small Beginner Crochet Bag | Free Beginner Crochet Pattern.