
How to Make A Chronicle Quilt {Recycle Craft} Chronicle Quilts are so named because they were made by sewing strips of fabric on newspaper- like the Chronicle- to make warm, inexpensive quilts during the Depression.
In the time when the motto was “Use it up, wear it out: Just make do, or do without.” ….this quilt can help you “use it up”- all those scraps from your stash AND empty your recycle bin of newspapers. Plus, since it’s sew-and-flip technique, there is no fussy measuring or seam-matching- just sit, sew, and enjoy! Let’s get started! Start with some newspaper. Start anywhere yould like with a piece of fabric, right side up. Take another scrap, and cover up one of the raw edges, placing the fabric right side down. Sew it down, making sure you’re going through both layers of fabric. Open the seam and press, with an iron or just your fingers. Take another scrap, and again, cover the previous raw edges- completely. You don’t have to line up the edges exactly- go a little catty-wampus if you like.
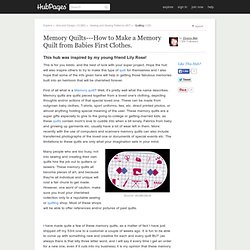
Flip it over…. ooh, ahh! How to Turn Old Baby Clothes into a Memory Blanket. Not everyone likes the ides of selling their little ones baby clothes.
There are many parents who want to hold on to the clothes and the memories attached to them. So why not make those old baby clothes into a nice memory filled quilt. Even if you are not good at sewing you can still make this fun project. To get started you will want to make sure that you have enough clothing to at least get the quilt started. Lay all of the pieces that you have for the quilt flat on a bed or another flat surface. Once you have all of the pieces separated you can start pinning the pieces together. Once you have finished sewing together all the pieces of clothing that you have you can make the blanket a bit thicker by sewing a piece of soft cotton material on the back. Memory Quilt Tutorial-Get those baby clothes out of the box and into your everyday life! Tutorial: A Baby Clothes Quilt from start to finish. Step 1: Determine what size quilt you are going to make.
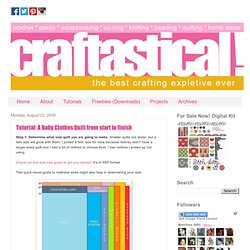
Smaller quilts are faster, but a twin size will grow with them. I picked a twin size for mine because Aubrey didn't have a larger sized quilt and I had a lot of clothes to choose from. I had clothes I ended up not using. Check out this quilt size guide to get you started. It's in PDF format. This quick visual guide to mattress sizes might also help in determining your size: Don't feel like you can't play with this a little, especially if you're going bigger.
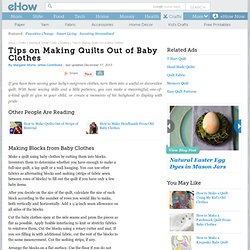
Determine your block size and how you are setting them in your quilt. My clothes in a bin: Step 2: Draft your quilt using graph paper. I didn't use graph paper, but here's my sketch: Step 3: Start cutting. I cut the clothing down the seams using a pair of scissors, although it would be possible to do it freehand with the rotary cutter. Squares rough-cut and waiting for flannel: Tips on Making Quilts Out of Baby Clothes.
Make a quilt using baby clothes by cutting them into blocks.
Inventory them to determine whether you have enough to make a full-size quilt, a lap quilt or a wall hanging. You can use other fabrics as alternating blocks and sashing (strips of fabric sewn between rows of blocks) to fill out the quilt if you have only a few baby items. After you decide on the size of the quilt, calculate the size of each block according to the number of rows you would like to make, both vertically and horizontally. How to Make a Memory Quilt from Babies First Clothes. Patch quilting with "sashing and cornerstones" There is however also a different way to get keepsake quilt done (which is my favorite) that would be by using a solid good quality poly-blend between each square called sashing with cornerstones.
The sashing creates a border or 'grid' around each of the quilting patches. The benefits are that each piece of the quilt will get stabilized. For this kind of quilt you will need to iron on interfacing to the back of you fabric if they're really thin or really-really stretchy. Let me back track... to cut strips of non-stretch fabric and surround each of your clothes-patches would definitely be more work but it would also give a lot of different options to your quilt. You will need less clothing items but more fabric. You will need: 7 yards/6.4meters of fabric for the backing, for the bias binding and the cornerstones. Tips: Many, many times it's happened in the past and it will happen again and again.
Baby T-shirt Quilts from Campus Quilt Co. No Sewing Machine? Hand Sew a Memory Quilt. I love to sew.

It is relaxing for me and lately has been a source of comfort. I haven't had a sewing machine in years now. I do everything by hand. I'd like to tell you how easy it is to make a memory quilt by hand with all the clothes and pieces of lace, buttons, even medals and rings you've saved, all the things that hold meaning to your life and your past. My husband recently died and I have all his blue jeans. I did the same with my children's baby clothes.