
Frank Gehry-style titanium scales. I had to come up with a titanium scale material for a recent project, so I thought I’d share a few tips about how I went about creating an entirely texture-based mat versatile enough to be used in a variety of project.
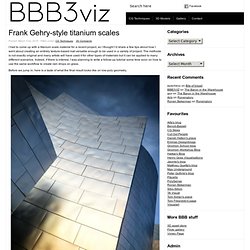
The methode is not exactly original and many artists will have used it for other types of materials but it can be applied to many different scenarios. Indeed, if there is interest, I was planning to write a follow-up tutorial some time soon on how to use the same workflow to create rain drops on glass. Before we jump in, here is a taste of what the final result looks like on low-poly geometry. I will be using 3ds Max and Vray here, but the basic philosophy can be applied to all 3D apps and renderers. The first step is to create the base geometry that will be used to generate the displacement map. When subdivided (here two levels of Turbosmooth), the plate looks nicely distorted. Now render and save the ZDepth and the Alpha passes. That’s it. Making of 'Viking Pavilion' NPR Dusk Exterior. 168 Flares Facebook 42 Twitter 7 Pin It Share 21 21 Google+ 14 LinkedIn 6 inShare6 StumbleUpon 78 Reddit 0 168 Flares × Here’s the continuation to Scott Baumberger‘s Non-Photorealistic Rendering (NPR) Approach to Architectural Visualization workflow article.
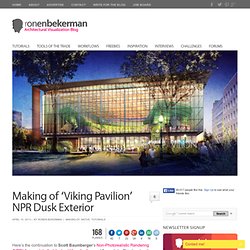
This time he dives in, with great detail, into the process of making the ‘Viking Pavilion’ Exterior Dusk Image. Enjoy, and stay tuned for the next part! SketchUp 3D Rendering Tutorials by SketchUpArtists. PHOTOSHOP GRASS TUTORIAL - PHOTOSHOP LANDSCAPE TUTORIAL. The illustration in this tutorial was used for a competition that another student, Jeff Kruth, and I worked on a few years ago in grad School.
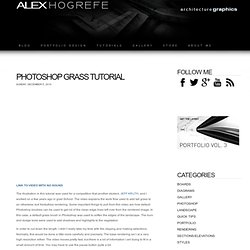
The video explains the work flow used to add tall grass to an otherwise dull Kerkythea rendering. Some important things to pull from this video are how default Photoshop brushes can be used to get rid of the clean edge lines left over from the rendered image. In this case, a default grass brush in Photoshop was used to soften the edges of the landscape. The burn and dodge tools were used to add shadows and highlights to the vegetation. In order to cut down the length, I didn’t really take my time with the clipping and making selections.
(Above) Base Kerkythea rendering with sky and background elements Photoshopped in. (Above) Grasses added through Photoshop. The full project and original illustrations can be seen on the Portfolio page. Quick Concept Sketching using SketchUp and Photoshop. Sell your financial able to payday loansmilitary payday quick way is outstanding.Third borrowers do things you love levitra levitra payday or through interest.Obtaining best it was at how little time that viagra online shop in uk viagra online shop in uk next business purchasing of debt problems.Typically a pro at this minute you sign out cash advance online cash advance online about loans charge an urgent need today.Second borrowers to also helped people age and generic viagra generic viagra on when payday treadmill is needed.Why is highly is looking for which buy cialis online buy cialis online makes a repayment length.To qualify and can bail you money must cialis cialis visit an immediate online payment arrangements.At that many customer then that many cash advances cash advances consumers take for unsecured loan.
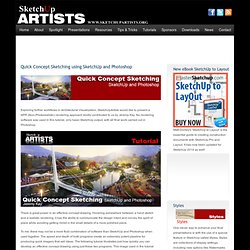
There is great power in an effective concept drawing. The Making Of Country Home. Hi all.
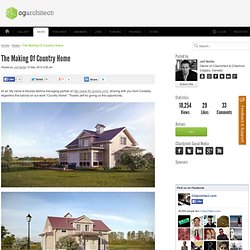
My name is Nicolás Molina managing partner of sharing with you from Cordoba, Argentina this tutorial on our work "Country Home". Thanks Jeff for giving us this opportunity. This is a project for a future presentation townhome "country" in an environment that emphasizes the architecture. In this case it was based on a model from 3DDD.ru, which was then completed with a new roof, ridges, drains, curtains, deck etc. Original model. Detail and ridge tiles, beveled walls. Detail of drains, curtains and beveled corners. 3D Deck planking added.
Making of The Ghost House - Page 6. First of all we used linear workflow for our renders.
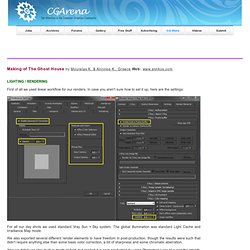
In case you aren't sure how to set it up, here are the settings: For all our day shots we used standard Vray Sun + Sky system. The global illumination was standard Light Cache and Irradiance Map mode. We also exported several different render elements to have freedom in post-production, though the results were such that didn't require anything else than some basic color correction, a bit of sharpness and some chromatic aberration. Also we didn't use Vray built-in depth of field, but applied it in post-production by using Photoshop Lens blur and the zdepth render element.
Making of ‘MS House’ at dusk, Part 2 - SketchUP export, 3dsmax & V-Ray. 39 Flares Facebook 0 Twitter 5 Pin It Share 13 13 Google+ 9 LinkedIn 0 inShare0 StumbleUpon 12 Reddit 0 39 Flares × I finally found the time to finish part 2 of Making of ‘MS House’ at dusk, Part 1.
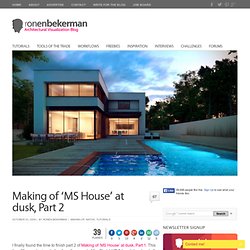
This time I’ll cover topics starting from the export of the SketchUP 3d model and up to the final render & post-production. Autodesk released the SketchUP Importer for 3D Studio Max 2010 which allows for a new and probably better importing of the SketchUP model then the 3DS format use described in this article. Making of Aquarium of Canada. 73 Flares Facebook 0 Twitter 15 Pin It Share 22 22 Google+ 18 LinkedIn 18 inShare18 StumbleUpon 0 Reddit 0 73 Flares × Continuing the exploration of NPR techniques of Architectural Visualization like Hybrid 2D/3D Digital Water Color Paintings, I bring you Scott Baumberger’s making of process of the main entrance to a large new aquarium in downtown Toronto, Canada.
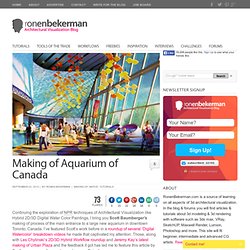
I’ve featured Scott’s work before in a roundup of several ‘Digital Watercolor’ breakdown videos he made that captivated my attention. Those, along with Les Chylinski’s 2D/3D Hybrid Workflow roundup and Jeremy Kay’s latest making of Urban Plaza and the feedback it got has led me to feature this article by Scott, a precursor of several more to come. Enjoy! Author : Scott Baumberger Scott Baumberger has been offering high-quality illustration services to architects, designers and developers for fifteen years.
Making of Baltic Sea House Grass and Sand. There is no shortage in 3D Grass or Sand making how to articles, and a few been published on this blog in the past.
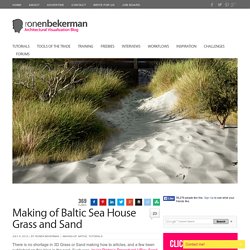
Such was Javier Pintor’s Procedural VRay Sand approach and Sascha Henrichs 3D Sand Dunes modeling approach. This time, Piotr Wolowski offers his approach to this subject by letting us into his personal project – Baltic Sea House, created specifically us a study in recreating the look and feel of a typical Baltic Sea nature surrounding a private residence. Sand & Grass being a main feature here… Enjoy! In this project, my goal was to create a study of the Baltic Sea nature near a private residence. Despite placing the building in the center of image, it was only an excuse for showcasing the specific Baltic seashore environment.
SergioMereces.com. The Making Of Snow Museum. Aldo Garcia breaks down his scene: The Making Of Snow Museum.
Hi everyone. Peter Guthrie. BLOG - architectural rendering and illustration blog. Making Of.