

How to Make an Origami Star Flower. How to Make Origami Bow (W/ a Few Cuts) DIY Woven Chain Collar Necklace. Earlier this month Lauren and I escaped city life with our dear friend Grace, of Stripes & Sequins, for a weekend chock-full of sun and DIY.

With an abundant supply of rhinestone and brass curb chain, we decided to try weaving the components together to make our own collar necklaces. It was fun to see how wonderfully different the pieces turned out - each so fabulous in their own unique way! Honestly, isn’t that the best part about DIYing with friends? You’ll need: Start by laying two pieces of curb chain side by side. Thread the floss under the first link on the left side and through the top of the 2nd link on the right side. Continue this weaving pattern. Tie a knot at the end. Using a different color flow, weave the floss around the first few links – again leaving about a foot of extra slack.
Washer Necklaces. I've seen several different tutorials for washer necklaces.
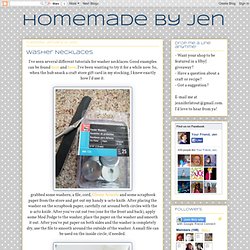
Good examples can be found here and here. I've been wanting to try it for a while now. So, when the hub snuck a craft store gift card in my stocking, I knew exactly how I'd use it. grabbed some washers, a file, cord, Glossy Accents and some scrapbook paper from the store and got out my handy x-acto knife. After placing the washer on the scrapbook paper, carefully cut around both circles with the x-acto knife. Then, apply Glossy Accents (or a similar product). Neat DIY gift and craft ideas.
* Design and Decor * - Vase of clothespins. DIY Wrap Bracelet. You should all know by now that we are all about stacking bracelets on our wrists.
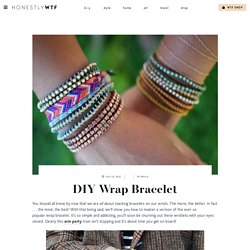
The more, the better. In fact . . . the most, the best! With that being said, we’ll show you how to master a version of the ever so popular wrap bracelet. It’s so simple and addicting, you’ll soon be churning out these wristlets with your eyes closed. Clearly this arm party train isn’t stopping and it’s about time you get on board! You’ll need (for a double wrapped bracelet) :* Lengths will vary depending on the size of your wrist (see comments for suggestions). Fold the length of leather cording in half to form a loop. Place the ball chain along the leather cording with the end of the chain meeting the end of the wrap.
Continue wrapping while checking it for fit around the wrist. When you have reached the end of the ball chain wrap the linen cording around the leather strands 2-3 more times. Thread the hex nut through the strands and tie a second knot. Trim with scissors and your wrap bracelet is finished!! Look to inspire. DIY Tube Bead Bracelet. On my birthday last month, my grandma gave me a set of those thin metal bracelets (see picture below).
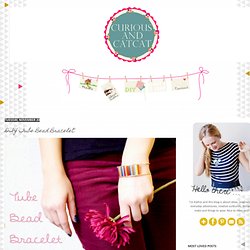
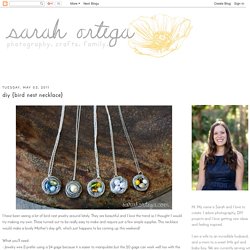
I have to admit that I never really liked these bracelets because they're too thin to be worn alone (and with a set of ten you could as well give the other nine away) and they tend to be quite noisy when worn in a bunch. So I took two of the bracelets and used them to make something I liked much better: A super simple bracelet using tube beads. Enjoy! [1] For this bracelet you'll need: Nylon beading cord, 0.01 inch in diameter (should fit at least 4 times through the beads you use). A bunch of 0.8 inch tube beads (also found as bugle beads) in the colors you prefer. Bird nest necklace} I have been seeing a lot of bird nest jewelry around lately.
DIY Clay Charm Bracelet. How To Mix Chalkboard Paint in Any Color. We love using chalkboards as backdrops for displays and parties (like this one here!).
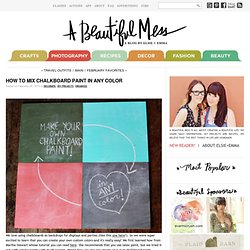
So we were super excited to learn that you can create your own custom colors-and it's really easy! We first learned how from Martha Stewart whose tutorial you can read here. She recommends that you use latex paint, but we tried it out with acrylic paints with much success. Here's how you too can create your own chalkboard paint... Supplies: 1/2 cup acrylic paint (choose any color you like, or mix colors together to make the perfect shade!)
1. 2. Once your chalkboard has fully dried be sure to slate the surface before using it for the first time. Have fun creating any color combination you like!! DIY Dinosaur Tutorial. Meet Julie the Dinosaur.

I asked my husband what we should name her, and he said Julie... so Julie she is! Julie Measures 18" long from nose to tail & 10" from toes to spikes. After printing & cutting out your pattern pieces, you need to assemble them as illustrated above. Tape the pieces connected by the light grey strips. Cut out fabric with a 1" hem allowance. Most favorited last 7 days - page 2. Geometric Tile Gem Necklace. This bib necklace is a bargain and easy to boot.
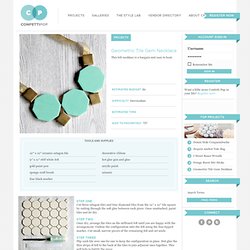
Estimated Budget $9 Estimated Time Add to Favorites? Login to add to your favorites Tools and Supplies 12″ x 12″ ceramic octagon tiledecorative ribbon9″ x 11″ stiff white felthot glue gun and gluegold paint penacrylic paintsponge craft brushscissorsfine black marker Cut three octagon tiles and four diamond tiles from the 12″ x 12″ tile square by cutting through the soft glue between each piece. Once dry, arrange the tiles on the stiffened felt until you are happy with the arrangement. Flip each tile over one-by-one to keep the configuration in place. Hot glue one strand of decorative ribbon to each upper most gold tiles to create your necklace’s “chain.”