background preloader

DIY

Facebook Twitter

DIY & Decorating Idea Roundups - Addicted 2 Decorating® 12 IKEA Rast 3-Drawer Chest Hack Ideas 15 Outdoor Projects For Your Backyard Five Fabulous Bathroom Makeovers 30 D.I.Y. Decorative Pillow Tutorials 15 Inspiring Dining Chair Makeovers 8 Amazing Before & After Coffee Table Makeovers 5 Fourth Of July Wreaths You Can Make 7 Front Door Spring Decor Ideas (Wreath Alternatives) 9 Inspiring Chandelier Makeovers 18 Beautiful DIY Spring Wreaths 10 DIY Projects To Make With Cabinet Doors 30 Ways to Craft & Decorate With Wine Corks 20 Ways To Arrange A Decorative Plate Wall 35 Beautiful DIY Winter Wreaths 19 Projects You Can Make With Paint Chips 45 Ways To Craft & Decorate With Jute 14 Ways To Add Color, Pattern & Texture To Ceilings 12 Beautiful Autumn Mantels That Will Inspire You 12 Ways To Repurpose An Old Dresser 11 Bright And Colorful Interior Doors 6 Ways To Repurpose Drawers.

Digitprop - Paper design. Build a Wall Niche: The Family Handyman. Overview: Cost, tools and materials If you need to carve out more storage space in your bathroom, we've got the project for you. Bathrooms are notoriously cramped, so we designed this cabinet to fit inside a wall, where it won't take up valuable space. We kept the width slightly narrower than the 14-1/2-in. stud space, so the cabinet will fit even if the studs are a little off center or bowed. We installed our cabinet in a bathroom, but it will work in any unobstructed wall cavity (more on that later). In this article, we'll show you how to build and install the cabinet. You can complete the project in just one weekend: Build and stain (or paint) it on Saturday, then stick it in the wall on Sunday.

Everything you need for this project is available at home centers. To complete the project, you'll need a miter saw, a circular saw or table saw, and a drywall saw. Figure A: Wall Niche Details Figure A: Wall Niche Details Overall Dimensions: 21“ x 35“ Step 1: Plan where to put the cabinet 1 of 1. PCsupport4me. Cara Merakit Komputer - Sepuluh Langkah Merakit Sendiri. Cara merakit komputer umumnya tidak akan mudah saat pertama kali mencoba. Mungkin akan ada beberapa kali trial dan error yang terjadi saat belajar merakit sendiri komputer. Akan tetapi setelah mencoba dengan serius, kita pun bisa merakit komputer sendiri dengan cukup mudah. Hanya saja untuk dapat menuju kesana, kita masih butuh beberapa panduan tentang cara merakit komputer.

Sebelum anda memulai cara merakit komputer berikut, ada baiknya anda tahu terlebih dahulu apa saja yang harus anda siapkan. Oleh karena itu, mari kita telusuri komponen-komponen hardware apa saja yang harus anda beli secara terpisah. Yang paling penting siapkan casing CPU anda. Casing ini adalah penutup atau kerangka luar semua komponen hardware penting anda. Onboard motherboard adalah yang paling sering dicari karena kepraktisannya. Langkah awal yang perlu dilakukan dalam merakit komputer adalah memeriksa terlebih dahulu posisi jumper dengan mencari tahunya di buku petunjuk.

DIY Project: Tiered Hanging Pots. When you collect as many things as I do, floor and table space can quickly become precious commodities. Having shelves full of plants is just not feasible in the studio, but I was not going to let that stop me from pursuing my dream of building a little greenhouse. If you have an interest in going vertical with your greenery, you could whip up this tiered hanging planter in a day.

You just need a tiny bit of scrap wood, some rope and a few basic woodworking tools. The best part — which should have been obvious to me from the start, but being a total gardening novice, it wasn’t — is that the system makes watering a breeze. All the runoff from the previous pot drips into the plants below, so you only need to place a little dish or bucket under the bottom. Enjoy! Read the full how-to after the jump . . . Materials scrap woodjigsawterracotta potsrope3/8″ boring bitpaintbrush and paintdrillplantsmetal ring Instructions 1. 2. 3. 4. 5. 6. 7. 8. You’re done!

How-To. So, I’ve been wanting to do another concrete craft ever since I participated in, and WON, the Panduro concrete challenge a few years ago. See my entries to the challenge at the end of this post. Anyway, I had envisaged doing a concrete circle grouping like I showed here, but as the time went by I decided against the idea. I still had some bags of concrete in the garage and was itching to do something fun with them. In the photo above you see the entrance to our back yard from the park. There were some random pavers going on a diagonal from the walkway towards the opening and they’ve bugged me ever since we moved in. 1) Don’t like those pebbled pavers at all. 2.
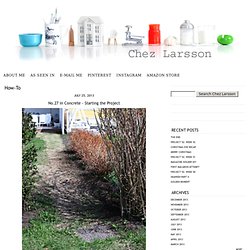
On a diagonal? I like things straight. So I dug them up. My idea was to use this piece of chunky cardboard tube which I’ve saved for a long time to make a house number. I should mention that I’ve have a lot of help on this project by a certain girl. To be continued. While you’re waiting , check out my other concrete crafts: Cara memperbaiki kipas angin atau exhaust fan yang lemah atau lambat putaran motornya ~ Tips dan Triks. Cara memperbaiki kipas angin atau exhaust fan yang lemah atau lambat putaran motornya Ini adalah sebuah tips dan triks bagi teman - teman yang tidak mempunyai bekal ilmu kelistrikan atau elektronik menemui masalah kipas angin atau exhaust fan di rumah anda putaran motornya sangat lambat atau melemah, dua minggu yang lalu saya menemukan masalah seperti ini setelah tanya beberapa teman apa saja fungsi komponen pada exhaust fan dan kipas angin yang berhubungan dengan putaran akhirnya berhasil juga.

Tanpa berbekal kelistrikan yang cukup saya coba mengganti salah satu komponen yang terdapat pada exhaust fan tersebut dan tanpa diduga ternyata tips dan triks ini memuaskan dan berhasil, ini tidak terlepas dari bantuan teman - teman. Sungguh senang rasanya exaust fan saya yang selama ini berputar sangat lambat bisa sekencang pada saat pertama saya membelinya. Bagaiman cara mengganti capasitor kipas angin atau exhaust fan tersebut : 1. 2. 3. 4. 5. Wonder How To » Show & Tell for Creators & Doers. Keeping Life Creative, Digital Scrapbooking, Themed Album | Keeping Life Creative. Sometimes I dread documenting my “event” photos (birthday, Christmas, vacation, etc.) because I get bored of the same event over and over.

However, I’ve found a solution that’s currently working for me and I’ve been organizing these photos into a themed mini album, and then printing in a 20-ish page hardbound book. Since starting a themed album can be a bit overwhelming, I thought I’d share a few tips on streamlining the process. 1. Organize your event photos into mini themes. The Space Needle: Pike Place Fish Market: But breaking photos into mini themes isn’t always easy. “Good Eats” features random photos centered around preparing or eating food. “Rest and Relaxation” is a collection of photos of people sleeping, cuddling babies, watching TV, etc. I grouped all the kiddie pool photos in this “Pool Party” spread. 2. In my recent Girls’ Getaway album I chose a kit and additional elements to carry the theme of the vintage shops we visited. 3. 4. 5. 6.

One page at a time. Hi! Digital Scrapbook Layouts. Let your imagination run wild with KB and Friends’ new Flights of Fancy digital scrapbook kit. This large kit designed by Kathryn Balint and Velma Balint is full of fanciful scrapbook embellishments that will add a touch of whimsy to your fantasy scrapbook pages. We think you’ll love the whimsical treehouse, the bridge, the floating island and the fun mushrooms, strawberries and flowers. Flights of Fancy is on sale for 25 percent off, along with some of our other popular, and newer, full-sized scrapbook kits, now through Friday, Oct. 2, 2009. Other kits on sale include: Social Butterfly, Bloomin’ Crazy, Room with a View and Romantically Inclined. Flights of Fancy digital scrapbook kit. Burlap & Wood Love Frame Collage. I've been imagining this one for a while now and am happy to be able to finally show it off! The inspiration came from all of the different collage frames and frame gallery walls that seem to be everywhere lately.

After a trip to Goodwill and $4 later I was well on my way to starting my frame collage. I had black primer and black spray paint on hand already, so I gave the mismatched frames a couple coats of each. Much to my dismay, when I asked my husband for help gluing the frames together, he told me I should've glued them before painting them. Apparently wood glue doesn't adhere to paint very well.

Two days later I removed the clamps and used a small brad nail gun to shoot small nails through the portions of the frames that were glued, just as an extra step to make sure that the collage was good and sturdy. Now I have a secure frame collage and burlap pieces for the four frames that I want to spell LOVE and two empty frames for pictures. Let me know what you think. 'til next time, Adina. What do to with your favorite photos — by Guest Mom Amy M. Being a photographer is one of the things I love most.

Catching the details of my life has become something I can’t live without. I enjoy looking through each photograph and savoring each memory that is tied to it, but I am always faced with the tough question, what should I do with my photos now? Here are some of my favorite ideas. Since I really enjoy scrapbooking my photos are most often then not used for that purpose, but then they are stuck in albums and not seen very often (if they get scrapbooked at all which seems to be the case as of late), so something I’ve done is frame the layouts so they can be enjoyed by all. Another great idea is to hang a shelf and do a collage of frame photos.

Or instead of using a shelf you could put them in a very pleasing arrangement (9x9in frames from IKEA). This just happens to be one of my favorite ways to display your photos, perhaps because it’s a creative way. Creating an accordion photo box (click here for more photos). DIY. DIY Natural Room Scents.

Don't miss my follow-up post to this one withNATURAL ROOM SCENTS FOR DIY GIFTS & CENTERPIECESCLICK HERE This post was featured in the April 2013 issue of Woman's Day magazine. Here's the thing. I'm married to a man who hates artificial scents of any kind. That goes for air fresheners, candles, perfume, soaps and anything else that is scented. We buy unscented everything. I could probably buy a car with the money I've saved on perfume throughout the years of our marriage. Turns out that King-Man may just be ahead of his time. But, the air in my house gets stale sometimes. There is a simple, all natural, truly lovely solution. Keeping the supply list simple. How to Make Natural Room Scents Fragrant items for naturally scenting your home: citrus -- I've tried other fruits.

View whole spices on Amazon: cinnamon sticks, anise stars, allspice, cloves, vanilla beans Five Natural Room Scent RecipesThese are all scents that my nose likes. View on Amazon: ♦pint jars ♦plastic lids for jars Gift them!