

The Gilded Hare: tutorial: color blocked bird pendant. Spoon Ring DIY. Here is a fun and ridiculously easy tutorial for you about making your own pretty ring! The hardest part is actually to find the perfect spoon. No you didn't read it wrong, I did say: spoon. This ring is gonna be made from the backpart of a spoon! (or fork, knife, etc.) Creative jewelry from bottle caps. Posted on September 1, 2010 in Creative If you’re new here, you may want to subscribe to our RSS feed or follow us on Facebook or Twitter . Thanks for visiting! Rate this Post (1 votes, average: 5.00 out of 5) Loading ... Stones and Leather. Stones and Leather.
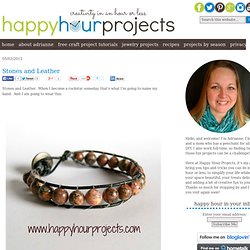
When I become a rockstar someday, that’s what I’m going to name my band. Upcycling Shirts Tutorials. Day three: Shirt into Bracelet (There is an update about this post, on the bottom part of this page) Pictures by Lana ------------------------------------Update------------------------------------ Red, White & Blue Wrap Bracelet. I love July 4th.
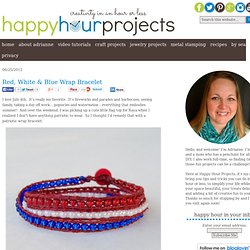
It’s really my favorite. It’s fireworks and parades and barbecues, seeing family, taking a day off work… popsicles and watermelon – everything that embodies summer! Perfect Summer Bangle. Here's a fun tutorial on how to make a message bangle that's one-of-a-kind, done in the sun, waterproof and weatherproof.

Even after several trips to the beach, it won't fade or wash off! Essentially, it's the Perfect Summer Bangle. Adjustable Ribbon Bracelet. Hello Friends! I am feeling fashionista this morning! Weeks ago I got to share my Adjustable Ribbon Bracelet over at Tatertots and Jello and today it is time to bring it home and share it with you! I love when I make a project with endless possibilities and I think this adjustable ribbon bracelet is just that. Think about the embellishments… from felt flowers, to buttons or missing earrings… Bettina's Blog - Something handmade. Make Bracelets from T-Shirts. Paperyandcakery.com. It’s been hot. So hot that just the thought of spending time with my glue gun makes me sweat. How to make a simple Friendship Bracelet. I taught a children's jewellery design class yesterday and I enjoyed every minute of it. Their excitement and wonder as the designs started to take shape was indeed a beautiful thing to witness.
Their questions came at me at mock speed and I realized that writing an article about how to make these Friendship Bracelets would be far more civilised and calm. The Friendship Bracelet that I will be showing you is the simplest design: the straight line. And it really is as simple as tying knots. How to make a Peruvian Wave Friendship Bracelet. Having written an article recently about making the most simple Friendship Bracelet, I wanted to quickly follow it up with my favorite Friendship Bracelet design. It is a design that I was not aware of way-back-when in school, when making these bracelets was so popular. The design is also surprisingly simple. I have taught the technique to a group of 8-10 year olds and they picked it up easily.
I'll have you knotting in no time! Materials Needed 4 or more different colors of embroidery flossTape or a clipboardScissorsDepending on your taste, a thicker piece of cord, string, or even a shoe lace. The great thing about this project is that is inexpensive. Step 1: Cut your thread Cut approximately 30 inches of each color of embroidery floss. You will be tying these thread to one central cord. Step 2: Tie a knot & lay out your colors Hold all your embroidery floss as well as the central cord of your choice and tie a knot leaving a 2 inch tail.
Step 3: Forward knots. Button Statement Rings. On any given day: episode three. Crafternoon to the max. Yesterday I had a Savers run post farmers market visit. I could have gotten all the things, but instead I just got some too hot to handle high waisted, salmon colored, spandex-y capris. To make into shorts, of course. $4.00 Golden Parade Bangles. Some women have a thing for shoes; I have a thing for bracelets.
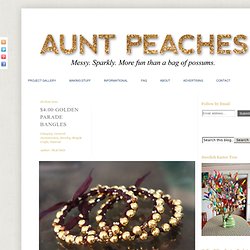
I love wearing them. I love looking at them. I love the sound they make as they jostle around on the wrist. DIY Nautical Knot Bracelet. Tutorial: Paper Pendants. If you have been reading my blog for a while, then you are well aware that I reallllly wanted a Silhouette Cameo.
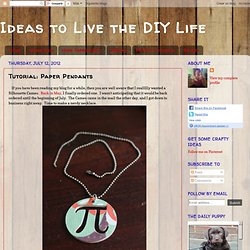
Back in May, I finally ordered one. I wasn't anticipating that it would be back ordered until the beginning of July. The Cameo came in the mail the other day, and I got down to business right away. Time to make a nerdy necklace. Before you say, "What the heck? "... After the jump you can see all the steps to make this beauty (or a paper pendant of any other design). To make this you will need the following materials: -paper that you like the design or color of -clear gel Tacky Glue -a jump ring -a chain, rope or some other material for the necklace part.
Braided wrap bracelet. There was a time my arms where filled with bracelets.
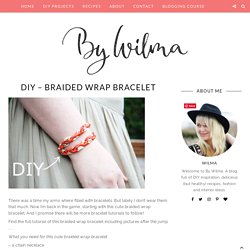
But lately I don’t wear them that much. Now I’m back in the game, starting with this cute braided wrap bracelet. DIY // Faux Gauges / Plugs. If these don't say "statement" I don't know what do!
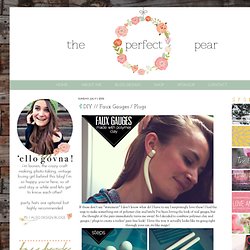
I have to say I surprisingly love these! I had the urge to make something out of polymer clay and lately I've been loving the look of real gauges, but the thought of the pain immediately turns me away! So I decided to combine polymer clay and gauges / plugs to create a rockin' pain free look! I love the way it actually looks like its going right through your ear, its like magic! Materials: Earrings you don't use, polymer clay, sharp knife or clay cutter, cutting board. 1: Separate two balls of polymer clay, smaller than the size of a golf ball. 2: Roll them both out into cones that create a point at the end. 3: Bend them down like so. 4: Cut a chunk of polymer clay from your earrings.