
Tips & Tricks for conditional iOS3, iOS3.2 and iOS4 code. A project or target that supports multiple versions of iOS To make an application target that runs on multiple versions of iOS is relatively simple: Set the "Base SDK" in your projects settings to the newest version number of iOS whose features you may want.Set the "iPhone OS Deployment Target" to the oldest version number of iOS that you will support However, getting the target settings correct is the easy part of the problem.
The hard part is using new features on newer iOS versions without breaking the app on older versions. Running in the 3.1.3 simulator Before getting to the actual code, it might be worthwhile to discuss how to run your projects in older versions of the simulator. The simulator is an important part of iOS development (since it is much faster and simpler than running your code on the device). Converting to a Universal App (Part I) - Blog. My notes and general comments on converting an existing iPhone App to a Universal binary.
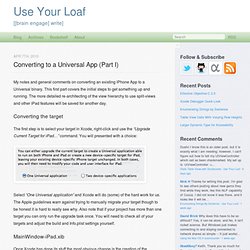
This first part covers the initial steps to get something up and running. The more detailed re-architecting of the view hierarchy to use split-views and other iPad features will be saved for another day. Converting the target The first step is to select your target in Xcode, right-click and use the “Upgrade Current Target for iPad…” command. You will presented with a choice: Select “One Universal application” and Xcode will do (some) of the hard work for us. MainWindow-iPad.xib Once Xcode has done its stuff the most obvious change is the creation of the Resources-iPad directory containing a new Main Window NIB file named “MainWindow-iPad.xib”.
If your existing MainWindow.xib was localized then localized versions of the MainWindow-ipad.xib will also be created which saves some effort.Only the Main Window NIB is converted. Japanese Fonts on Quartz. Quartz で 日本語 font が使いたい on iPhone CGFontGetGlyphsForUnichars に代わる関数を呼び出せる実装を用意したよ。
という話です。 最近 iPhone アプリ開発にはまっているのですが、iPhone の 高速な 2D 描画機能である Quartz で日本語を使うのに苦労したので書き残しておきます。 Quartz は Mac 向けの OSX でも採用されている、PDF の操作なども出来る高速な 描画フレームワークです。 Objectice-C から呼び出せますが、基本的には C の関数を呼び出して使うようです。 例によって Apple のドキュメントが素晴らしくまとまっており、Webから閲覧出来ます。 この資料にも、Text という章があって次のようなコードで文字の描画できるとあります。 Void MyDrawText (CGContextRef myContext, CGRect contextRect) { float w, h; w = contextRect.size.width; h = contextRect.size.height; CGAffineTransform myTextTransform; CGContextSelectFont (myContext, "Helvetica-Bold", h/10, kCGEncodingMacRoman); CGContextSetCharacterSpacing (myContext, 10); CGContextSetTextDrawingMode (myContext, kCGTextFillStroke); CGContextSetRGBFillColor (myContext, 0, 1, 0, .5); CGContextSetRGBStrokeColor (myContext, 0, 0, 1, 1); myTextTransform = CGAffineTransformMakeRotation (MyRadians (45)); CGContextSetTextMatrix (myContext, myTextTransform); CGContextShowTextAtPoint (myContext, 40, 0, "Quartz 2D", 9); }
Chris Hanson - Xcode: Debugging Cocoa application unit tests. A couple weeks ago as part of my Unit Testing Series I talked about how to use Xcode to write unit tests for Cocoa frameworks, debug unit tests in Cocoa frameworks, and write unit tests for Cocoa applications.
However, I haven't yet described how to debug your unit tests in Objective-C Cocoa applications. I'll take care of that tonight. After you've set up unit testing in your Cocoa application, debugging your unit tests is similar to debugging them in a Cocoa framework. All you have to do is adjust the arguments and environment variables your application's Executable is configured to use in Xcode.
You don't even have to create a new executable. To start, bring up the Info window for your application's executable (which is its entry in Xcode's Executable smart group). Now we'll need to engage in a little bit of environment variable magic. In the Arguments tab of your application executable, first add an environment variable named DYLD_INSERT_LIBRARIES. Why do you need to do this? Theocacao: Improved "Open Quickly" Feature in Xcode 3.1. Xcode 3.1 has an updated version of the "Open Quickly" dialog.
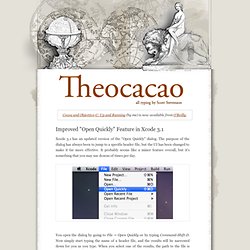
The purpose of the dialog has always been to jump to a specific header file, but the UI has been changed to make it far more effective. It probably seems like a minor feature overall, but it's something that you may use dozens of times per day. You open the dialog by going to File → Open Quickly or by typing Command-Shift-D. Now simply start typing the name of a header file, and the results will be narrowed down for you as you type. When you select one of the results, the path to the file is shown in the path control along the bottom. There are, of course, other ways to open header files.
Complete Xcode Keyboard Shortcut List (UPDATED) Support - Discussions - ResourceRules.plist - cannot compile ...