
Pogo Mobile uBoot Debian. Avoir son propre serveur Cloud. Si vous voulez monter votre propre serveur cloud, un peu à la Dropbox mais sur votre propre serveur, histoire de conserver la propriété de vos données, il existe de plus en plus de solutions intéressantes.
La dernière que j'ai découverte hier matin s'appelle OwnCloud. Il s'agit d'une appli PHP, qui couplée à un Apache+MySQL permet d'uploader et de synchroniser ses fichiers entre plusieurs ordinateurs, soit via l'interface web, ou soit via des clients compatibles WebDAV. Cela signifie qu'un serveur OwnCloud est accessible depuis tous les OS (Linux, Win, Mac et autres), mais aussi via des applications mobiles comme ce client Android en cours de développement ou ce client WebDav sur iPhone (payant). La version 2 d'Owncloud, qui est sorti le 11 octobre dernier est je trouve encore peu documenté. Le wiki est vide, mais gageons que ça se remplisse vite. Pour installer OwnCloud, il suffit d'avoir une machine Linux sous la main et de suivre ce tuto. [Source et photo] Install package isv:ownCloud:community / owncloud.
Aaron Randall. Or, “How to turn your Pogoplug into a BitTorrent, file and web server!”
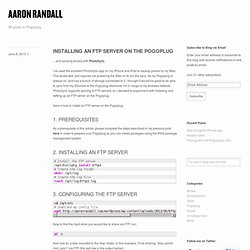
Please note: Follow the instructions below at your own risk. Please do not blame me if your Pogoplug breaks 17/06/2012 – I’ve received a number of queries via my contact page so I thought I would clarify here; existing Pogoplug functionality (such as my.pogoplug.com and the Pogoplug drivers) should be unaffected by the instructions in this post (and my other blog posts regarding customising the Pogoplug). Enjoy! Pogoplug is a small embedded Linux device sold to enable personal cloud computing. If you have one already and would like to add support for 100s of different applications, including a BitTorrent client, Samba, Apache Web Server, CUPS etc, then read on!
The great thing about the Pogoplug is that it allows root access via SSH, and also includes an unused internal flash drive, perfect for tinkering with. Install Lighttpd and Webdav on a Pogoplug. So when you install Debian on your Pogoplug you lose web access to your files.
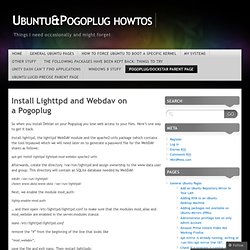
Here’s one way to get it back. Install lighttpd, the lighttpd WebDAV module and the apache2-utils package (which contains the tool htpasswd which we will need later on to generate a password file for the WebDAV share) as follows: Installation et paramétrage du pogoplug - Ze Chubb-Chubb's Grange. Pogo Plug Pink Serial Connection - hack247. The PogoPlug pink is a low powered linux based computer that is based around the SheevaPlug.
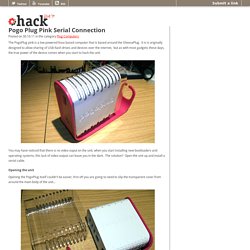
It is is originally designed to allow sharing of USB flash drives and devices over the internet, but as with most gadgets these days, the true power of the device comes when you start to hack the unit. You may have noticed that there is no video ouput on the unit, when you start installing new bootloaders and operating systems, this lack of video output can leave you in the dark.
The solution? Open the unit up and install a serial cable. Opening the unit Opening the PogoPlug itself couldn't be easier, first off you are going to need to slip the transparent cover from around the main body of the unit… With this cover removed, take a small flat headed screwdriver and insert it in between the two halfs.
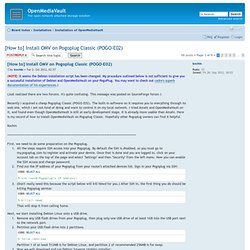
Revealing the motherboard and power supply PCB of the PogoPlug.. Constructing The Cable. Pogo-Debian 1. Pogo-Debian 2. Pogo-Debian "Wheezy" Pogo-Debian - The best way. Contents Introduction This guide describes the steps I took to install and configure Debian on my PogoPlug.
Pogo-Hack 1. GOAL:To setup from beginning to end a personalized Pogoplug server.

Installation of Arch Linux, with addition of Apache, PHP, MySQL and whatever else we may decide upon. Pogoplug v2 (Pink/Gray)2gb+ Clean flashdrive or external hard driveMac Terminal or Windows Terminal Program (I like PuTTY)Basic Linux knowledge and the ability to follow a manual Install time. (This varies greatly, but figure about 45 min for a Linux veteran, maybe about 90+ for novices. Depending on what it is you would like to do, configuring this beast could take hours or days..) Following this guide will void your manufacturer’s warranty, and will lead to very little official support in the event of imminent failure.
Pogo-Hack 2. GOAL:Install all system updates and a handful of useful tools as well as the Webmin utility.

Pogoplug that has been hacked from Part 1 Fire up your terminal program. We will do a little maintenance and install a few apps you may want/need down the line. Copy and paste the following code boxes in order, one at a time.Make sure to read the content as not all boxes are copy paste. Step 1: Updates and Tools: Lets start by making sure the system is totally up to date with all installed packages Next lets update the pacman installer. Followed by some zip and archive tools And then two popular terminal based text editors Step 2:Fixing the clock From here we are going to edit a file to fix the system clock. At the top find TIMEZONE Scroll down to the bottom, and find DAEMONS. Pogo-Linux Web Server. OpenMediaVault - Debian Squeeze. (NOTE:It seems the Debian installation script has been changed.
Pogo-Arch Linux 1. Pogo-Arch Linux 2. In my case, I am using a Brother HL-2270DW (highly recommended, works great and cheap toner) which has built in wireless and supports various printing options - socket, ipp, http, etc.
I'm going to use socket (AppSocket/HP JetDirect) which is the same option you would select if you had your USB printer directly connected to your PogoPlug. USB attached printers should be auto detected (untested). For the Brother wireless printer, the Connection address I'm using is " ( for the record " would also work).If you're using a DD-WRT or TomatoUSB Router as your print server, " would be the correct Connection address..Name your printer. Check the "Share This Printer" checkbox. Select the Make/Model of your Printer. Set your Default Options. Print a test page. Printing a test page needs to work. Cloudprint is very fragile. Pogo-Serial Connection.
Install Hamachi VPN on the PogoPlug USB Device. Update: A newer version of this article has recently been posted.
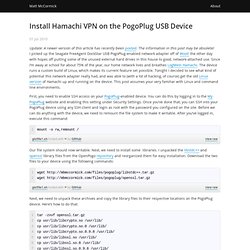
The information in this post may be obsolete! I picked up the Seagate FreeAgent DockStar USB PogoPlug-enabled network adapter off of Woot! The other day with hopes off putting some of the unused external hard drives in this house to good, network-attached use. Since I’m away at school for about 75% of the year, our home network lives and breathes LogMeIn Hamachi. The device runs a custom build of Linux, which makes its current feature set possible. Pogo-USB Boot. The G Man Speaks: PogoPlug Cheap NAS.
I wrote previously about , a good deal from Pogoplug. I was really intersted in that there was a Sata port on the inside and it had a Gigabit Ethernet port. I explored the options available to connect and power a sata drive. I eventually found a " NEON SSD/HDD Stand-alone Duplicator and Docking Station (USB2.0 - eSATA) " on MemoryC.com. Just under €32 and free shipping. What could possibly go wrong? OK, so crack open the PogoPlug, easy. Warning: The power board is on the right of the picture. Run Linux on your Dockstar, GoFlex, or Pogoplug NAS. This guide will replace the locked bootloader on your device with a new version that can boot from a variety of locations, including USB drives.
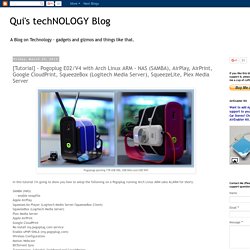
The installer will create a simple Debian Linux installation on your external USB drive. From there, you can install any of the 25,000+ packages from the Debian repository. If you decide that you don't like Debian and want to use the old Pogoplug software, simply unplug your USB drive and reboot. After you've installed Debian, please visit the forums for additional project ideas and support. Qui's techNOLOGY Blog: [Tutorial] - PogoPlug E02 with Arch Linux ARM - NAS (SAMBA4), AirPlay, AirPrint, Google CloudPrint.