

Depth of Field in Photoshop. Are you new to Photoshop?
Have you been trying to teach yourself the basics of Photoshop but have found the amount of educational material available on the net a bit overwhelming? As the world's #1 Photoshop site, we've published a lot of tutorials. So many, in fact, that we understand how overwhelming our site may be to those of you who may be brand new to Photoshop. Using Photoshop and Your Brain to Produce Diorama Illusions. Have you ever built a diorama?
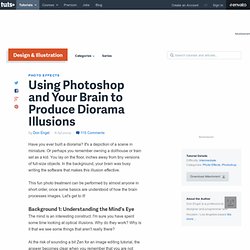
It's a depiction of a scene in miniature. Or perhaps you remember owning a dollhouse or train set as a kid. You lay on the floor, inches away from tiny versions of full-size objects. In the background, your brain was busy writing the software that makes this illusion effective. This fun photo treatment can be performed by almost anyone in short order, once some basics are understood of how the brain processes images. Background 1: Understanding the Mind's Eye The mind is an interesting construct. At the risk of sounding a bit Zen for an image editing tutorial, the answer becomes clear when you remember that you are not actually experiencing reality when you look at the world. When you were very young, your brain wrote the software that it uses to process image data from your eyes.
Background 2: Effects of Depth of Field on Perception. Foggy Window Effect in Photoshop. Apply a Tilt-Shift Effect to a Video Using Photoshop. Tilt-shift is an effect that when applied to an image or in this case, a video, will create the illusion of miniaturization, making it seem as if the video is shooting a model set and not real life.
To create one of these videos outside of Photoshop would require an expensive camera and and an even more expensive lens, which can cost into the thousands of dollars. In this tutorial I will show you how to create this effect using only Photoshop and how to apply it to almost any video. Tutorial Assets The following assets were used during the production of this tutorial. Download Original Footage Before you begin. Step 1 Before opening Photoshop, install the Extension that was included in the tutorial assets. PC users, if for some reason, it will not let you install the Extension, close and re-open the Extension Manger by right-clicking on the program in the start menu and selecting "Run as administrator". 110 Best Photoshop Photo Manipulation Tutorials.
Create a Lost Fantasy Micro World with Powerful Photo Manipulation Techniques in Photoshop. Today we will take a break from the ordinary stuff and go into a fantasy world.

Learn how to build up your own micro society using many different pictures and some cool photo manipulation techniques. Preview Detail Step 1 Let’s start by creating a new document of dimensions around 1500x1300px. Grab Ellipse Tool (U) and draw an ellipse in the center of the design (make sure it’s set to Shape Layers). Duplicate that ellipse layer. Step 2 Now download one of these concrete textures and drag it to the project. Create another adjustment layer above the texture – Curves. Next add another adjustment layer – Levels. Next, add a Gradient Map using colors from #231d18 to #f3d949. Step 3 Next, open one of these textures and drag it to your project. The texture should automatically jump “into” the layer as you can see below.
Continue adding this textures to the “bottom” layer, for each piece use a Clipping Mask. Step 4 OK, this is how the ground edges should look like after you’re done. Milk monster and chocolate splash. Humor digital art scene with milk and liquid chocolate cartoon character , milk and chocolate, photoshop, splashes, monster, eyesballs, bubbles, cartoon character, cute, drops, hot chocolate, liquid. Used images: Milk [link] Chocolate [link] Bubbles [link] [link] Eyes [link] Water drop[link] - Creative Commons Attribution-Share Alike 2.5 Generic Teeth [link] Help files [link] Open milk texture image in Photoshop The original image has some noise, in order to improve milk texture, apply Filter > Blur > Surface Blur with following settings: Make the picture little bit lighter by playing with Levels settings.

This is result of our changes. To create monster character, we will use milk surface specifics. To create tongue, use Burn and Dodge tools. Apply Dodge Tool to the convex areas of the "tongue". And Burn Tool to the shadow areas. Choose Elliptical Marquee Tool and select one of the milk drop. You may copy and paste to cheeks area different milk drops, to get various bubbles texture. Add Drop Shadow effect layer style effect to the copied milk circles. For the small circles use Distance parameter around 1-2px. Manipulate Smoke to Create Hyper-Real Images. Learn to apply the Warp Tool effectively and a few other tricks to make smoke look like a skull.
This technique has a variety of outcomes and works well with water, clouds and a whole bunch of other stuff. This is probably more for intermediate users, as I guide you through the process well, but not every Warp Grid point handle move. Let's get started! Final Image Preview Take a look at the image we'll be creating. Video Tutorial Our video editor Gavin Steele has created this video tutorial to compliment this text + image tutorial. Image Assets Smoker - from my personal collectionSkull - thanks to Martin Land for thatSmoke 1, Smoke 2, Smoke 3, and Smoke 4 Step 1 Open up Smoker image.
Step 2 Open the Skull image and draw a path around it using the Pen Tool (set to Paths not Shape Layers). Make a selection from your Path (Command-click the Path icon on the Paths palette) and copy and paste it into the working document. Step 3 Step 4 Change the "CIG_SMOKE" Layer Blending Mode to Screen. Step 5. Creating a Stylish Cinematic Photo Using Camera RAW & Photoshop. In today's tutorial, you'll learn how to add a cinematic style to any of your photos using Photoshop and a Camera RAW file.
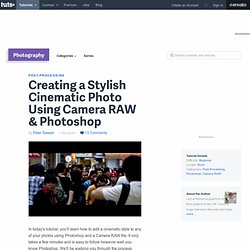
It only takes a few minutes and is easy to follow however well you know Photoshop. We'll be walking you through the process step-by-step in both a tutorial and video format! Watch the Video Getting the Perfect Photo Here's the photography kit I used: Canon 450D or 7DCanon EF 70-200mm f/4L USM I headed out on a Sunday in Macau, the busiest day of the week, in order to capture people enjoying the old town. 11 Great Photoshop Photo Effects Tutorials.