
4 Tips for Post-Processing Efficiency in Photoshop. Useful Photoshop Tips And Tricks For Photo Retouching. Advertisement When it comes to designing in Photoshop, there is a myriad of ways one could use to achieve a certain result, especially when it comes to photo retouching.

Designers use technique they are most confident as well as comfortable with, which is great because it’s always useful to peek into the workflow of our colleagues and learn new design approaches. We have had articles on cloning1, compositing2, masks3 and obscure Photoshop time-savers4 in the past. This article is different. I’ll be covering some of the useful techniques and tricks which I’ve learned from my experience. Here is a short overview of the techniques we’ll be covering: Naturally Increased Light The light of the sun creates texture.
Increase light on a separate layer. Then use the brush tool with a soft brush, and hold the Alt/Option key to pick up colors from the area that you want to brighten. The blending mode “Color Dodge” creates realistic results. Simulate Infrared Images It’s almost like an infrared image. Photography with Kristen Duke~Photoshop and Workflow. I feel a bit unqualified to cover photoshop, but I’m just going to speak in my own personal language and hopefully this will reach some of you.
Basic Photoshop CS6 Edit » Jessica Drew Photography. Basic Photo Editing Tutorial by `TheTragicTruth-Of-Me on deviantART. Simple steps for beginner to do a clean edit in Photoshop Elements. I am thrilled that I Heart Faces has started their Fix It Friday back up, and this week they haven given us a beautiful photo to edit!
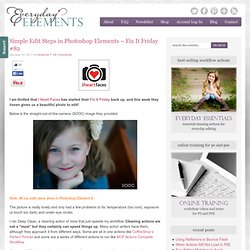
Below is the straight-out-of-the-camera (SOOC) image they provided. Note: All my edits were done in Photoshop Element 9 The picture is really lovely and only had a few problems to fix: temperature (too cool), exposure (a touch too dark) and under-eye circles. I ran Deep Clean, a cleaning action of mine that just speeds my workflow. Cleaning actions are not a “must” but they certainly can speed things up. If you would like to learn how to do a clean edit on your own, read the clean edit post I wrote a while back.
At the bottom of this post is a short video tutorial showing those simple steps listed above. Photoshop tutorials by night-fate on deviantART. Master Vibrance and Iris Blur in Photoshop. Post Production: How to Create a White Background and Keep the Original Shadows « Photigy: Online Studio Photography Lessons. How to Shoot Product, Water, Jewelry. About the Author of this Post Production Tutorial My name is Nenad Veljkovic.
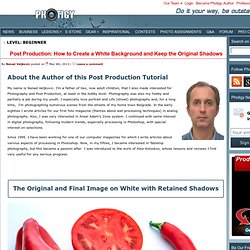
I’m a father of two, now adult children, that I also made interested for Photography and Post Production, at least in the hobby level. Photography was also my hobby and partially a job during my youth. I especially love portrait and Life (street) photography and, for a long time, I’m photographing numerous scenes from the streets of my home town Belgrade. In the early eighties I wrote articles for our first foto magazine (themes about wet processing techniques) in analog photography. Since 1995. When you get a correctly exposed pictured object, this also means that we want all the bright parts on that object to have details at the highlighted areas.
On the other hand, it is sometimes necessary to maintain the original shadows on the picture. The Steps of this Process Are: (1) The main object(s) must be previously isolated from the background by using some of the selection tools. My name is Nenad Veljkovic. How to Sign Your Work. A popular trend these days is to sign your images when posting online.

The thought is to treat the image more like it was being shown in a gallery and less like pixel dust in the wind. The process is really pretty easy to do. How to Create Realistic Shallow Depth-of-Field Backgrounds for Compositing. Mornin’ everybody.
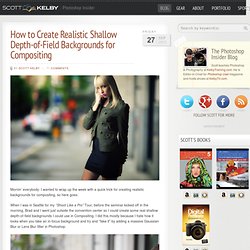
I wanted to wrap up the week with a quick trick for creating realistic backgrounds for compositing, so here goes: When I was in Seattle for my “Shoot Like a Pro” Tour, before the seminar kicked off in the morning, Brad and I went just outside the convention center so I could create some real shallow depth-of-field backgrounds I could use in Compositing. I did this mostly because I hate how it looks when you take an in-focus background and try and “fake it” by adding a massive Gaussian Blur or Lens Blur filter in Photoshop. Above: I had Brad stand in the street, and I zoomed-in fairly tight on him with a 70-200mm f/2.8 lens, at f/2.8 so the background would be way out of focus (as seen here). Once I was focused on Brad, I would hold the shutter button half-way down to lock the focus on Brad, then I would give Brad a signal and he would walk out of the frame (that’s Brad walking out of the frame above). Back to Football This weekend I’m shooting the Bucs vs.