
Five Best Tablet Drawing Apps. It seems to impress passers buy when you edit video with your fingers in iMovie on the iPad.

It still impresses people when I edit photos on an iPad. I'm not so much out to impress people with what I'm doing, but what the end result may be. Though I do agree that it was skewed away from windows tablets. There are plenty of Android options up there, too. Not just Apple. these were user submitted and voted choices. next time speak up louder during the initial submissions and you'll see your preference listed here. oh, and the windows tablet digitizers are NOT more accurate then the cintiq, not even close.
Photography OpenCourseWare. Art. Ubuntu Studio. What Digital Camera. The Photo Argus - A Photography Resource Blog. Photoshop. Memory techniques. Fabulous photographs. Fabulous photographs. 44 essential digital camera tips and tricks. Our collection of top digital camera tips and essential photography advice will have you improving your photos in no time.
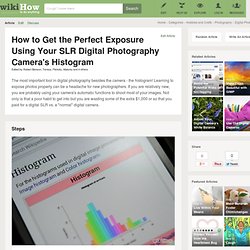
Culled from experts and photographers who have been taking pictures for quite some time, they all agree that these 44 camera tips are essential knowledge for honing your craft. So feast your eyes below, check out some of our best photography tips on everything from setting up your digital camera to honing your photo composition, and by the end you will learn the secrets and shortcuts to getting high-quality pictures every time. How to Get the Perfect Exposure Using Your SLR Digital Photography Camera's Histogram. Edit Article Edited by Robert Benson, Teresa, Flickety, Maluniu and 4 others The most important tool in digital photography besides the camera - the histogram!
10 Tips to better outdoor portraits. 1.

Capture candid moments: Candid photography is about capturing spontaneous moments, it’s not posed, not forced, and it’s un-obtrusive. The aim here is to show life as it’s happening. The ideal is to get people to either ignore the camera and continue with their activities, or to accept you as a fly on the wall. 10 Street Photography Tips from an Anonymous Street Photographer. I recently got these 10 street photography tips from an anonymous street photographer who wanted to share this information with you.
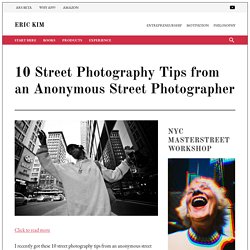
I found these tips to be very insightful, and I hope you will too! Keep reading more to learn about all the goodness. 1. 10 Ways to Take Stunning Portraits. How do you take Portraits that have the ‘Wow’ factor?

Today and tomorrow I want to talk about taking Portraits that are a little out of the box. You see it’s all very well and good to have a portrait that follows all the rules – but it hit me as I was surfing on Flickr today that often the most striking portraits are those that break all the rules. How Do I Figure Out How Many MegaPixels Are Necessary for Printing a Photo at a Specific Size? Become More Photogenic by Knowing How Genuine Facial Expressions Feel. Can you tell the difference between a real smile and a fake one?

There's a neat test you can take to find out. [www.bbc.co.uk] I got 13 out of 20 right, which is apparently a really good score. Based on overall test results, people seem to be notoriously bad at telling real from fake. I concentrated not on the eyes or the mouth, but on how quickly they test subjects returned from smiling to a neutral expression. There's some interesting insight on the post-test page, I'm pasting it for the benefit of anyone who doesn't want to take the test. "Most people are surprisingly bad at spotting fake smiles. Although fake smiles often look very similar to genuine smiles, they are actually slightly different, because they are brought about by different muscles, which are controlled by different parts of the brain. Genuine smiles, on the other hand, are generated by the unconscious brain, so are automatic. Bottom line, if you want your fake smile to look real, you kinda have to make it real.
Create an Instant "Green Screen" with Your Computer's Display for Quick and Dirty Background Removal. Macro Photography Tips for Point and Shoot Digital Cameras. A Post By: Darren Rowse Much has been written on the topic of Macro photography for those photographers fortunate enough to own a DSLR with macro lenses – but what about if you own a compact point and shoot camera?
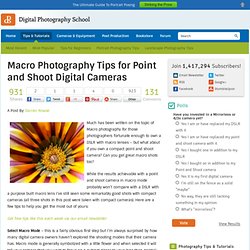
Can you get great macro shots too? While the results achievable with a point and shoot camera in macro mode probably won’t compare with a DSLR with a purpose built macro lens I’ve still seen some remarkably good shots with compact cameras (all three shots in this post were taken with compact cameras). Here are a few tips to help you get the most out of yours: Get free tips like this each week via our email newsletter Select Macro Mode – this is a fairly obvious first step but I’m always surprised by how many digital camera owners haven’t explored the shooting modes that their camera has. Our approach to food photos. As much as it flatters me when I get emails asking what my secret to taking pictures is, I rarely have a good response.
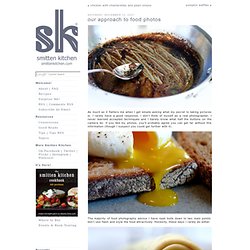
I don’t think of myself as a real photographer, I never learned accepted techniques and I barely know what half the buttons on the camera do. If you like my photos, you’ll probably agree you can get far without this information (though I suspect you could get further with it). The majority of food photography advice I have read boils down to two main points: don’t use flash and style the food attractively. Honestly, these days I rarely do either. While I of course use available light when it is, uh, available, in the evenings, when most food for this blog is cooked, I’m at a loss. These days, we’re using the Canon Speedlite 430EX flash, and it is making a world of difference. Food photography setup. Just recently I have got a few emails from people asking about the food photography setup that I use.
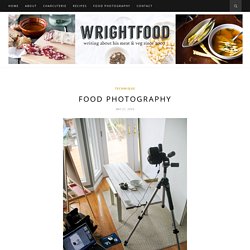
I honestly find those some of the most flattering emails I have ever received, because honestly, I am a big time hack. BIG TIME. Lara Ferroni (Food Photographer & Writer, Seattle, Washington) 49 Awesome Photography Hacks, Mods And DIY Projects. Following the great demand, here are 49 Awesome Photography Hacks, Mods And DIY Projects. Something for everyone with Tripod hacks, lighting hacks, light modifiers mods and a few crazy projects that are simply not classifiable. In this section tripod for macro photography, tripods for food photography, tripod for your bicycles. Did I say tripods? Here you’ll find all your light stand needs. If it’s mounting a flash where no flash can be mounted, clamping it, sticking it, of making a new lightstand out of PVC scraps. How to Be a Curious Photographer. How do some people end up more curious than others? Is Curiosity a personality trait or can it be learned? How can I be more curious? How can you add Curiosity to your Photographic toolbox?
Here are 10 Ways to be a more Curious Photographer: 1. DIY: Greenscreens and Backdrop or Background Stands. This article will explain how to design and assemble bluescreens, greenscreens and backdrops for photos and video, as well as how to easily and inexpensively build a portable frame to support these backdrops (or other things like quilts, etc.) out of PVC pipe or metal conduit.
(NOTE: Please be sure to read some of the extra notes at the bottom of this guide for optimal performance). For amateur or hobbyist photographers and video producers, coming up with the money for a nice, $200 (and up!) Backdrop and the expensive stands and hangers required to help support it isn't very easy. Strobist: When you absolutely, posit... Ten Things I’ve Learned About Food Photography. Sometimes I look back at my older food posts on The Pioneer Woman Cooks…and cringe. I knew nothing about photography in general…let alone food photography. I want to reshoot all those old recipes. But I know I’ll never have the time. So I just keep those old photos in the archives, referring back to them whenever I need proof that my photography has improved through the years. 10 Ways to Know You Made a Good Picture. Copyright Scott Bourne - 2009 All Rights Reserved How Do I Know if I Shot a Good Photograph? My pal Rick Sammon gave his take on this subject a few days ago here at Now it’s my turn.
Here are 10 things to look for in a good photograph. (NOTE: These are offered in no particular order.) 1. Tasteful Food Photography. Food photography traditionally has been the realm of a handful of weathered professionals well versed in their niche profession, armed with high-end, medium-format cameras and a ton of expensive studio gear, and flanked by a small army of dedicated chefs and food stylists.
You can see their work in ads, cook books, and high-end glossy magazines such as Sunset, Gourmet, Bon Appétit, and Food & Wine. So for the casual shooter or even the ambitious amateur, getting great food shots can seem like an intimidating and daunting task at best. Food Photography Techniques and Tips. Your Camera Doesn't Matter. Home Donate New Search Gallery Reviews How-To Books Links Workshops About Contact. What Works in Black & White. Photography: How to Take Sharper Pictures.