
Lacy Crocheted Earrings. Author Gene in SoCal Introduction Liven up an old pair of hoops with this simple pattern.
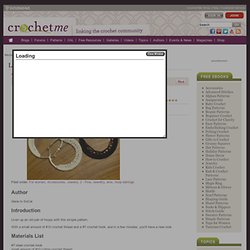
With a small amount of #10 crochet thread and a #7 crochet hook, and in a few minutes, you'll have a new look. Materials List #7 steel crochet hook small amount of #10 cotton crochet thread pair of hoop earrings Finished Size Completed size depends on hoops used and number of rounds completed. Gauge Gauge is not important with this pattern. The Pattern Rnd 1: Make a loop around the hoop and sc around to cover the hoop. Rnd 2:. Pretty Pretty Bow. By Erin Burger – 30 Comments This bow is super simple, super cute and super versatile.
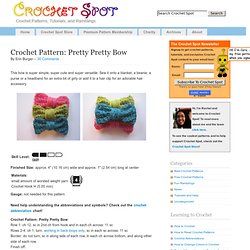
Sew it onto a blanket, a beanie, a purse or a headband for an extra bit of girly or add it to a hair clip for an adorable hair accessory. Finished Size: approx. 4″ (10.16 cm) wide and approx. 1″ (2.54 cm) long at center Gauge: not needed for this pattern Need help understanding the abbreviations and symbols? Check out the crochet abbreviation chart!
Crochet Pattern: Pretty Pretty Bow Row 1: ch 12, sc in 2nd ch from hook and in each ch across: 11 sc Rows 2-4: ch 1, turn, working in back loops only, sc in each sc across: 11 sc Border: do not turn, sc in along side of each row, in each ch across bottom, and along other side of each row. This is what you’re bow will look like thus far: To make center of bow: Tie a tight knot in center of bow, don’t worry about any ends right now, it’s better to weave them all in upon completion: Wrap yarn around center of bow until center looks right to you. A Quartet of Headbands. Deep-textured bow. Free Knitting Pattern: Cabled Headband. Basic Cable: Working with cables can be a little mysterious for new knitters, but it's really easy to make simple cables.

The best way is to just dive in and try one. This super-warm headband/earwamer is a great first cable project because it involves just one cable and is a small, quick-knitting project. It's also incredibly useful on those cold, windy winter days when you'd like to wear your hair back and still keep your ears warm. Materials: about 75 yards of chunky weight 100 percent wool (I used about half a hank of Manos del Uruguay in Cirrus, color 39) size 8 U.S. needles one cable needle or double-pointed needle scissors tapestry or yarn needle Gauge About four stitches and six rows per inch in garter stitch. Size Finished piece is 20 inches around and 3 inches wide. Instructions for Cable Pattern: Cast on 8 stitches.
Continuing and Finishing: About the Yarn: Mans del Uruguay produces hand-spun, hand-dyed yarn made by rural women throughout the nation of Uruguay. Regular_Guy_Beanie. Escargot hat: Knitty Winter bis 2011. Brim and Spiral: Using CC and the cable cast-on, CO 240 sts onto longer circular.
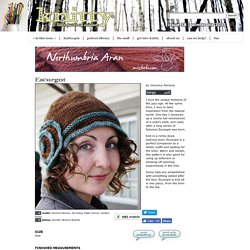
Do not join. Row 1 [RS]: K120, pm, k120. The first 120 sts will become the spiral; the 2nd 120 sts will become the brim.Row 2 [WS]: K120, sl m, [k1, k2tog] to end. 200 sts.Row 3 [RS]: Break CC and switch to MC. K across in MC.Row 4 [WS]: P120, sl m, p64, w&t.Row 5 [RS]: K64, sl m, k100, w&t.Row 6 [WS]: P100, sl m, p48, w&t.Row 7 [RS]: [K1, k2tog] to marker; sl m, k80, w&t. 184 sts.Row 8 [WS]: P80, sl m, p16, w&t.
Simple hat calculator. Abbreviations: K = Knit K2tog = Knit 2 stitches together as if they were one (this is a decrease).
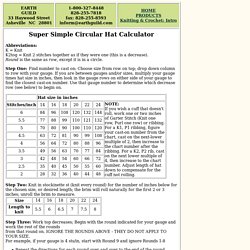
Round is the same as row, except it is in a circle. Step One: Find number to cast on: Choose size from row on top; drop down column to row with your gauge. If you are between gauges and/or sizes, multiply your gauge times hat size in inches, then look in the gauge rows on either side of your gauge to find the closest cast-on number. Use that gauge number to determine which decrease row (see below) to begin on. Step Two: Knit in stockinette st (knit every round) for the number of inches below for the chosen size, or desired length; the brim will roll naturally for the first 2 or 3 inches; unroll the brim to measure. Step Three: Work top decreases; Begin with the round indicated for your gauge and work the rest of the rounds from that round on. Repeat the directions for each round over and over to the end of the round. Step Four: Break yarn and thread through remaining stitches.