

From Entertainment Unit to Terrific Toy Kitchen. I was long-distance for this entire project, so the only credit I can take is encouraging the purchase of an entertainment unit for the purpose of converting it into a kitchen, and making sure my sister, Shanda, had seen adequate inspiration from blogland before attempting this make-over.
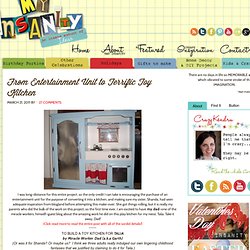
She got things rolling, but it is really my parents who did the bulk of the work on this project, so the first time ever, I am excited to have my dad–one of the miracle workers, himself–guest blog about the amazing work he did on this play kitchen for my niece, Talia. Take it away, Dad! (Click read more to read the entire post with all of the sordid details!)
TO BUILD A TOY KITCHEN FOR TALIA by Miracle Worker Dad (a.k.a Garth) (Or was it for Shanda? The first task was to find an appropriate entertainment center and then make it into something new and wonderful. (Note: This is not the same cabinet. A major challenge was to build this on the cheap—no big investments in materials etc. Thanks, Dad! Ribbon Flowers by MakeBowsandMore.com. Perfect Summer Bangle. Here's a fun tutorial on how to make a message bangle that's one-of-a-kind, done in the sun, waterproof and weatherproof.

Even after several trips to the beach, it won't fade or wash off! Essentially, it's the Perfect Summer Bangle. Used in this tutorial: Inkodye Red Prepare. Iron-on vinyl coasters. At the local fabric store I found some iron-on vinyl to play with. It's pretty neat—you can iron it onto fabric or paper. I tested it by making coasters. 1) Cut out two squares of fabric and vinyl for each coaster. (I wanted to end up with 4" coasters, so I cut my pieces larger than that.) 2) Follow the directions that come with the vinyl to adhere it to your fabric. 3) Place two of your newly laminated squares together, vinyl sides out. 4) Mark a square on the fabric with a disappearing fabric marker and sew the pieces together, following your lines. 5) Trim the edges with a pinking shears. (This heavy-weight fabric is by Trefle, sent by my supplier in Japan, AKA Megumi.) Diy 101: building your toolbox — adhesives.
I have been obsessed with craft supplies since my early childhood, and I am not afraid to talk about my lifelong love affair with glue.
It’s rivaled only by my love of tape, but more on that later :) Glue is a magical substance, and trust me when I say that the ability to permanently stick anything to anything else has revolutionized the world. Did you know the first simple glue was invented in 200,000 BC? Clearly, we thought it would come in handy, and it has. Modern glues are leaps and bounds beyond primitive pastes, and today there is a strong, durable adhesive for just about every job you can imagine. Tutorial: Leather water bottle. Cutting and sewing - Bushcraft USA Forums. Scrapbooking with Fabric. In the days before I became addicted to scrapbooking, I enjoyed another hobby, called Scherenschitte, a German form of intricate paper cutting.
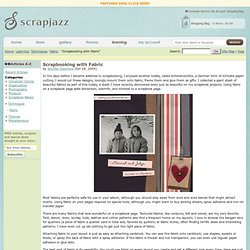
I would cut these designs, lovingly mount them onto fabric, frame them and give them as gifts. I collected a giant stash of beautiful fabrics as part of this hobby, a stash I have recently discovered looks just as beautiful on my scrapbook projects. Using fabric on a scrapbook page adds dimension, warmth, and interest to a scrapbook page. Most fabrics are perfectly safe for use in your album, although you should stay away from wool and wool blends that might attract moths. Using fabric on your pages requires no special tools, although you might want to buy pinking shears, spray adhesive and iron-on transfer paper.
Baby Sock Monkey. World Map Wall Mural. Project Gallery. General Crafts. DIY: Mini Doily-print Bowl by Sodapop Design. Everything Your Mama Made & More. HOMEFREE: Tutorial : Gumboots to Pixie Puddlers. A day in the life of the gilded bee. Eggshell Mosaic Bracelet by Tiffany Windsor. Celebrating her rich creative heritage, Tiffany Windsor’s beautiful eggshell mosaic bracelets are created with a vintage crafting technique made popular back in the 1960′s by her mother Aleene.
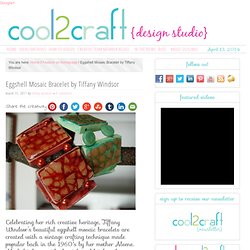
Alcohol inks provide the rich and bright colors to this fan favorite technique. Featured on Cool2Craft TV. Watch Eco Tiffany’s Eggshell Mosaic Bracelet YouTube video tutorial! Materials: Resin jewelry shapes Egg shells (brown or white) Aleene’s Original Tacky Glue (in the gold bottle) Alcohol ink (color(s) of your choice) Beads (to coordinate with alcohol ink color) Myrtle & Eunice: How to Craft a Gnome. Remember these critters?
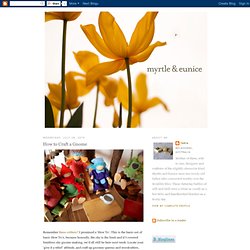
I promised a ‘How To’. This is the basic-est of basic How To’s, because honestly, the sky is the limit and if I covered limitless sky gnome making, we’d all still be here next week. Mod Podge formula guide. You've been waiting for this fairy tale. - Mod Podge Rocks! You’ve asked it in a few different ways, but the basic question is the same.
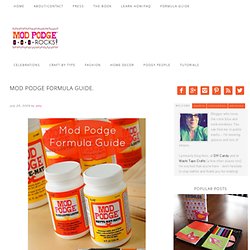
I’m ready to explain to you with my Mod Podge formula guide – so let’s do this thing. And in case you are wondering if you should make your own Mod Podge, the answer is no. Here’s why. #1 thing to remember: All Mod Podge formulas are essentially the same in that they can all do three things. They are all good for gluing, sealing and finishing. Classic Mod Podge: There are 2 formulas that fall under this umbrella: Gloss and Matte.
Okay. Antique Mod Podge: There are some who love the look of vintage, aged projects that have an antique feel. Brushstroke Mod Podge: Are you looking to get the look of a hand painted image without the hefty price tag?