
Christmas Tutorials Start Here - Chris's Patchwork Decorations. OK, can you believe four months today Christmas Day will be over?
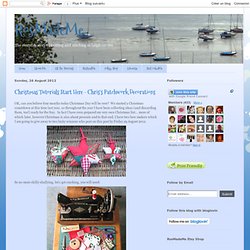
We started a Christmas countdown at this time last year, so throughout the year I have been collecting ideas (and discarding them, too!) Ready for the fray. In fact I have even prepared my very own Christmas list... more of which later, however Christmas is also about presents and to that end, I have two bow makers which I am going to give away to two lucky winners who post on this post by Friday 29 August 2012. So no more shilly shallying, let's get cracking, you will need: Paper, pencil, protractor (go on you know you can borrow it from your children's new school set... just to see if it works), a ruler and paper scissorsChristmas fabric scrapsPins, needle, thread, dressmaking scissors, small sharp scissorsFish knifeRibbon or hairy stringIron and ironing boardWizard little bowmaker (I will be giving away two, Merry Christmas!) Now pin the other side to the middle diamond and sew it as above.
Repeat for the other side. Stash crafted wrapping paper snowman ornament. Isn’t it funny how kids latch onto different things?

Last month, Burke was all about pumpkins. Right now, he is enamored with snowmen. He finds all the snowmen ornaments on every Christmas tree he sees, loves it when snowmen are part of Christmas cards, just can’t get enough snowmen. All Free Christmas Crafts- Free Christmas Crafts for DIY Decorations, Gifts and More. Scrapbook Paper Wreath Tutorial. Handmade Holidays: Scrap Wood Snowmen. Do you woodwork?
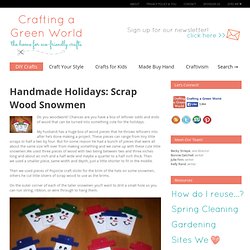
Chances are you have a box of leftover odds and ends of wood that can be turned into something cute for the holidays. My husband has a huge box of wood pieces that he throws leftovers into after he’s done making a project. These pieces can range from tiny little scraps to half a two by four. But for some reason he had a bunch of pieces that were all about the same size left over from making something and we came up with these cute little snowmen.We used three pieces of wood with two being between two and three inches long and about an inch and a half wide and maybe a quarter to a half inch thick.
Then we used a smaller piece, same width and depth, just a little shorter to fit in the middle. Then we used pieces of Popsicle craft sticks for the brim of the hats on some snowmen, others he cut little slivers of scrap wood to use as the brims. Paint the snowmen before putting them together. Then paint your hats in the desired colors. Now paint happy snowman faces on the wood. Scrappy Bird Ornament. [ Close Privacy Policy ] Privacy Policy / Your California Privacy Rights Revised and posted as of March 4, 2013 Prime Publishing, LLC ("Company," "we" or "us") reserves the right to revise this Privacy Policy at any time simply by posting such revision, so we encourage you to review it periodically.

In order to track any changes to this Privacy Policy, we will include a historical reference at the top of this document. This Privacy Policy will tell you, among other things: Your California privacy rights. ACKNOWLEDGEMENT/YOUR AGREEMENT Company websites are not intended for use by individuals under the age of 18 or those who are not legal residents of the United States. Scrapbook paper tree ornament. I have been looking for an easy ornament for my kids to make to carry on one of my annual Christmas traditions and I found this idea on the BHG website.
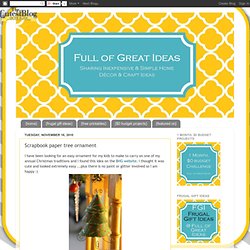
I thought it was cute and looked extremely easy ...plus there is no paint or glitter involved so I am happy :) Materials needed: Scrapbook paper (I used thick paper that had a cotton like texture to it with glitter accents..got it at the Dollar Store) Thin wire Glue Beads (optional) Method: Cut three pieces of wire (approximately 10 inches each) and bend the top of each wire into a loop. I used a dab of hot glue to attach the 3 wires together and then wrapped a small piece of paper around the glue to hide it. Make sure the loops are pointing in various directions. Draw three circles of gradually increasing size on the back of the scrapbook paper. Cut the circles out leaving approximately 1/2 an inch outside the circle and then carefully rip the paper along the line to give a rough edge. Cut from the side of the circle to the middle.
Enjoy. How About Orange. Here's a look at our upstairs guest bathroom.
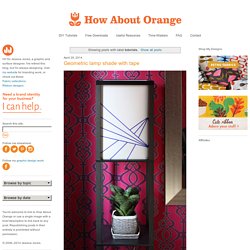
Last night I covered an accent wall with removable wallpaper. I love it! This bathroom has a peculiar layout. You walk in past the shower stall on the right, and when you hit the sink, you turn right to get to the toilet. Which is under a lovely arch at the end of a passage that is almost long enough to feel like a hallway. The kind folks at Walls Need Love sent the product to review. Like the Sunburst wallpaper I designed last year, this paper is essentially a giant self-adhesive wall decal, and it's easily to peel off and reposition. Southern Fairy Designs. So today I went to market with my things for the very first time!

Never really sold my items by anything more than word of mouth and via facebook... so this was a very big step for me! The market was run by Clairabella a shop in High Wycombe that sells goods made by local crafters, that once a month has a market for sellers to get together and sell their new things. First score of the day...