
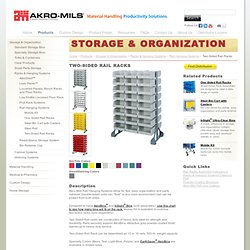
Tom's Torsion Box Workbench - Woodworking Projects. Home. Two-Sided Rail Racks. Bin/Tote Colors Steel/Shelving Colors Description.
Welcome to the Virtual Crash Course in Design Thinking. Welcome to the d.school’s Virtual Crash Course resource page!

We know not everyone can make a trip to the d.school to experience how we teach design thinking. So, we created this online version of one of our most frequently sought after learning tools. Using the video, handouts, and facilitation tips below, we will take you step by step through the process of hosting or participating in a 90 minute design challenge. If you choose to participate, in 90 minutes you will be taken through a full design cycle by participating in The Gift-Giving Project.
This is a fast-paced project where participants pair up to interview each other, identify real needs, and develop a solution to “redesign the gift-giving experience” for their partner. Through this experience we hope you will take away some of the basic principles of Design Thinking and start to adapt them into your personal and professional routines. INFOGRAPHIC. Excellence Now by Tom Peters. How to Moderate a Brainstorming Session and Get Results. Ah yes, ye old brainstorming session.

We’ve all been there, and have had varying degrees of success with the process. But what makes for a great brainstorming session, and more importantly, what drives a session to produce some truly great results? I wish I could say that there’s a single, bullet proof formula for outstanding brainstorming sessions, however, unfortunately, there is none. When effectively organized, a brainstorming session can bring some previously unheard/unthought-of ideas to life, sparking further creativity. Conversely, when poorly organized and not well directed, a brainstorming session can rapidly deteriorate into a colossal waste of everyone’s time. So how do you end up with the former, and avoid the latter? Prep Cook As the moderator, one of your most important functions of the entire process is to be well versed in the topic(s) to be discussed and have the bigger picture in mind at all times.
The Right Players House Rules Space, check. Moderate It The Shotgun. Meetings Are A Skill You Can Master, And Steve Jobs Taught Me How. This is our second excerpt from Insanely Simple: The Obsession That Drives Apple’s Success by Ken Segall, a close collaborator with Jobs for over a decade.

To read the first, on how the iMac was almost called the MacMan, go here. Apple encourages big thinking but small everything else. That is, if you feel the urge to speak or act in a manner reminiscent of anything you learned in a big company, it’s best that you do that in the privacy of your own home. Meeting size is a good example. Once Chiat/Day was installed as Apple’s agency of record and we’d settled into our work, we would meet with Steve Jobs every other Monday. Typically there would be no formal agenda. Tileboard - Trimac Panel Products.
Techmaster: Structural Framing. Products. RollerRings™ - The original rollerball shower curtain rings that glide effortlessly.

Rolls friction-free across your shower curtain rod Only a light tug required to open or close the curtain Colors include Brass, Nickel(Silver), Graphite, Smokey Grey, Antique Brass, Black, Satin Nickel, and Bronze Corrosion free - solid brass or brass and stainless steel construction with heavy duty plating Sold in sets of twelve rings, enough for one shower curtain. Johnson Hardware® 2222 SLIDING BYPASS DOOR HARDWARE. Black & Decker Projects and Advice.
You can build adjustable utility shelves in a single afternoon using 2 x 4s and plain 3/4" plywood.

Perfect for use in a garage or basement, utility shelves can be modified by adding side panels and a face frame to create a finished look suitable for a family room or recreation area. Difficulty Level: Easy Time to Complete: 4-8 hours Estimated Cost: $0 - $100 Continue to Step 1 Overview You can build adjustable utility shelves in a single afternoon using 2 x 4s and plain 3/4" plywood. Step 1 How to Build Utility Shelves - Step 1 Mark the location of top plates on ceiling. Step 2. Garage Storage: Space-Saving Sliding Shelves - Step by Step.
Let’s face it.

No matter how big your garage is, there never seems to be enough room to store everything. But by making ultra-efficient use of the narrow area on the sidewall of your garage, this storage project can help. The heart of the system is a series of double-sided rollout shelves that allow easy access to everything that can be stored in a narrow space. With these rollouts, you don’t have to store your paint cans, nails, screws and other stuff four layers deep and then shuffle everything around to find what you’re looking for. When the shelves are pulled out, everything is in full view and easily accessible. Don’t worry if you’ve also got some large items to store. The cost of the materials for this project is about $800. Expect to spend three or four days building this project. The particleboard and framing lumber you’ll need are available from home centers and most lumberyards.