
DIY guide - draped skirt. Mandag, 19 september 2011.

31 Insanely Easy And Clever DIY Projects. Projects / A Beautiful Mess D.I.Y Index. DIY Geometric Necklace Pendant. Happy New Year!
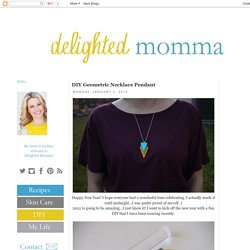
I hope everyone had a wonderful time celebrating. I actually made it until midnight...I was pretty proud of myself :) 2012 is going to be amazing...I just know it! I want to kick off the new year with a fun DIY that I have been wearing recently. What you will need:3 different colors of polymer claySome kind of roller (a large marker will also do the trick)Razor bladeCotton cordKrazy glueToothpick or object to poke a hole in clay Soften and condition the clay with your hands before starting. Carefully slice out 3 triangles. Poke a hole in the smallest of the 3 triangles. Krazy glue the triangles on top of each other, staggering them a little bit. Attach the necklace cord and have fun wearing! Simple Ideas That Are Borderline Crafty (35 Pics)
Click Here For More Amazing Ideas.
Art 1. Optical Design. Friendship Necklace from String : How to Make Embroidery Floss Friendship Necklaces. Love this website?
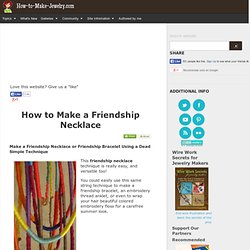
Give us a "like" Make a Friendship Necklace or Friendship Bracelet Using a Dead Simple Technique This friendship necklace technique is really easy, and versatile too! You could easily use this same string technique to make a friendship bracelet, an embroidery thread anklet, or even to wrap your hair beautiful colored embroidery floss for a carefree summer look. What You Need: Embroidery floss or yarn in different colors Cotton twine or something similar to use as a base for wrappingScissorsCardboard bobbins or pieces of cardboardOptional: Brass nuts and washers Instructions How to Make a 2-Tone Necklace: Step 1: Take each of your chosen embroidery thread colors and wrap them each around its own piece of cardboard. Step 2: Cut a long piece of cotton twine or rope, and tie the two colored threads to the rope leaving at least 3 inches of slack.
Natural Pools or Swimming Ponds. Natural Pools or Natural Swimming Ponds (NSPs) Let nature clean the water...

Chemical-free water garden and swimming pool. The plant portion, or regeneration zone, is separated from the swimming area by the wall seen a few inches below the water’s surface. www.naturalswimmingpools.com The pools have skimmers and pumps that circulate the water through the regeneration zone and back into the swimming area. The aquatic plants filter out contaminants and use nutrients from the water as food which helps prevent algae. Then rocks, such as granite river rock or haydite, to which friendly bacteria attach, act as biological filters. There are many options as to design.
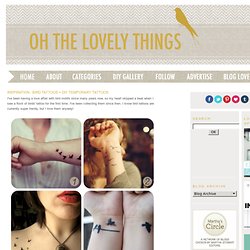
A gradual slope contains the plants, gravel and loamy sand, a wall keeps them separate from the swimming area. Vacuum but twice a year and tend to the plants as needed. The regeneration zone can be along the perimeter of a natural pool or a pond unto itself but connected to the swimming area. www.gartenart.co.uk. Design Folder: Your Online Design and Decorating Resource. Inspiration : bird tattoos + DIY temporary tattoos. I've been having a love affair with bird motifs since many years now, so my heart skipped a beat when I saw a flock of birds' tattoo for the first time.
Glowing jar project – varázslat a lakásban (EN/HU) Bottle (w)rap. I drink a lot of wine.
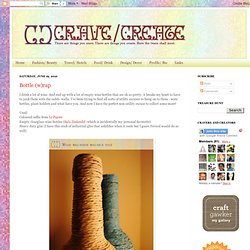
And end up with a lot of empty wine bottles that are oh so pretty, it breaks my heart to have to junk them with the raddi- walla. I've been trying to find all sorts of utility excuses to hang on to them - wate bottles, plant holders and what have you. And now I have the perfect non-utility excuse to collect some more! Used: Coloured raffia from Le Papier Empty clearglass wine bottles (Sula Zinfandel -which is incidentally my personal favourite) Heavy duty glue (I have this stick of industrial glue that solidifies when it cools but I guess Fevicol would do as well) Starting at the bottom (cos the top's a bit tricky) starting winding the raffia tightly around the bottle, pausing to add a bit of adhesive every now and then.
Edited to add: A couple of months later some more string arrived. TipJunkie Decorating. Haha.nu - the lifestyle blogzine - StumbleUpon. D.I.Y. recycled book journal. Curiously crafty. Welcome to the wonderful world of journalling! I promise, if i can make one then you can too. the following instructions will make a journal that is 5 3/4″ x 4 1/2″. (view more journals here) Materials: 60 – 70lb. paper (i use 20 sheets per journal) one sheet of white paper for the cover guide, cut to 5 3/4″ x 9 1/2″ decorative paper for end papers (I used scrapbook paper: you will need 2 papers that measure 5 1/2″ x 8 1/2″ each)cardboard covers are 5 3/4″ x 4 1/4″ eachspine is 5 3/4″ x (width of pages; to be discussed later)fabric (1/2″ wider than cover guide on all edges)pencilscissorsgluewax paperclothespins/paperclipsrulersewing needlestrong thread (you can buy bookmaking thread, or just use hand-quilting thread)bone folder (*optional)awl (*optional) Part 1: Sewing the pages.
DIY Braided Bead Bracelet - Honestly WTF - StumbleUpon. It’s been awhile since our last bracelet DIY.

I don’t know about you, but our wrists have been begging for another colorful addition for months now. So after playing with some materials that were already on hand, we’ve created a tutorial for a braided bead bracelet, which is a not so distant cousin of the hex nut and wrap bracelet. Because honestly, you can never have too many . . . You’ll need: Cut the waxed linen cord into a 26″ and 19″ piece. Tie a knot about half an inch down from the loops. Start braiding the strands. Push the bead against the base of the braid, and cross the left strand over the middle. Keep a finger at the base of the braid, holding the beads in their place and keeping the braid tight. Finish the bracelet with another inch of braided cord, measuring it against the wrist. Allison lehman : show + tell / 30 Day Drawing Challenge.