

Nano editor tutorials. Nano command line editor is a text editor that can be run from a command prompt via a telnet or ssh session.
It allows you to create or edit HTML, text, scripts or practically any text file. Although it is not as easy as a GUI based editor you may be used to it does afford you the luxury of being able to create and edit your site files from almost any computer in the world. nano is a small, free and friendly editor which aims to replace Pico,the default editor included in the non-free Pine package. Rather than just copying Pico's look and feel, nano also implements some missing (or disabled by default) features in Pico, such as "search and replace" and "go to line number". Install nano in Debian #apt-get install nano Now we are going to craete a test file in nano editor At the prompt type the following and hit enter. Virtual Box Shared Folder between WinXP host and Ubuntu guest (Tao's Sun Blog) Although Virtual Box provided an option of shared folder, it is not straightforward to use this shared folder.
It took me some searches on VirtualBox forum to find it how Ubuntu guest OS can access the shared Folder on WinXP host OS. 1. Terminal as the desktop background. HOWTO: Use Shared Folders. After installing the Guest Additions, you can use the Shared Folders Functionality.
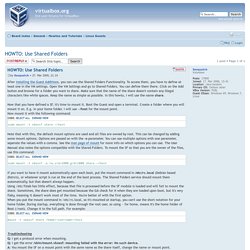
To access them, you have to define at least one in the VM settings. Open the VM Settings and go to Shared Folders. You can define them there. Click on the Add button and browse for a folder you want to share. Make sure that the name of the share doesn't contain any illegal characters like white spaces. Now that you have defined a SF, it's time to mount it. Code: Select all Expand viewCollapse view sudo mount -t vboxsf share ~/host Note that with this, the default mount options are used and all files are owned by root.
Sudo mount -t vboxsf -o rw,uid=1000,gid=1000 share ~/host If you want to have it mount automatically upon each boot, put the mount command in /etc/rc.local (Debian based distro's), or whatever script is run at the end of the boot process. HOWTO: Install Linux Guest Additions + Xorg config. This HowTo is Command Line based.
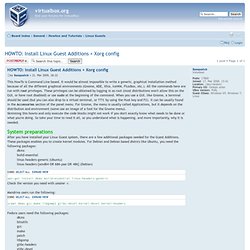
It would be almost impossible to write a generic, graphical installation method because of all the different graphical environments (Gnome, KDE, Xfce, IceWM, FluxBox, etc.). All the commands here are run with root privileges. These privileges can be obtained by logging in as root (most distributions won't allow this on the GUI, or have root disabled) or use sudo at the beginning of the command. When you use a GUI, like Gnome, a terminal should be used (but you can also drop to a virtual terminal, or TTY, by using the Host key and F2). It can be usually found in the Accessories section of the panel menu.
Download Free Ubuntu 10.10 (Maverick Meerkat) PDF Guide If you're new here, you may want to subscribe to my RSS feed and if you have questions related to your ubuntu system post question to our forums.
Thanks for visiting! This 158 Page Guide will cover the basics of Ubuntu 10.10 (such as installation and working with the desktop) as well as guide you through some of the most popular applications. This guide is simple to follow, with step-by-step instructions and plenty of screen shots, allowing you to discover the potential of your new Ubuntu system even if you are a novice computer user or are migrating from another operating system for the first time.
Getting Started with Ubuntu is not intended to be a comprehensive Ubuntu instruction manual. It is more like a quick-start guide that will get you doing the things you need to do with your computer quickly and easily, without getting bogged down with technical details. Incoming search terms: Related posts. Javascript PC Emulator. Ubuntu Blog auf Deutsch. The GNU Operating System. GRUB. Bei Ubuntu wird der Boot-Loader GRUB verwendet, um sich selbst und andere auf dem System installierte Betriebssysteme zu starten.
Standardmäßig wird GRUB im MBR (Master Boot Record) der ersten Festplatte (/dev/sda) installiert. Dies bringt den Vorteil einer einfachen Installation und Aktualisierungsmöglichkeit des Bootloaders. Bootloader wiederherstellen In manchen Fällen kann es notwendig sein, den Bootloader wiederherzustellen. Ein häufiges Beispiel ist die nachträgliche Installation eines Windows-Betriebssystems, bei dem der MS-eigene Bootloader in den MBR geschrieben wird.
Je nach vorhandener Rescue-CD gibt es hierbei verschiedene Möglichkeiten. Achtung! In folgenden Anleitungen wird davon ausgegangen, dass das Ubuntusystem auf der Partition /dev/sda2 installiert ist. Wenn man nicht sicher ist, welche Bezeichnung richtig ist, kann man sich mit. Linupedia. Support-Wiki für (nicht nur) openSUSE Linux® Hier handelt es sich um eine Wissensbank rund um openSUSE .
Jeder, der mithelfen möchte, ist herzlich eingeladen. Dazu bedarf es lediglich einer Registrierung welche Du auf der Anmelden Seite vornehmen kannst. Solltest Du dich nicht mehr einloggen können, schicke bitte eine E-Mail an den webmaster damit dieser dein Passwort zurück setzen kann. Wer mehr Informationen braucht, um im Wiki mitzuarbeiten, findet hier Informationen. The LiveCD List. Der Bootloader GRUB. Sudo apt-get install tuxtoo. Download EasyBCD 2.0.2 - NeoSmart Technologies.