background preloader

Command line tools

Facebook Twitter

Using ImageMagick to make sharp web-sized photographs. ImageMagick is a command-line program that can do many operations on images quickly and with high quality. It's especially useful for resizing and sharp­ening images before publishing them on a site or forum, making thumbnails, etc. Why sharpen? When downsized, photographs tend to appear dim and blurry.

Here's an example : If you hover the mouse on the image, you'll see the sharpened version. Much better isn't it? How to get a sharp, web-sized picture from your camera file? Here's the command I ran to get the sharp photo above from the original high‐resolution file : gm convert P1020592.jpg -resize "600x" -unsharp 2x0.5+0.7+0 -quality 98 iseran_s.jpg What does it do ? Note : if you choose to use imagemagick rather than graphicsmagick, just remove the "gm " at the beginning of the command. How to tweak the unsharp mask function? The function we use for sharpening is called unsharp mask. -unsharp RadiusxSigma+Amount+Threshold How do I resize a whole folder of images? Here's a command you can use : Get a count of how many file types a project has. Twitter en ligne de commande. Practical Vim.

About this Book 346 pages Published: Release: P1.1 (2012-10-31) ISBN: 978-1-93435-698-2 Vim, a vast improvement over its classic ancestor vi, is a serious tool for programmers, web developers, and sysadmins. No other text editor comes close to Vim for speed and efficiency; it runs on almost every system imaginable and supports most coding and markup languages. Learn how to edit text the “Vim way”: complete a series of repetitive changes with The Dot Formula, using one keystroke to strike the target, followed by one keystroke to execute the change.

Automate complex tasks by recording your keystrokes as a macro. Run the same command on a selection of lines, or a set of files. Discover the “very magic” switch, which makes Vim’s regular expression syntax more like Perl’s. You’ll learn how to navigate text documents as fast as the eye moves—with only a few keystrokes. All this, without having to touch the mouse. What You Need: Vim version 7 About the Author Upcoming Author Events. Resolution of a image. Command-line Tools: Identify. Finding Files. GNU Findutils This file documents the GNU utilities for finding files that match certain criteria and performing various operations on them. Copyright © 1994, 1996, 1998, 2000, 2001, 2003, 2004, 2005, 2006, 2007, 2008, 2009, 2010, 2011 Free Software Foundation, Inc. Permission is granted to copy, distribute and/or modify this document under the terms of the GNU Free Documentation License, Version 1.3 or any later version published by the Free Software Foundation; with no Invariant Sections, with no Front-Cover Texts, and with no Back-Cover Texts.
A copy of the license is included in the section entitled “GNU Free Documentation License”. This file documents the GNU utilities for finding files that match certain criteria and performing various actions on them. This is edition 4.5.11-git, for find version 4.5.11-git. 1 Introduction This manual shows how to find files that meet criteria you specify, and how to perform various actions on the files that you find. 1.1 Scope For brevity, the word file.

Unix find and replace text within all files within a directory. Git Commands. I've used git quite a bit but I don't consider myself a git expert, per se. I often find myself looking up the same basic commands so I thought I'd share them there so I'd have a fast reference, and maybe this will help you out too! Create and Checkout a New Branch git checkout -b <branchName> Checkout a Remote Branch git checkout -b <localBranchName> origin/<remoteBranchName> Abort Changes of a File git checkout -- <fileName> Modify the Previous Commit's Message git commit --amend Partial Change Checkin git add --edit Undo the Previous Commit git revert HEAD^ Temporarily Stash Changes, Restore Later git stash git stash pop Delete a Remote Branch git push origin :<branchName> Pull in the Latest from a Shared Repository git remote add <remoteName><gitAddress> git fetch <remoteName> Tagging, Deleting, and Pushing Tags git tag <tagName> git tag -d <tagName> git push --tags Who F'd it All Up?
Git blame <fileName> These basic git commands should help you on your way. Older Newer. XEV(1) manual page. Table of Contents Name xev - print contents of X events Synopsis xev [-display displayname] [-geometry geom] [-bw pixels] [-bs {NotUseful,WhenMapped,Always}] [-id windowid] [-s] [-name string] [-rv] Description Xev creates a window and then asks the X server to send it events whenever anything happens to the window (such as it being moved, resized, typed in, clicked in, etc.). Options -display display This option specifies the X server to contact. -geometry geom This option specifies the size and/or location of the window, if a window is to be created.

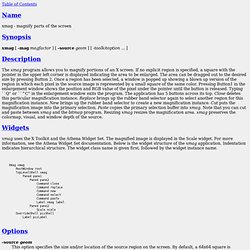
-bw pixels This option specifies the border width for the window. -bs {NotUseful,WhenMapped,Always} This option specifies what kind of backing store to give the window. -id windowid This option specifies that the window with the given id should be monitored, instead of creating a new window. -s This option specifies that save-unders should be enabled on the window. -name string This option specifies the name to assign to the created window. -rv See Also. XMAG(1) manual page. Table of Contents Name xmag - magnify parts of the screen Synopsis xmag [ -mag magfactor ] [ -source geom ] [ -toolkitoption ... ] Description The xmag program allows you to magnify portions of an X screen.

Widgets xmag uses the X Toolkit and the Athena Widget Set. Xmag xmag RootWindow root TopLevelShell xmag Paned pane1 Paned pane2 Command close Command replace Command new Command select Command paste Label xmag label Paned pane2 Scale scale OverrideShell pixShell Label pixLabel Options -source geom This option specifies the size and/or location of the source region on the screen. -mag integer This option indicates the magnification to be used. 5 is the default. Authors Dave Sternlicht and Davor Matic, MIT X Consortium. Table of Contents.

Evolution of shells in Linux. From Bourne to Bash and beyond M. JonesPublished on December 06, 2011/Updated: December 09, 2011 Connect with Tim Tim is one of our most popular and prolific authors. Browse all of Tim's articles on developerWorks. Check out Tim's profile and connect with him, other authors, and fellow developers in the developerWorks community. Shells are like editors: Everyone has a favorite and vehemently defends that choice (and tells you why you should switch). My first experience with a modern shell came in the 1980s, when I was developing software on SunOS. Let's begin with a short history of modern shells, and then explore some of the useful and exotic shells available for Linux today. A history of shells Shells as little languages Shells are specialized, domain-specific languages (little languages) that implement a specific use model—in this case, providing an interface to an operating system.
What the Thompson shell lacked was the ability to script. UNIX shells since 1977 Figure 1. Figure 2. Developing custom plug-ins for the Vim editor. Introduction Vim is one of the two most popular editors in just about any flavor of UNIX®, despite its minimalist interface. You can easily extend it to suit a wide variety of software development and systems administration needs. Vim even has its own scripting language that you can use to code your scripts and then load them into Vim. Alternatively, you can use external scripting languages like Perl or Python to extend the editor's functionality.

Syntax highlighting of programming languages is the most common situation where a custom plug-in would be helpful. Similarly, compiling sources from within the editor is a nice feature to have. This article shows what Vim has to offer to highlight syntax from a custom programming language. Note: This article assumes that you have basic familiarity with Vim, Perl, make, and regular expressions. Back to top Syntax highlighting We will use Vim's internal scripting engine to highlight syntax from a custom language you have created. Listing 1. Script Bash[3] – renommer plusieurs fichiers – rename a bunch of files « Une vie de loque – A Wreck Life. Encore un pense-bête, cette fois pour faire du renommage massif de fichier, avec notamment sed et les expressions régulières.

Once again a reminder, today how-to mass-rename files, with sed and regular expressions. Of course there is a lot of software[en] with graphical interface, user-friendly, etc. But hey, where is the fun !? ;) As I have already shown you, simple script for simple renaming is sufficient: for i in *.html; do mv $i.bak; done You may also want to use find but I won’t go into details with it here. You can use basename (and dirname) to do little more complicated: for i in *htm; do mv $i `basename $i htm`html; done or, some useful bash operator: for i in *htm; do mv $i ${i%%.htm}.html; done Little reminder: More difficult, with Perl regular expressions and rename: rename "s/htm/html/" *htm Option -n to see what files would have been renamed. ls | sed -rn "s/^[0-9]+_(.*)/mv '&' '\1'/ p" | sh You just have to find the good regular expression, and then add the ‘| sh’ to execute ;) #!

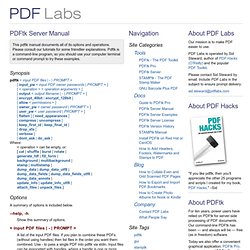
#! Pdftk Man Page. A summary of options is included below. Show this summary of options. Available operations are: cat, shuffle, burst, rotate, generate_fdf, fill_form, background, multibackground, stamp, multistamp, dump_data, dump_data_utf8, dump_data_fields, dump_data_fields_utf8, dump_data_annots, update_info, update_info_utf8, attach_files, unpack_files. Some operations take additional arguments, described below. If this optional argument is omitted, then pdftk runs in ’filter’ mode. Filter mode takes only one PDF input and creates a new PDF after applying all of the output options, like encryption and compression. cat [ < page ranges > ] Assembles ("catenates") pages from input PDFs to create a new PDF. . [ < input PDF handle > ] [ < begin page number > [ -< end page number > [ < qualifier > ] ] ] [ < page rotation > ] For example: pdftk A=in1.pdf B=in2.pdf cat A1 B2-20even output out.pdf If a PDF handle is given but no pages are specified, then the entire PDF is used.
Page range examples without handles: Pdfimages. Pdfimages(1) pdfimages(1) pdfimages - Portable Document Format (PDF) image extractor (version 3.01) pdfimages [options] PDF-file image-root Pdfimages saves images from a Portable Document Format (PDF) file as Portable Pixmap (PPM), Portable Bitmap (PBM), or JPEG files. Pdfimages reads the PDF file, scans one or more pages, PDF-file, and writes one PPM, PBM, or JPEG file for each image, image-root-nnn.xxx, where nnn is the image number and xxx is the image type (.ppm, .pbm, .jpg).

NB: pdfimages extracts the raw image data from the PDF file, without performing any additional transforms. Any rotation, clipping, color inversion, etc. done by the PDF content stream is ignored. Pdfimages reads a configuration file at startup. Many of the following options can be set with configuration file com- mands. The Xpdf tools use the following exit codes: 0 No error. 1 Error opening a PDF file. 2 Error opening an output file. 3 Error related to PDF permissions. 99 Other error. How to Combine Multiple PDF Files With pdftk. At first glance this topic might seem like an easy fix, but if you stop and think about it, there are few quick and easy methods for merging two or more PDF files. The desired end result is one PDF file that contains all of the information from the original two or more files without any noticeable breaks or ugly indications of a hack.

If the PDF files are yours, the intelligent thing to do is to combine them before you export them into PDF format. But if you no longer have the original documents, or you want to combine files that were not yours originally, such as bank statements, tax forms, etc., you will need pdftk. Short for “pdf toolkit”, pdftk allows you to merge PDF documents, split PDF pages into new documents, rotate PDF pages, decrypt and encrypt, update metadata, apply watermarks, and much more. It is free and open source software available for Windows, Linux, Mac OS X, FreeBSD, and Solaris. Best of all, it does not require Acrobat or any other Adobe products to work. 1. 2. Famous Perl One-Liners Explained, Part I: File Spacing.

Hi all! I am starting yet another article series here. Remember my two articles on Awk One-Liners Explained and Sed One-Liners Explained? They have received more than 150,000 views total now and they attract several thousand new visitors every week. Inspired by their success, I am going to create my own perl1line.txt file and explain every single oneliner in it. I hope it becomes as popular as awk1line.txt and sed1line.txt. A tiny intro to those unfamiliar with the awk1line.txt and sed1line.txt files – they contain around 80 useful awk and sed one-liners for doing various text file manipulations. The article will be divided in seven or more parts. Here is the general plan: These one-liners will make heavy use of Perl special variables. Awesome news: I have written an e-book based on this article series. Other than that, I can't wait to start writing the article, so here I go: File Spacing 1.

Perl -pe '$\="\n"' This one-liner double spaces a file. First let's start with the "-e" option. 2. Manpage of WGET. Wget est non interactif c'est-à-dire qu'il peut travailler en arrière-plan, sans intervention de l'utilisateur. Ceci vous permet de lancer un téléchargement et de vous déconnecter du système, laissant Wget finir le travail.

En revanche, la plupart des navigateurs Web requièrent la présence constante de l'utilisateur, ce qui est particulièrement pénible lorsqu'on transfère beaucoup de données. Wget peut suivre les liens des pages HTML et XHTML et créer une copie locale de sites web distants, en récréant complètement la structure du site original. Ceci est parfois désigné sous le nom de « téléchargement récursif ». Wget a été conçu pour être robuste en dépit des connexions réseaux lentes ou instables : si un téléchargement échoue suite à un problème réseau, il réessayera jusqu'à ce que l'intégralité du fichier soit téléchargée. --bind-address=ADRESSE Lors de la création de la connexion TCP/IP cliente, utilise ADRESSE sur la machine locale (bind()). -t n --tries=n -O fichier -nc --no-clobber -c. ULIMIT(3) -N. List the contents of a tar or tar.gz file. Q. How do I list the contents of a tar or tar.gz file? A. GNU/tar is an archiving program designed to store and extract files from an archive file known as a tarfile.

You can create a tar file or compressed tar file tar. Task: List the contents of a tar file Use the following command: $ tar -tvf file.tar Task: List the contents of a tar.gz file Use the following command: $ tar -ztvf file.tar.gz Task: List the contents of a tar.bz2 file Use the following command: $ tar -jtvf file.tar.bz2 Where, t: List the contents of an archivev: Verbosely list files processed (display detailed information)z: Filter the archive through gzip so that we can open compressed (decompress) .gz tar filej: Filter archive through bzip2, use to decompress .bz2 files.f filename: Use archive file called filenameTwitterFacebookGoogle+PDF versionFound an error/typo on this page?