
Polarizing filters test 2015 - Results and summary - LensTip.com. Overall ranking On the one hand the results of the third polarizing filters test are far less surprising than the results of the first one.

The top of the scale is occupied by brand name devices produced by Hoya, B+W and Marumi while low-budget products predictably dropped to the bottom of the group. There were no proverbial ‘black horses’ and the leaders somehow didn’t want to have any slip-ups. Even the duel for the third place was hardly unexpected. The winner of our test, the Hoya Fusion Antistatic, is first and foremost a good polarizer. 5 Simple Secrets To Sharper Photos. Many factors play a part in image sharpness, not the least of which is the lens.

Most of us who ever pick up a camera judge our images, at least in part, on overall sharpness. Before you go out and plunk down some hard earned cash on that top of the line pro-level lens you’ve been drooling over, think about these steps you can take with the lenses you already own to get sharper images. Pay attention to the basics. Hold the camera properly. Your right hand should grip the camera with your finger ready to press the shutter button.
The above finished and edited image was shot at f/11. There is obviously much more to getting sharper images, but these five basic tips are a good start to keeping your images sharp. How to Get “Tack Sharp” Photo Images Part V: Fast Lenses, Filters, Teleconverters/Extenders, Environment, LCD Image Review, Monitors, Image Compression, & Sharpening. For this shot I wanted as large of a depth of field as I could get.

I didn’t have a macro, so I used an extension tube on my 24-70mm lens, and got up very close. I used the zoom lens to find the focus, then fine tuned the focus by using Live View, magnified, and used manual focus to find the exact focus I wanted. Foto's. Resources. You can either read the manual online or download it in PDF format: English - most recent version.

Darktable. These are some of darktable's current features, and a coarse overview over the current image operation modules.

You can find a more detailed description of every single item in our online user manual. darktable runs on GNU/Linux / GNOME, Mac OS X / macports and Solaris 11 / GNOME.Fully non-destructive editing.All darktable core functions operate on 4x32-bit floating point pixel buffers, enabling SSE instructions for speedups. It offers GPU acceleration via OpenCL (runtime detection and enabling) and has built-in ICC profile support: sRGB, Adobe RGB, XYZ and linear RGB.A collect module allows you to execute flexible database queries, search your images by tags, image rating (stars), color labels and many more. Currently darktable serves 47 image operation modules in L*a*b* and profiled rgb. Some of them can be used as blending operators offering blend functionality that works on the incoming image information and the output of the current module.
Basic image operations: Correction modules:
Afdrukcentrales. Win 7: How to change default image editor from MS paint to Photoshop. How to change the default image editor program in Windows. – July 30, 2012Posted in: Windows 7 If you like I often work with images in Windows you might find it annoying that the default editor for images is the old built-in program MS Paint what comes with Windows.
Whenever you right click on an image to choose edit MS Paint will as default open up good old MS Paint. Let’s face it. MS Paint is not the most sophisticated program for photo editing. Personally I prefer a program like Microsoft Office Picture Manager or Paint.Net. To make the change you need to go to the registry editor to make the changes. Start regedit.exe and locate the key: HKEY_CLASSES_ROOT\SystemFileAssociations\image\shell\edit\commandLocate the string value in the right windows called (default). Add customized buttons to Picasa. The more I use Picasa , the more I like this great photo viewer and editor from Google. And now I just learned that you can make it even more yours by adding customized buttons to its interface. With these buttons you can open your photos in another graphic tool for further editing or upload them straight away to your blog or your favorite online photo manager. Custom Picasa buttons - PicasaStarter.
Photo editing - Is there a software to automatically crop a scan of multiple images? - Photography Stack Exchange. Fred's ImageMagick Scripts: MULTICROP. USAGE: multicrop [-c coords] [-b bcolor] [-f fuzzval] [-g grid] [-d discard] [-p prune] [-u unrotate] [-m mask] infile outfile USAGE: multicrop [-h or -help] PURPOSE: To crop and unrotate multiple images from a scanned image.

DESCRIPTION: MULTICROP crops and unrotates multiple images from a scanned image. The images must be well separate so that background color shows between them. The process uses a floofill technique based upon a seed coordinate and a fuzz value to separate the individual images from the background of the scan. ImageMagick: Convert, Edit, Or Compose Bitmap Images. Red een Portret. Scanner Review: Konica Minolta DiMAGE Scan Elite 5400 II. Digital Camera Home > Photo Scanners > Konica Minolta DiMAGE Scan Elite 5400 II By MIKE PASINI EditorThe Imaging Resource Digital Photography Newsletter Review Date: May 2005 Just as we were wrapping up our review of the Konica Minolta DiMAGE Scan Elite 5400 what does Konica Minolta do?
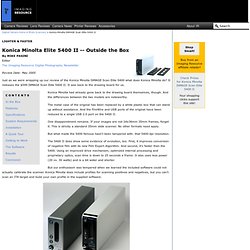
It releases the $599 DiMAGE Scan Elite 5400 II. It was back to the drawing board for us. Konica Minolta had already gone back to the drawing board themselves, though. The metal case of the original has been replaced by a white plastic box that can stand up without assistance. One disappointment remains. Konica Minolta’s DiMAGE Scan Elite 5400 II; The Best 35mm Scanner Gets Better And More Affordable Page 2.
So, I quickly moved on to a different workflow using the DiMAGE Scan Utility to make a 48-bit raw scan file output for adjustment, correction, and editing in another application.

Fortunately, the DiMAGE Scan Utility is easy and effective to set up and use to output raw high-bit scan files, including batch processing. And, you can use Digital ICE to produce a 48-bit raw file that is free of dirt and scratch defects. I found this is a quite efficient way to work, even scanning at the 5400 II's maximum optical resolution of 5400dpi, which produces a 220MB raw 48-bit file, and got 15-20 files done per hour. Initially I chose to adjust, color correct, and edit these raw files using Adobe's Photoshop Elements 3.0.
Fortunately, I had recently acquired the latest version of LaserSoft's SilverFast HDR Studio. How to Convert Megapixels to DPI. Megapixel Calculator - digital camera resolution. CameraQuest Leica M to Micro 4/3 Lens Adaptor. Test images for printing and lens resolution. Our collection of Test Images If you have a test image on your site that you'd like us to mention, please feel free to drop us an email.
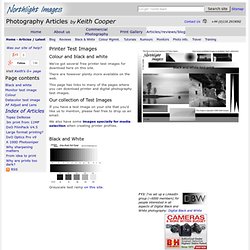
We also have some images specially for media selection when creating printer profiles. Black and White.