
Design.tutsplus. 10 expert tips for improving your packaging design skills. There are few things more rewarding than seeing your packaging designs appear on supermarket shelves across the country.
But there's more to packaging design than just a great creative vision. Put simply, if your idea isn't executed well, it will probably never make it to the finished product. Here we offer 10 expert tips to help make your workflow more efficient and successful – and hopefully make your packaging dreams a reality... 01. Use approved cutter guides Make sure your client or printer has given you the right specs – never start a packaging job without the right details.
Making sure everything is right from the offset will prevent any problems at a later date. 02. If you're making the cutter guide yourself on the client's specifications, don't only get it approved by the client but also involve the printer from the beginning. 03. Here's a great tip for visualising your packaging designs: use Illustrator's 3D Revolve tool. 04. 05. 06. 30 Amazing 3D Illustrator Tutorials Collection. Adobe Illustrator is a vector illustration application.
Meanwhile, The illustrator features and capabilities can extend the known vector graphic art by creating detailed and photorealistic high quality 3D illustrations. The idea behind creating high quality 3D content is to know more about the tips and tricks that allow you to create vector content on the 3 dimensions. Create Beautiful 3D Graphs and Charts in Illustrator. I love graphs.
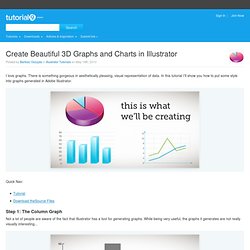
There is something gorgeous in aesthetically pleasing, visual representation of data. In this tutorial I’ll show you how to put some style into graphs generated in Adobe Illustrator. Step 1: The Column Graph Not a lot of people are aware of the fact that Illustrator has a tool for generating graphs. While being very useful, the graphs it generates are not really visually interesting… Create a 3D rocket ship in Adobe Illustrator CS5. Creative Nerds - Part 8. 3D Gradient Text Effect in Illustrator CS5. Type embellishment is what sets the stage for a good design project.
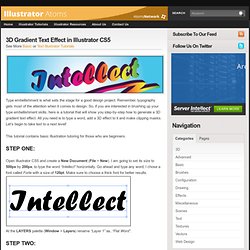
Remember, typography gets most of the attention when it comes to design. So, if you are interested in brushing up your type embellishment skills, here is a tutorial that will show you step-by-step how to generate a 3D gradient text effect. All you need is to type a word, add a 3D effect to it and make clipping masks. Let’s begin to take text to a next level! This tutorial contains basic Illustration tutoring for those who are beginners. Open Illustrator CS5 and create a New Document (File > New). At the LAYERS palette (Window > Layers) rename “Layer 1” as, “Flat Word”. Select the word and go to Type > Create Outlines to convert our text into shapes. Rename “Flat Word copy” as, “3D Word” and drag it under the “Flat Word” layer: Select the “Flat Word” layer and toggle its visibility off (Click the eye icon). Www.IllustratorAtoms.com. Creating a 3D Logo or Icon with Illustrator - Yassine Bentaieb.
For my first ever blog and tutorial post I will try to share my experiences with creating 3D icons and logo’s in Adobe Illustrator.
Even though I am a minimalist when it comes to design(especially branding), I think these techniques can be useful for creating icons whenever you’ll be needing them. The post is basically for everybody wanting to get to know Illustrator’s tools a little better. Since this is the first time I’ve ever done such a thing, I’d appreciate any feedback for a better tutorial post in the future.
Thanks and enjoy! What will we be making? Illustrator Tutorial 3D Vase And Rose. Vector Tutorial: Creating Your Own Colorful and Patterned Christmas Balls. It seems like ages since I last shared a vector tutorial here.
The last one was “Vector Tutorial: Creating Your Own Vector iPhone“, and with the quite busy schedule I’ve had these past few months I haven’t got much time to do another lengthy tutorial until this time. Luckily, I was able to find time to do one. Probably my last tutorial for the year. So I hope you’ll be able to get along with this one. It’s December, and Christmas Season is in the air, so there’s nothing more appropriate than to show you how to create some shiny vector Christmas balls using Adobe Illustrator (CS4). Here’s a preview first of the Christmas balls that we will do with this tutorial. Part 1 – The Christmas Ball Step 1: Creating the basic shape The Christmas ball shape consists of just two basic shapes, circle for the body and a small rectangle for the neck. (1) Overlap both shapes as seen above. (2) Open the “Pathfinder palette” and use the “Unite” tool to combine the two shapes into one. Grungy 3D Text In Illustrator at Design Panoply.
Create a Colorful 3D Sliced Sphere to use as a Logo Design. Creating 3D Dice from Scratch in Adobe Illustrator (Super In-Depth!) This tutorial was specifically designed for newcomers to Illustrator.
Anyone with experience in Illustrator may also learn from it, but it was written with non-illustrator users in mind. If you’re looking for a great primer for getting started with Illustrator, this is an awesome place to begin. In this tutorial, you’ll learn how to make a 3D Dice in Illustrator from scratch. An example of what you might create with what you learn is shown below. Step 1: Create Document Create a new document with the following dimensions: Step 2: Setup Dice Base Shape Select the Rectangle Tool from the toolbar (M). The exact shade of blue used does not matter as we’ll be changing it later on. We will not return to this square for some time. Step 3: Begin Creating the Sides of the Dice Deselect the square that you just created by going to Select → Deselect (Shift + Ctrl + A).
In another area of the document, create a new green ellipse using the Ellipse Tool (L). Create Super Glossy 3D Typography in Illustrator and Photoshop.